Pattern construction for wedding dresses
Deutsch

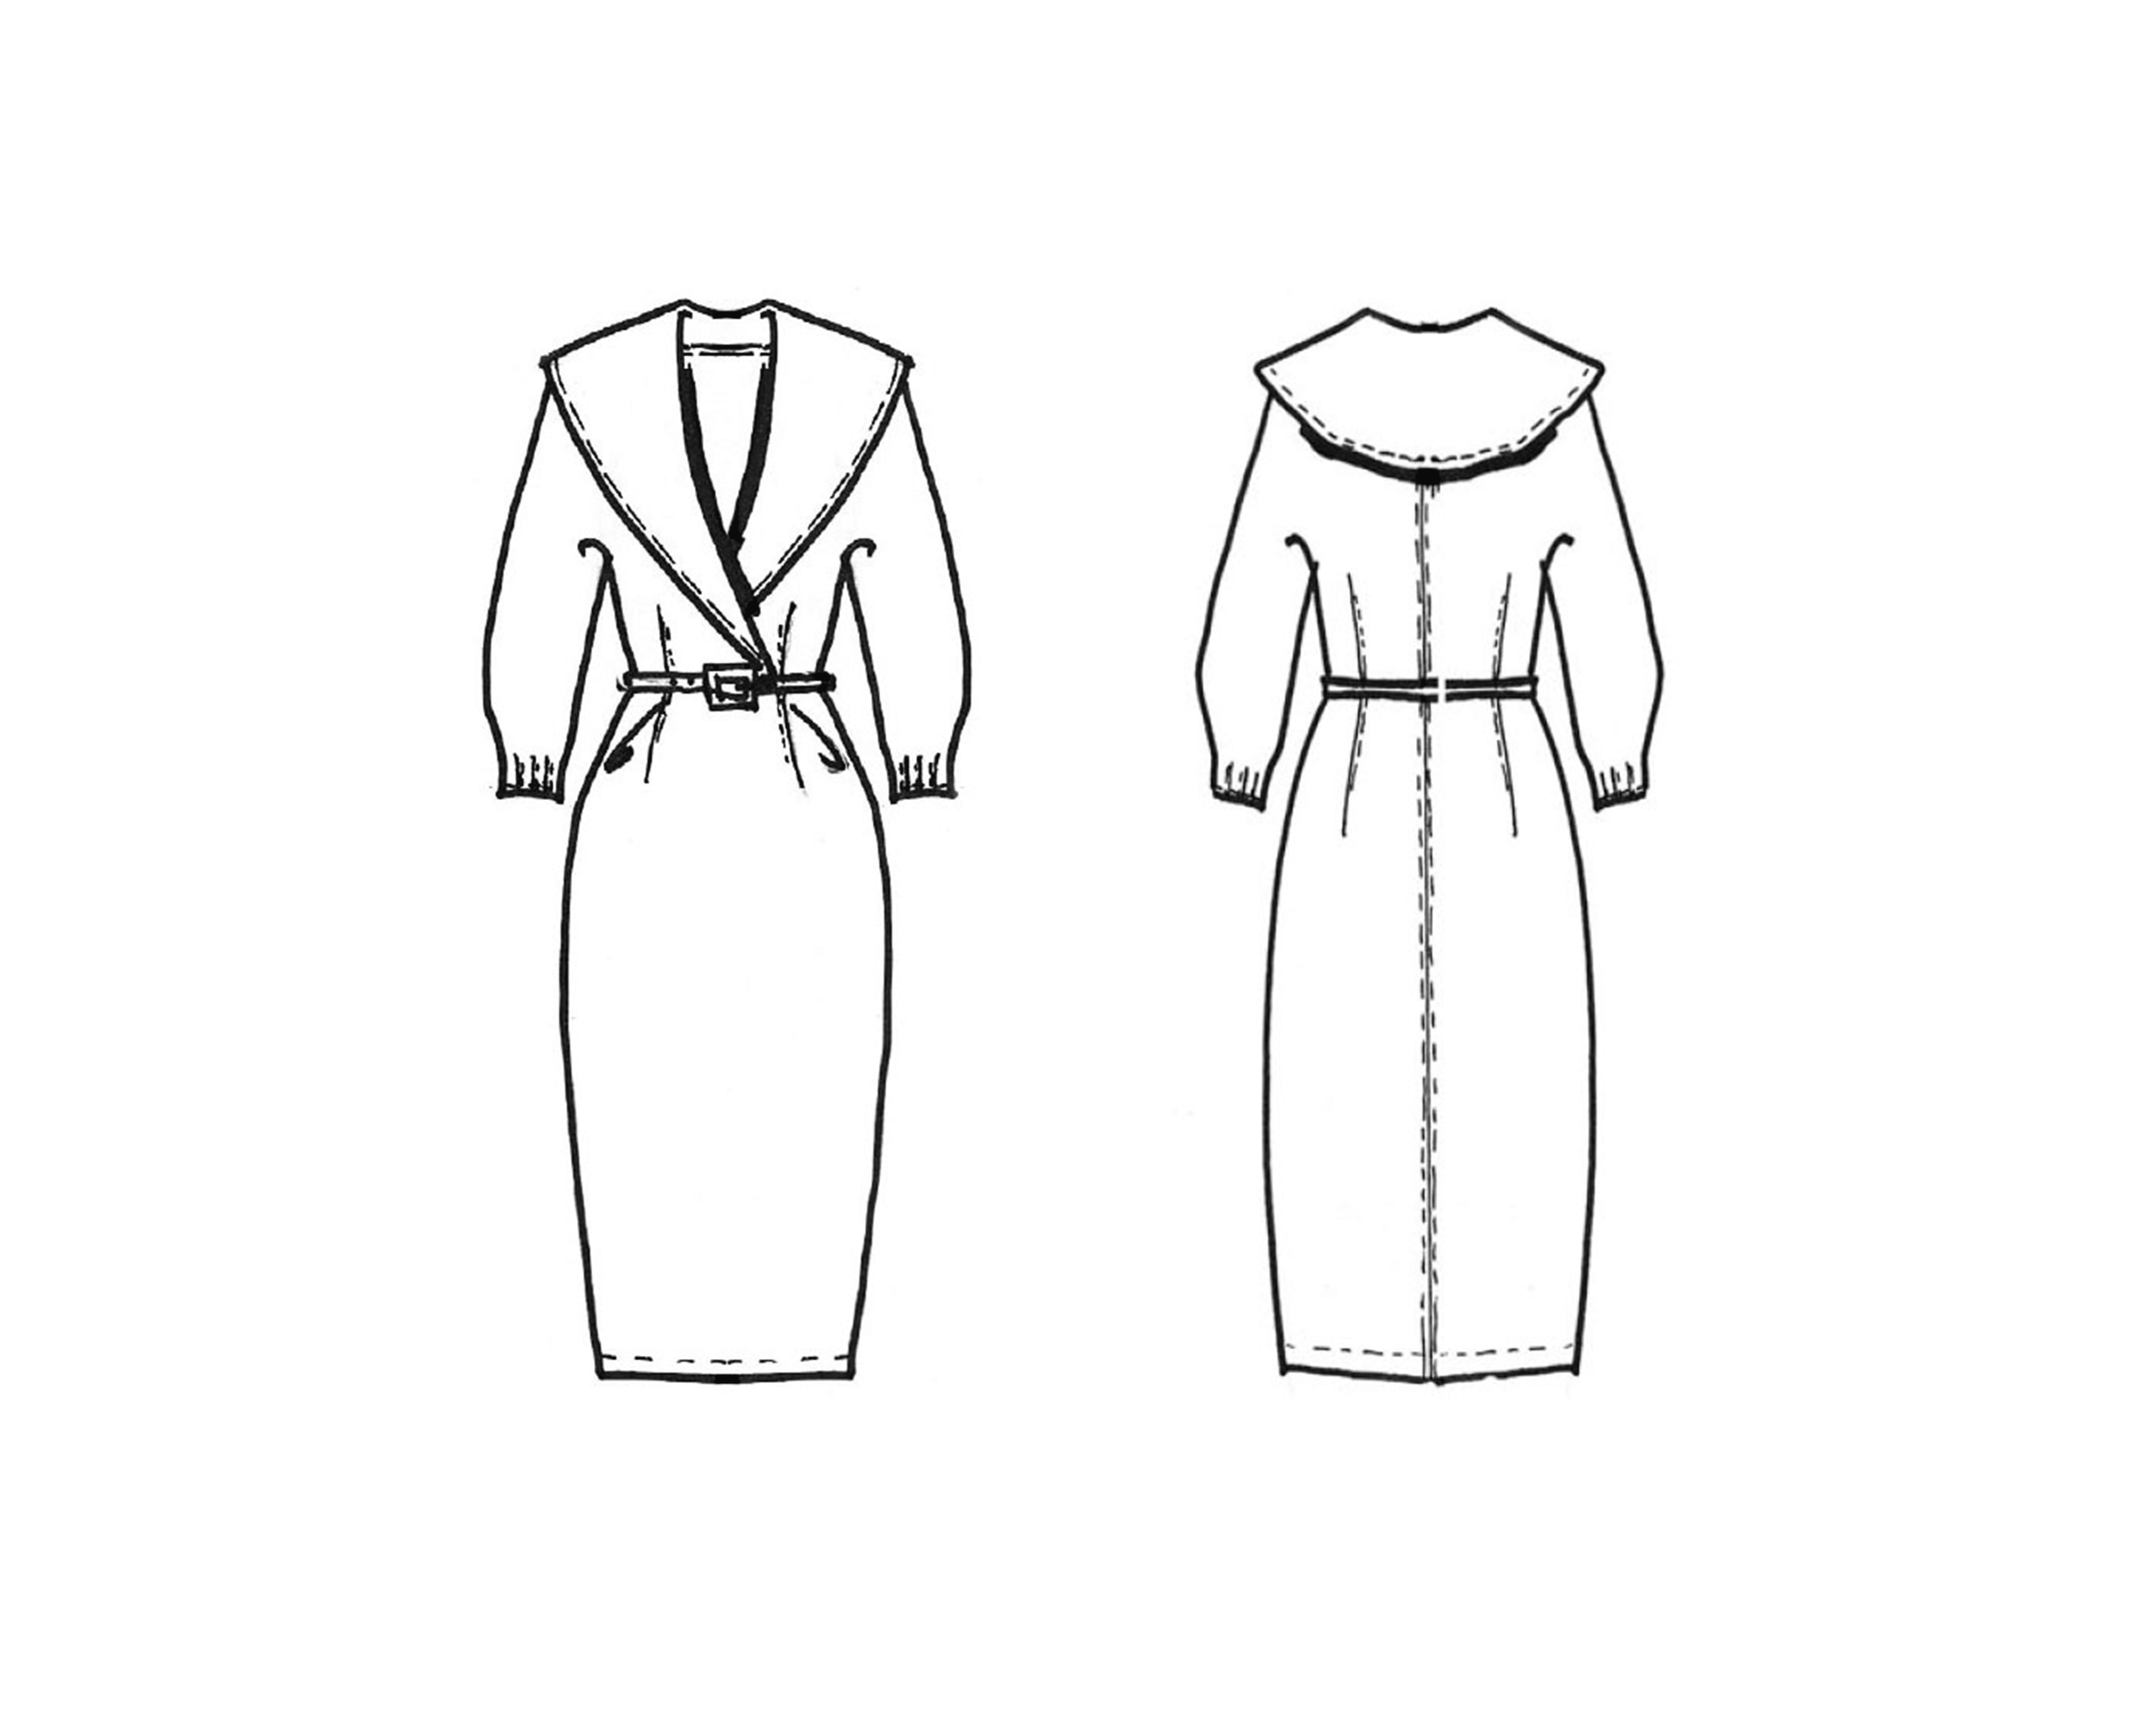
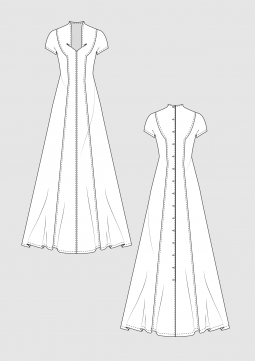
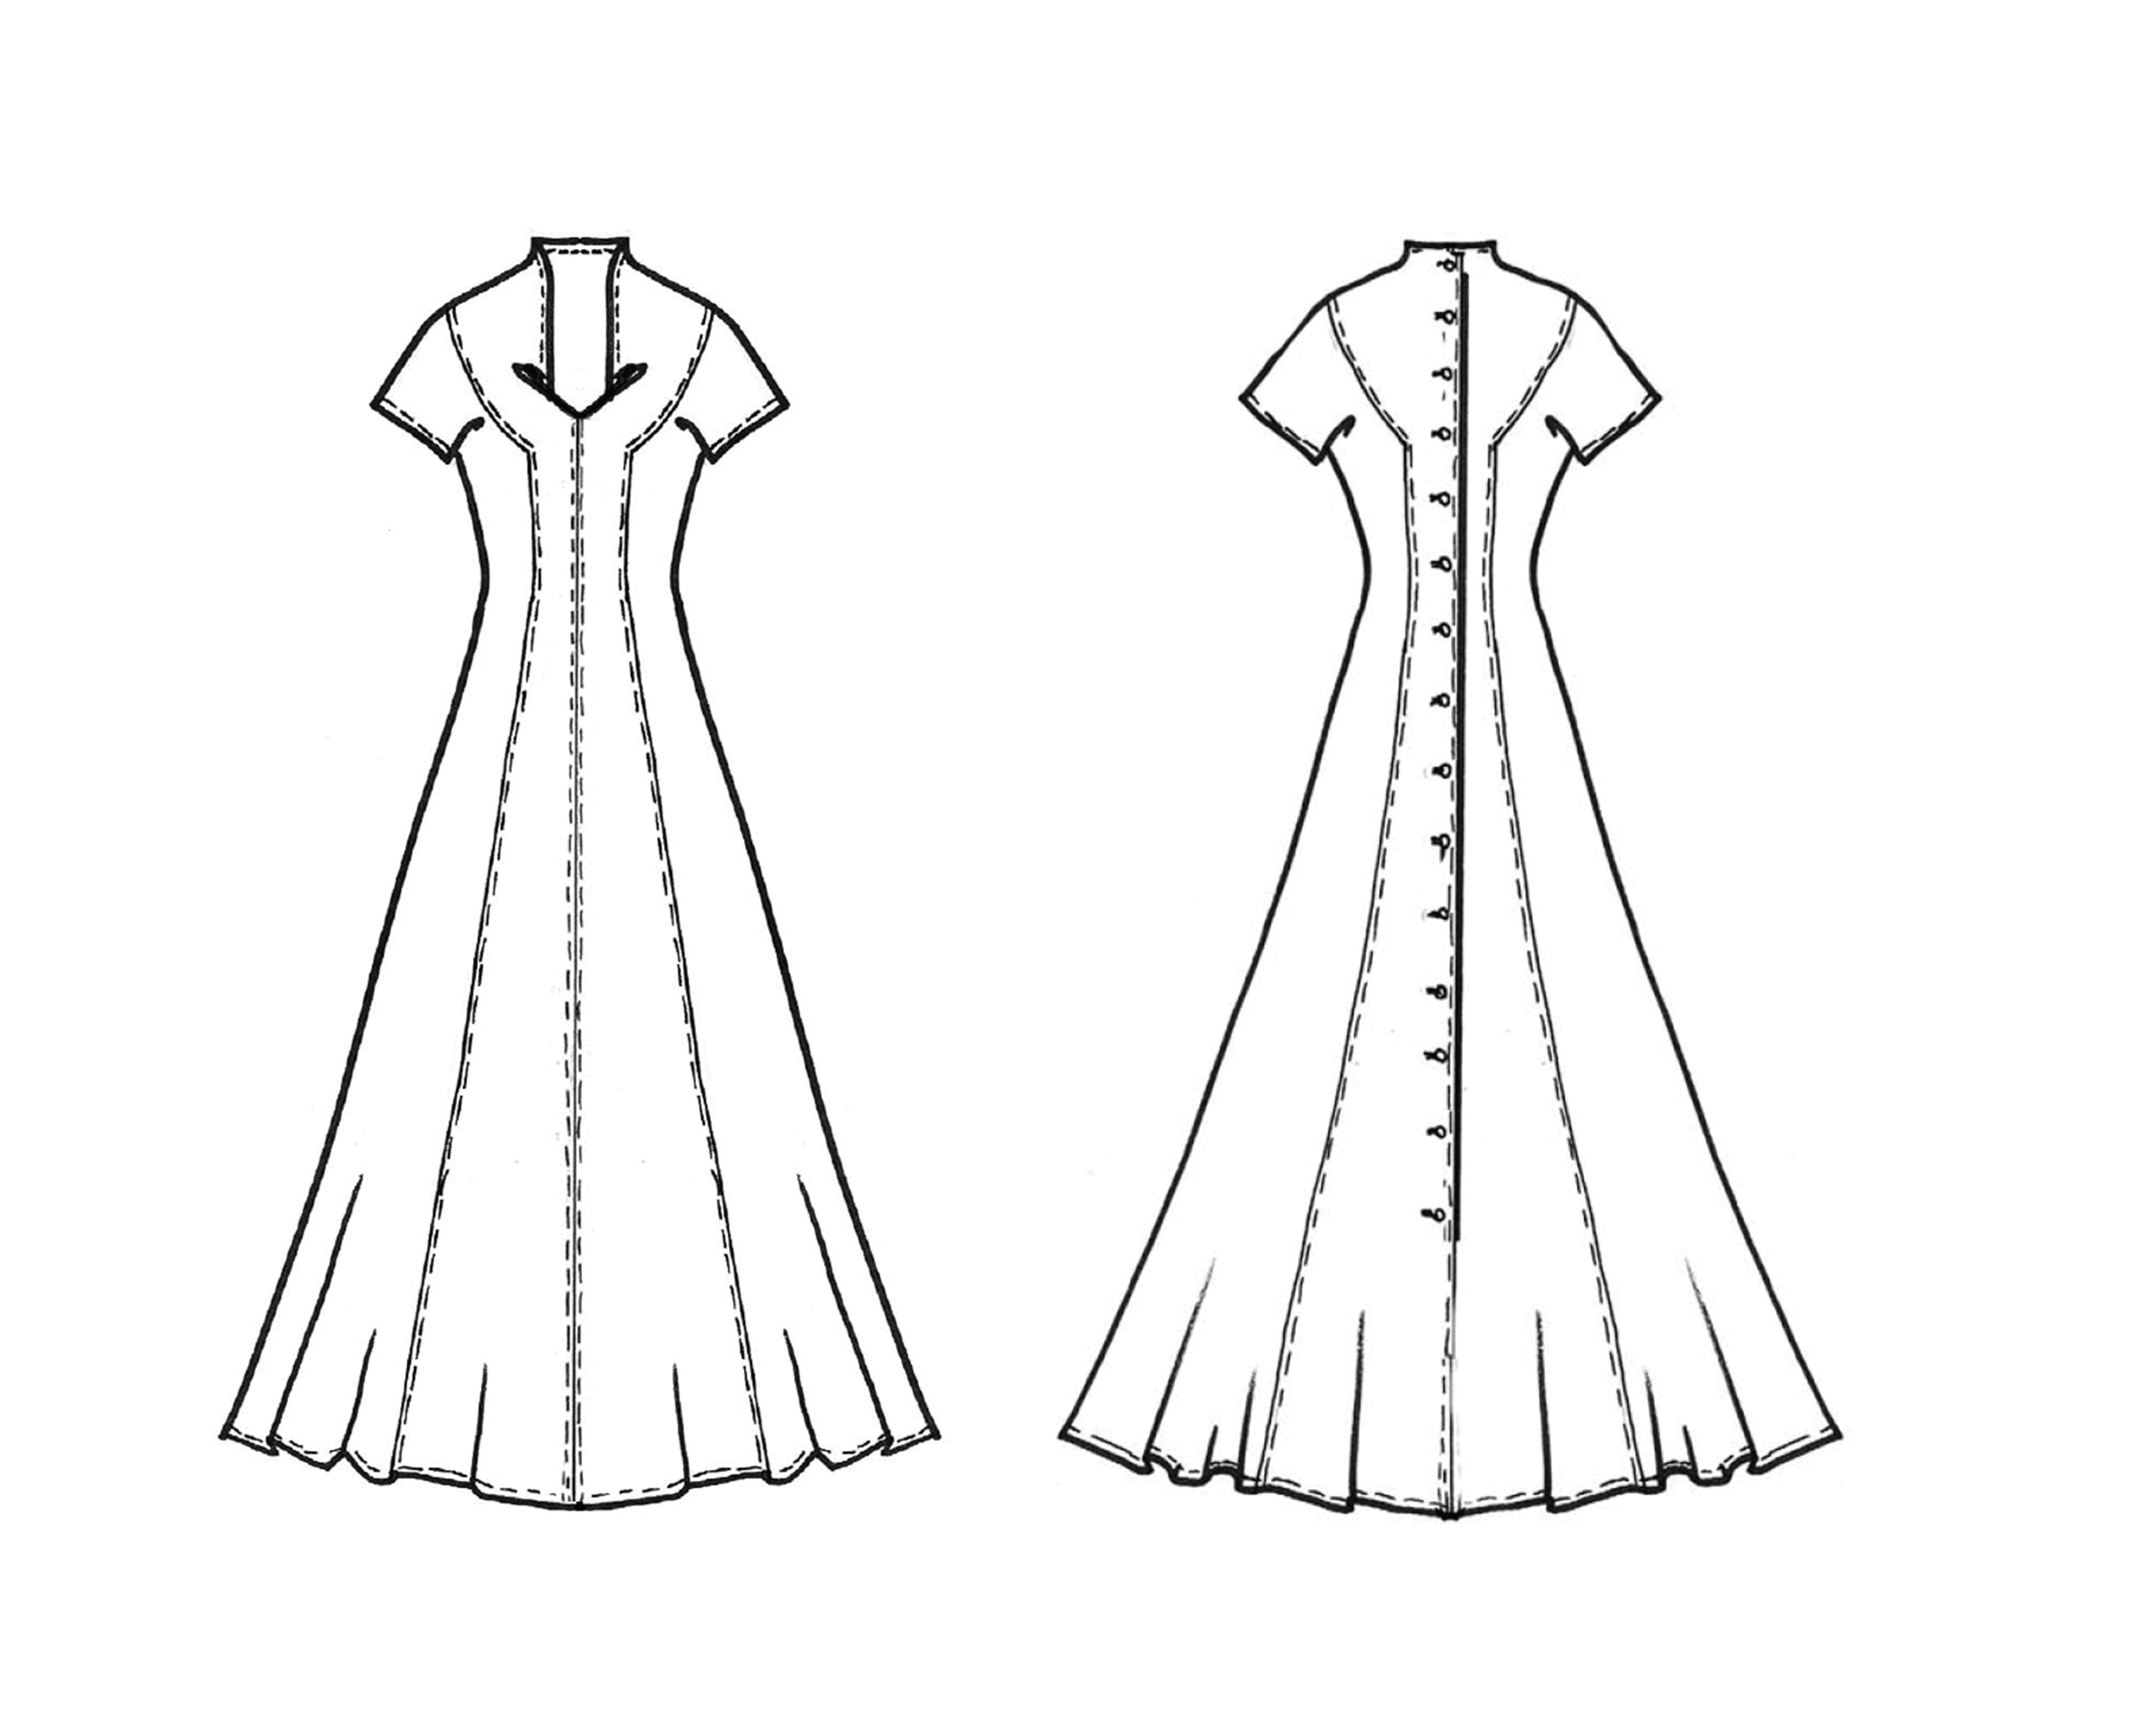
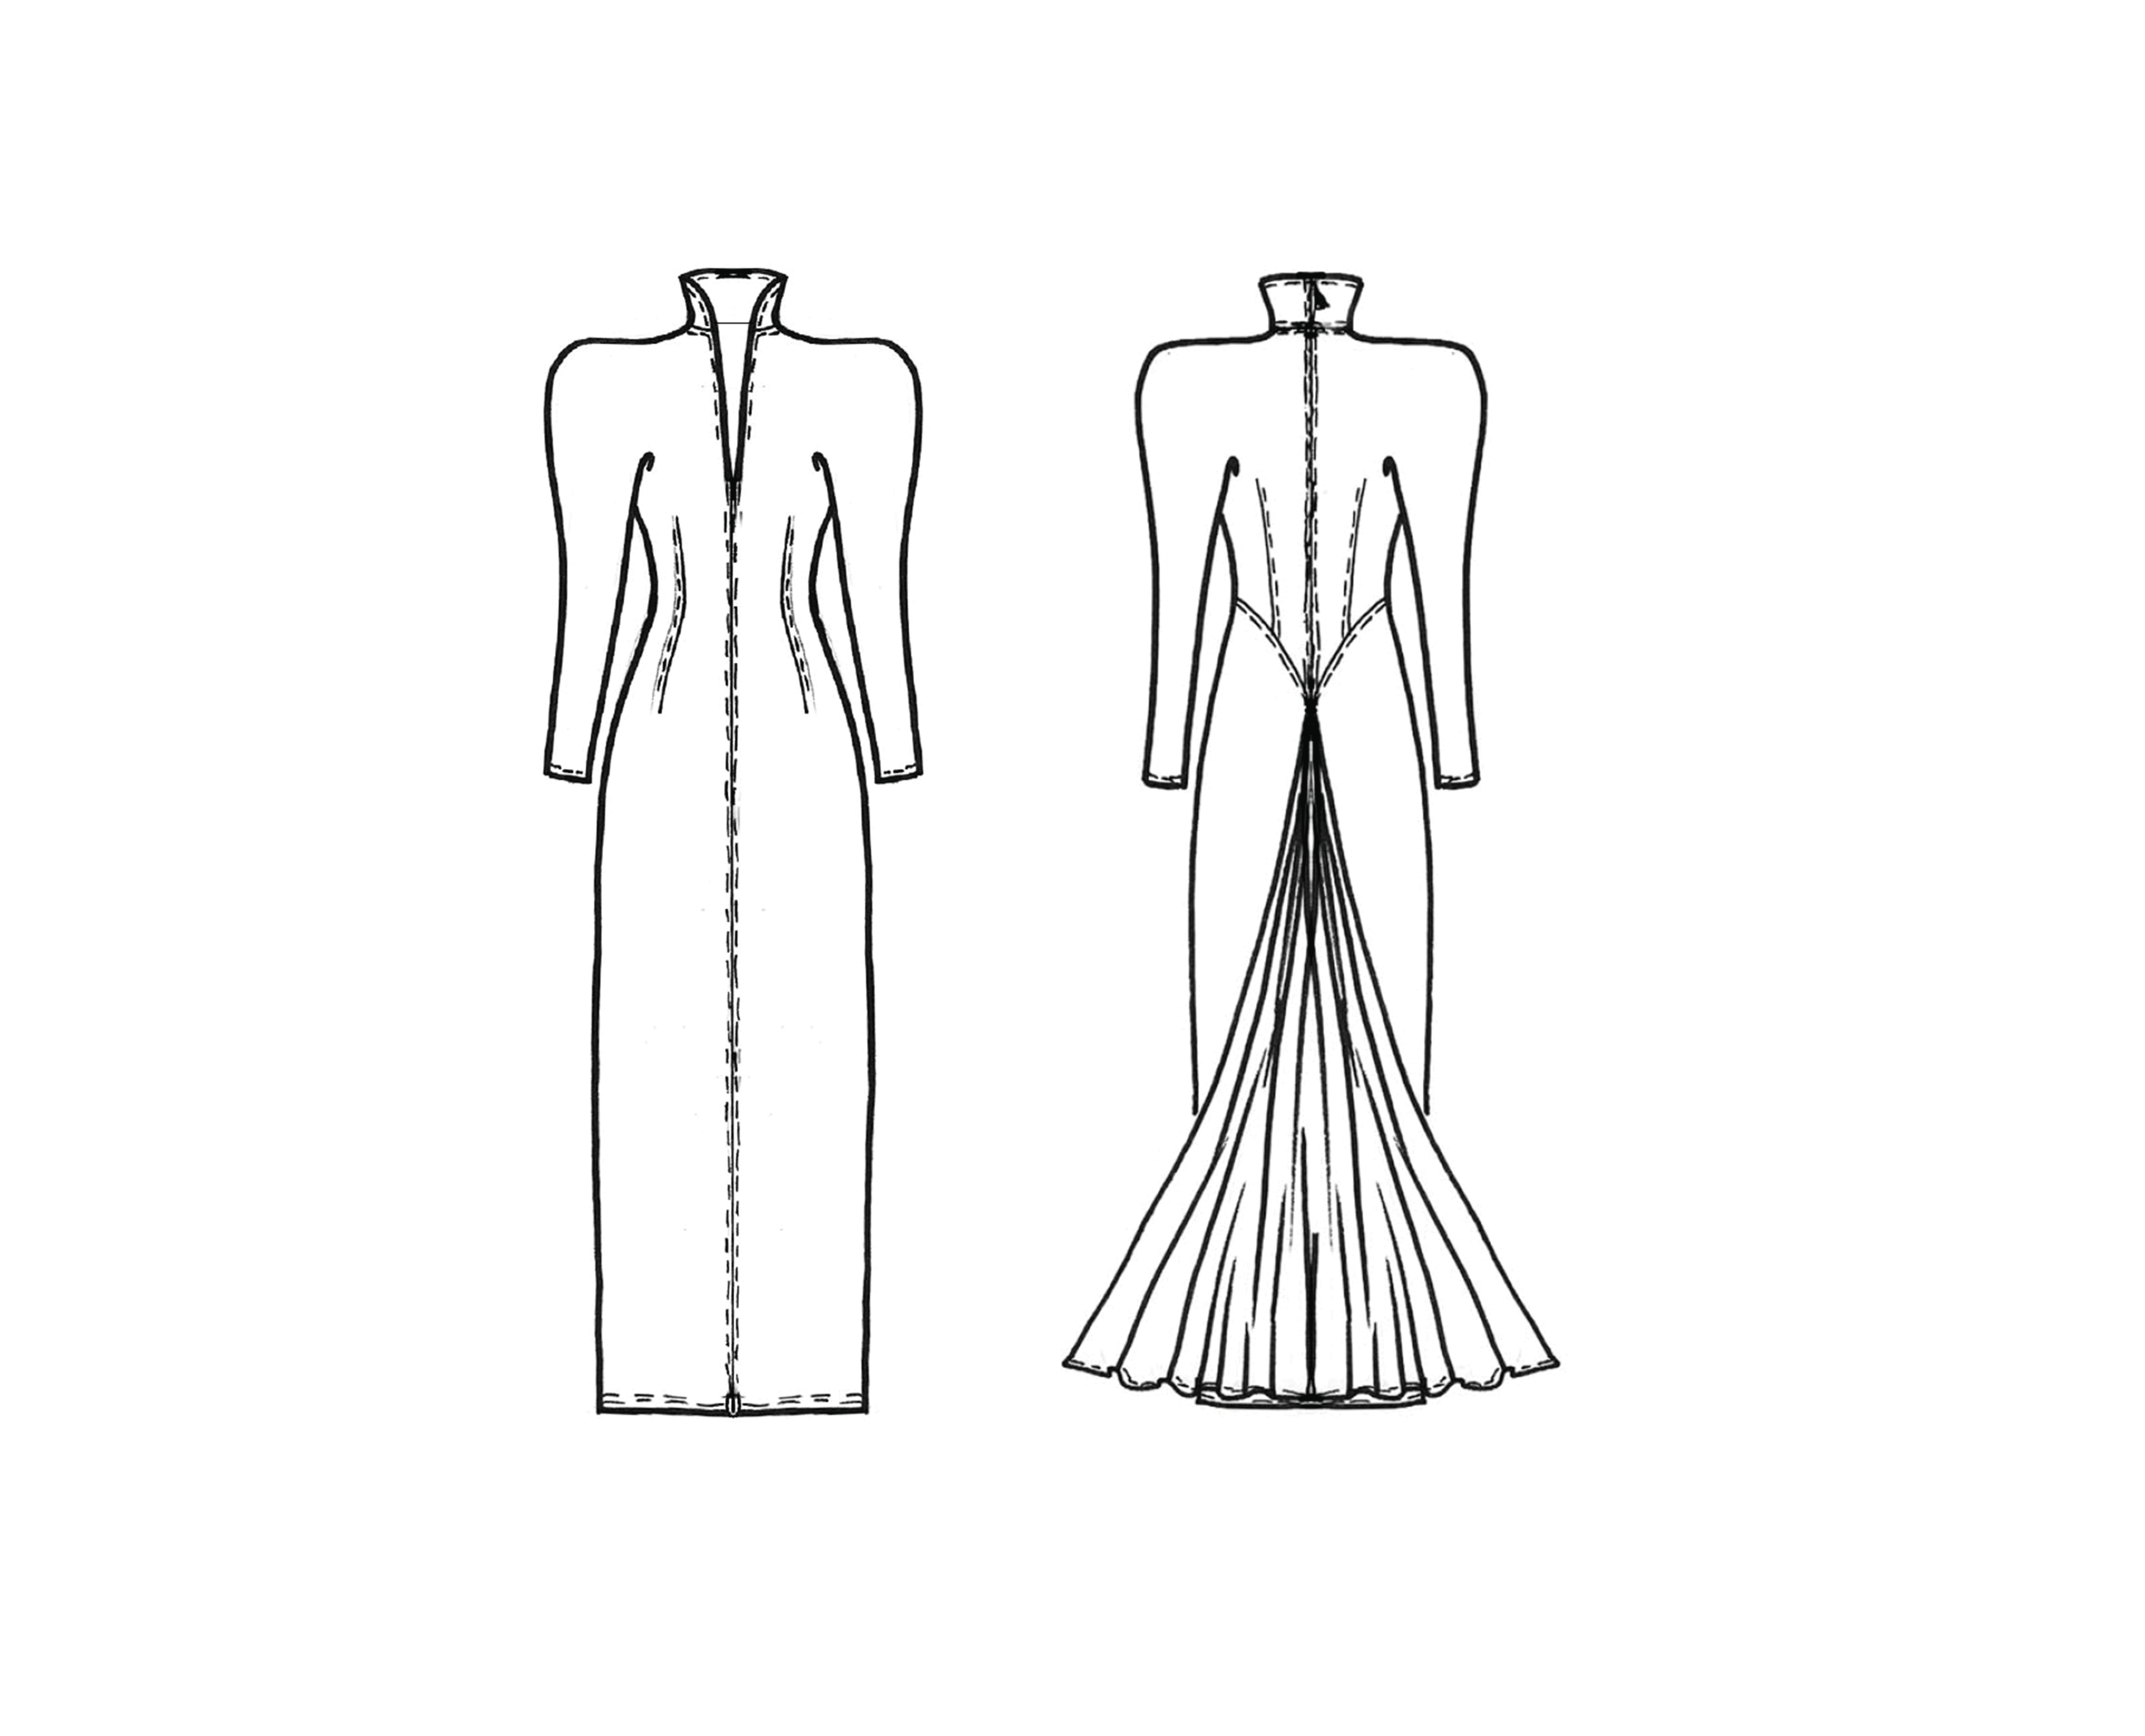
Dress with Wide Collar
Template: Basic Dress Block, Size 40
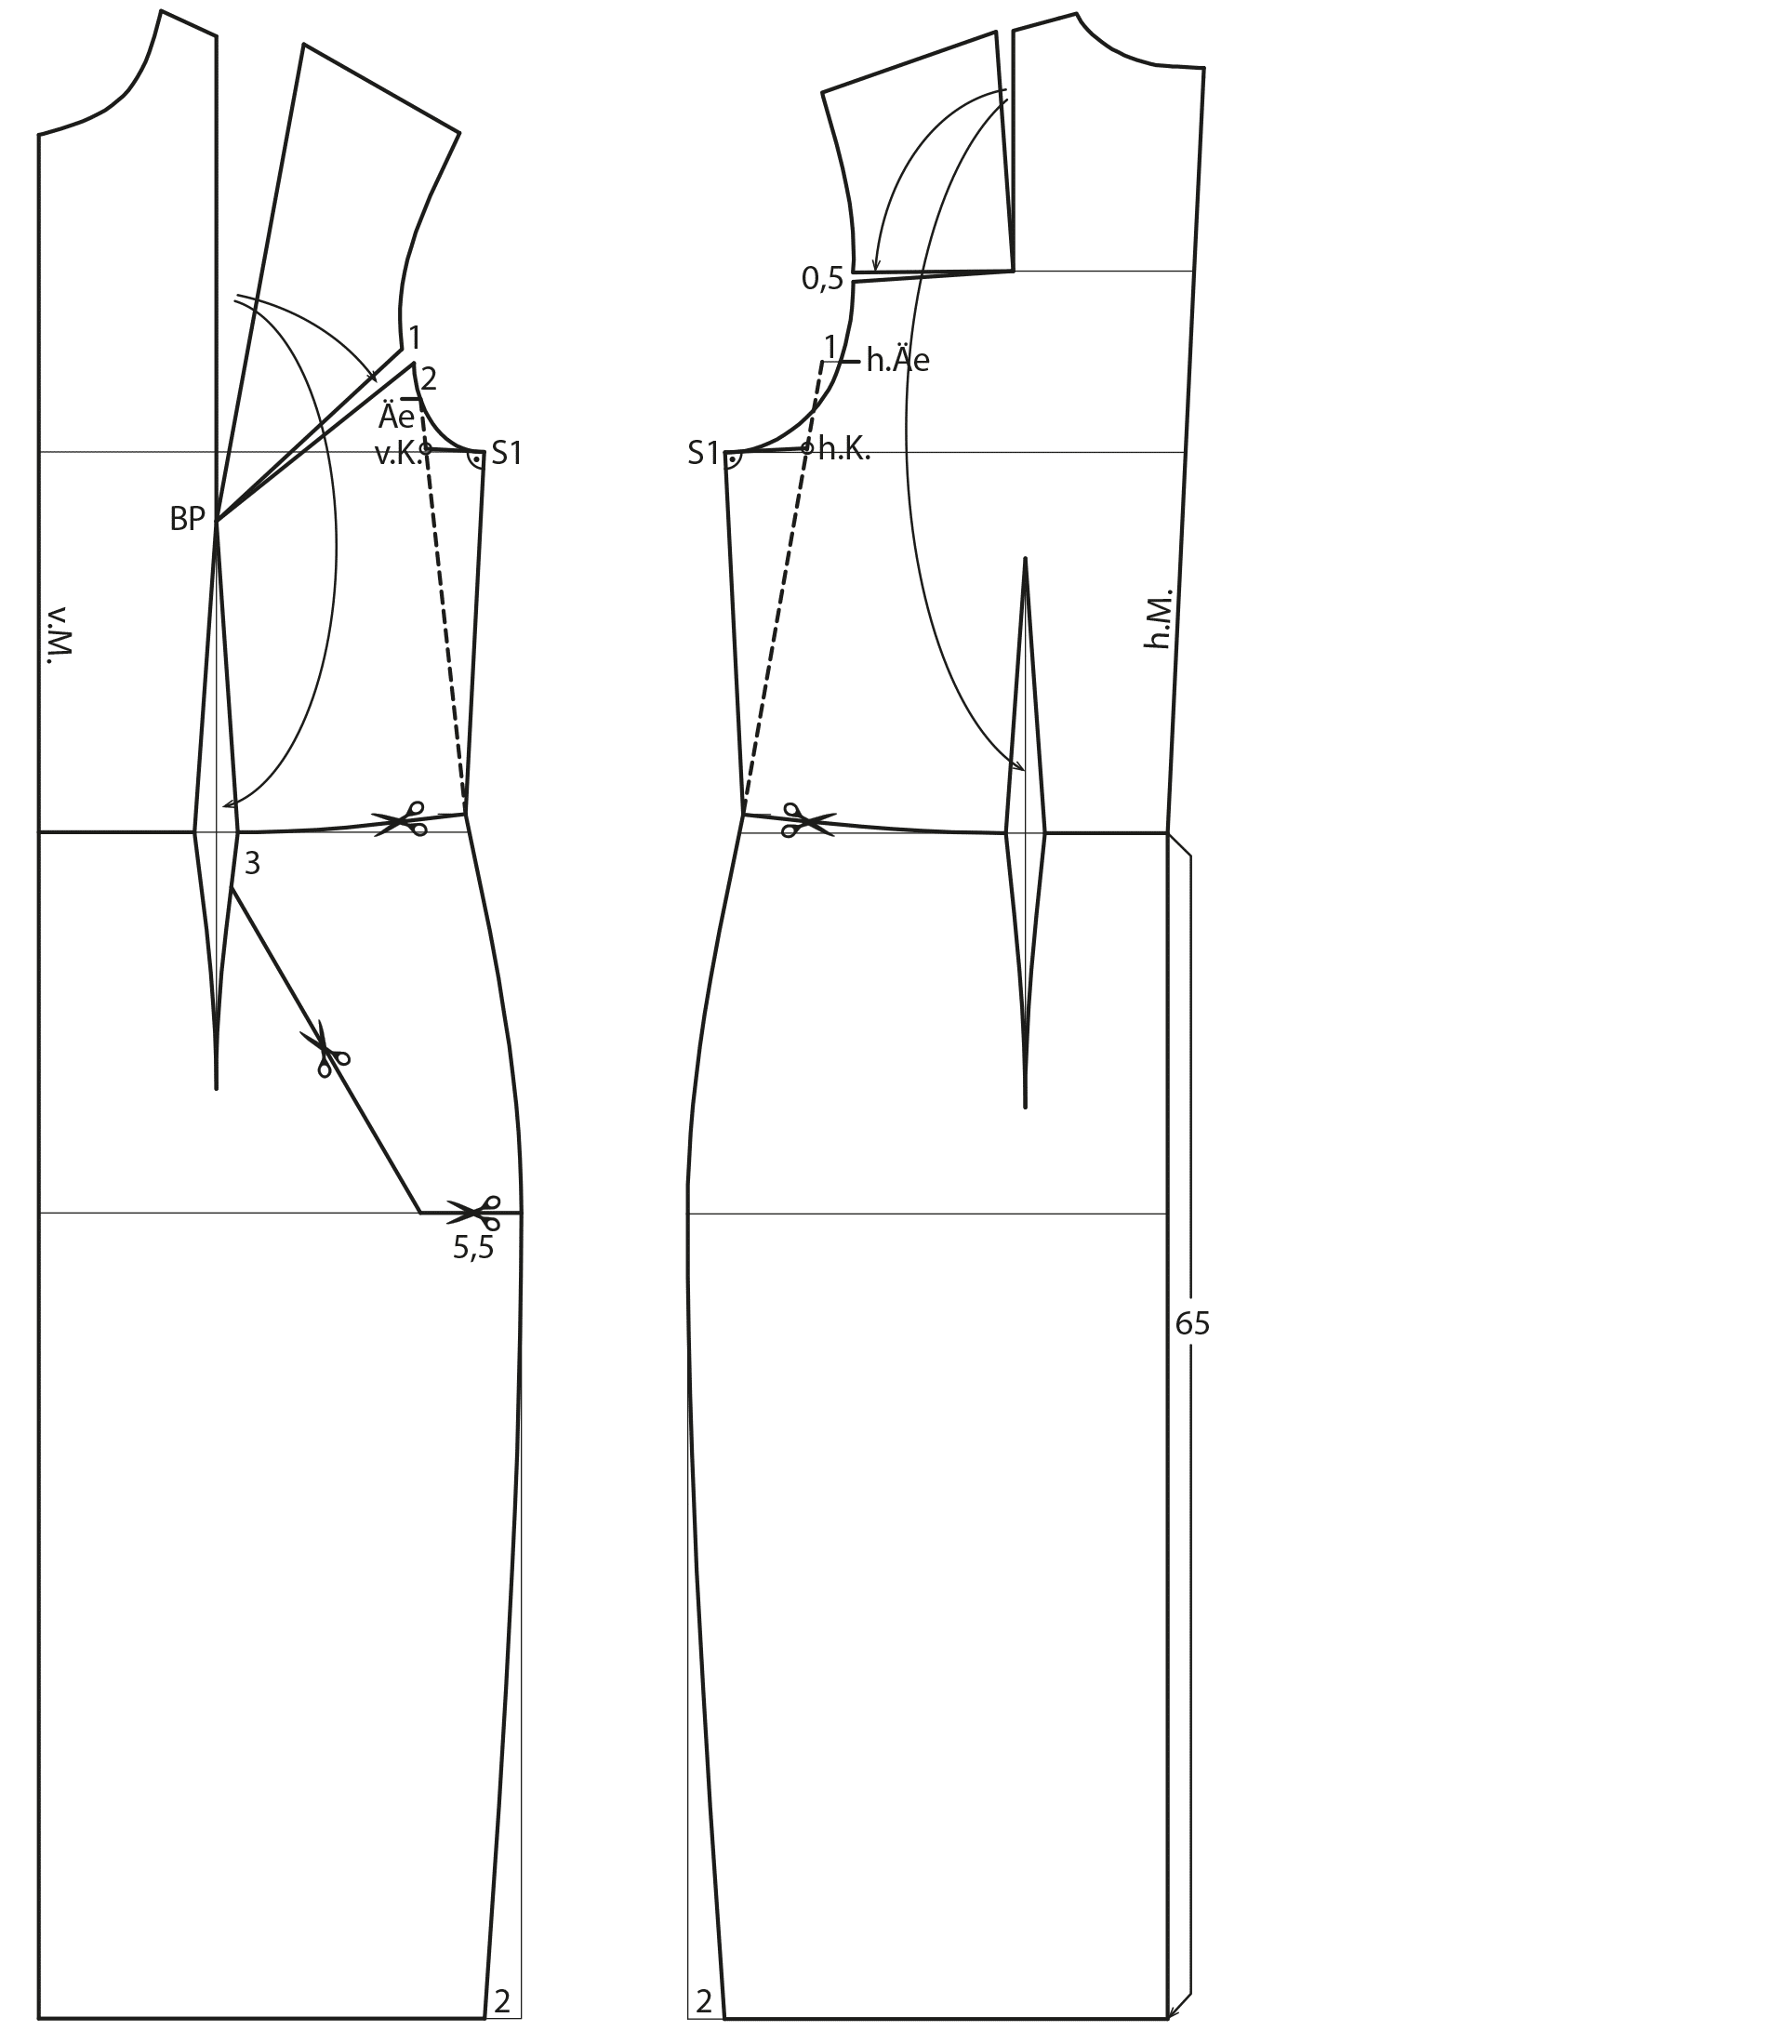
1. Front and Back Pattern
-
Mark the length with 65 cm at the centre back.
-
Draw the waist seam from the raised waist point at the sideseam to the front and back waist dart.
-
From 2 cm above the front armhole notch, cut from the armhole to the bust point as shown in the illustration. Open the armhole 1 cm.
-
Relocate 0.5 cm of the back shoulder dart intake to the armhole.
-
Rotate the remaining bust dart and back shoulder dart intake to the waist dart.
-
Mark a cutting line for the front pleat from the waist dart to the hipline.
-
Draw a parallel line 1.5 cm away from the centre front and another parallel line with 7 cm distance. The second parallel line is the guideline for the front panel seam.
-
Draw a guideline from the front armhole notch to the raised waist point at the sideseam for the gusset construction of the diamond gusset sleeve. Draw the back guideline, starting 1 cm away from the back armhole notch to the raised waist point at the sideseam.
-
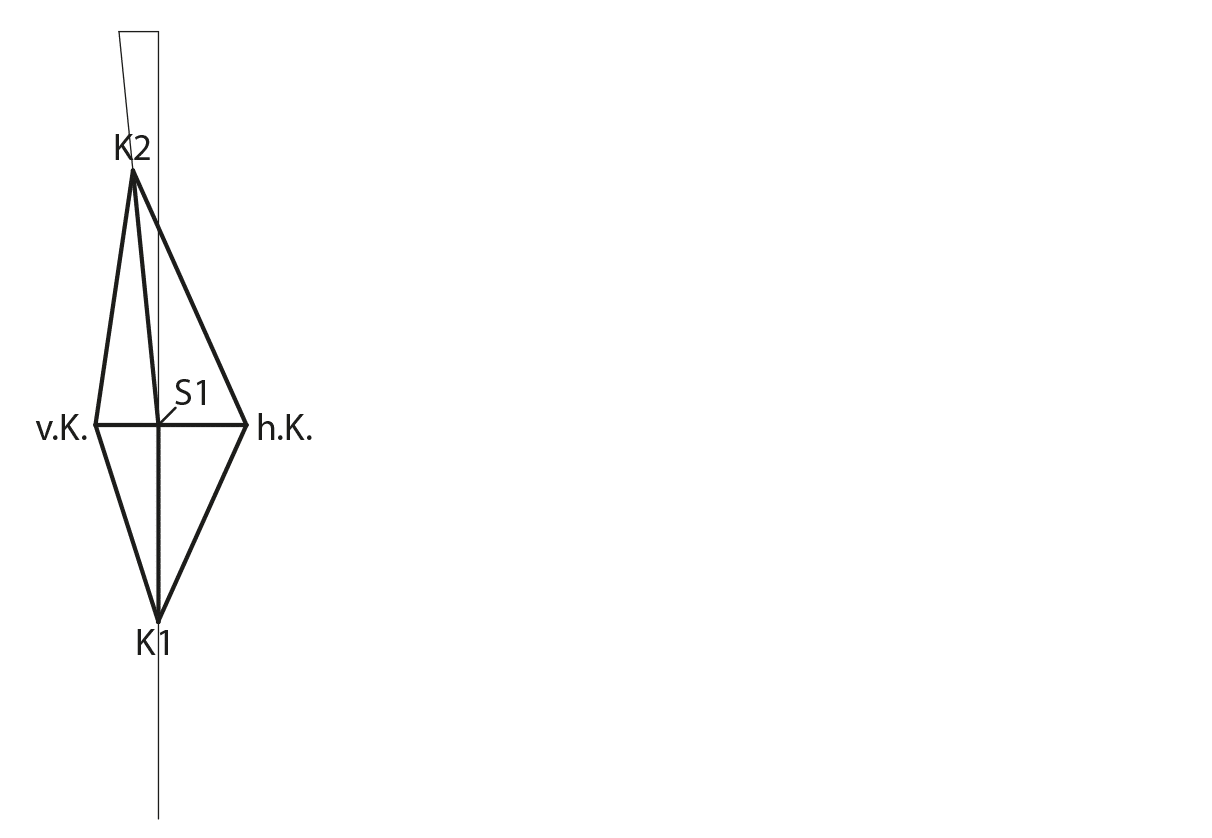
Draw a perpendicular line from the intersection of armhole and sideseam (S1) to the guideline. Mark front gusset point (v.K.) and the back gusset point (h.K.) at the intersection.
-
Taper the sideseam 2 cm at the hem.
2. Sleeve
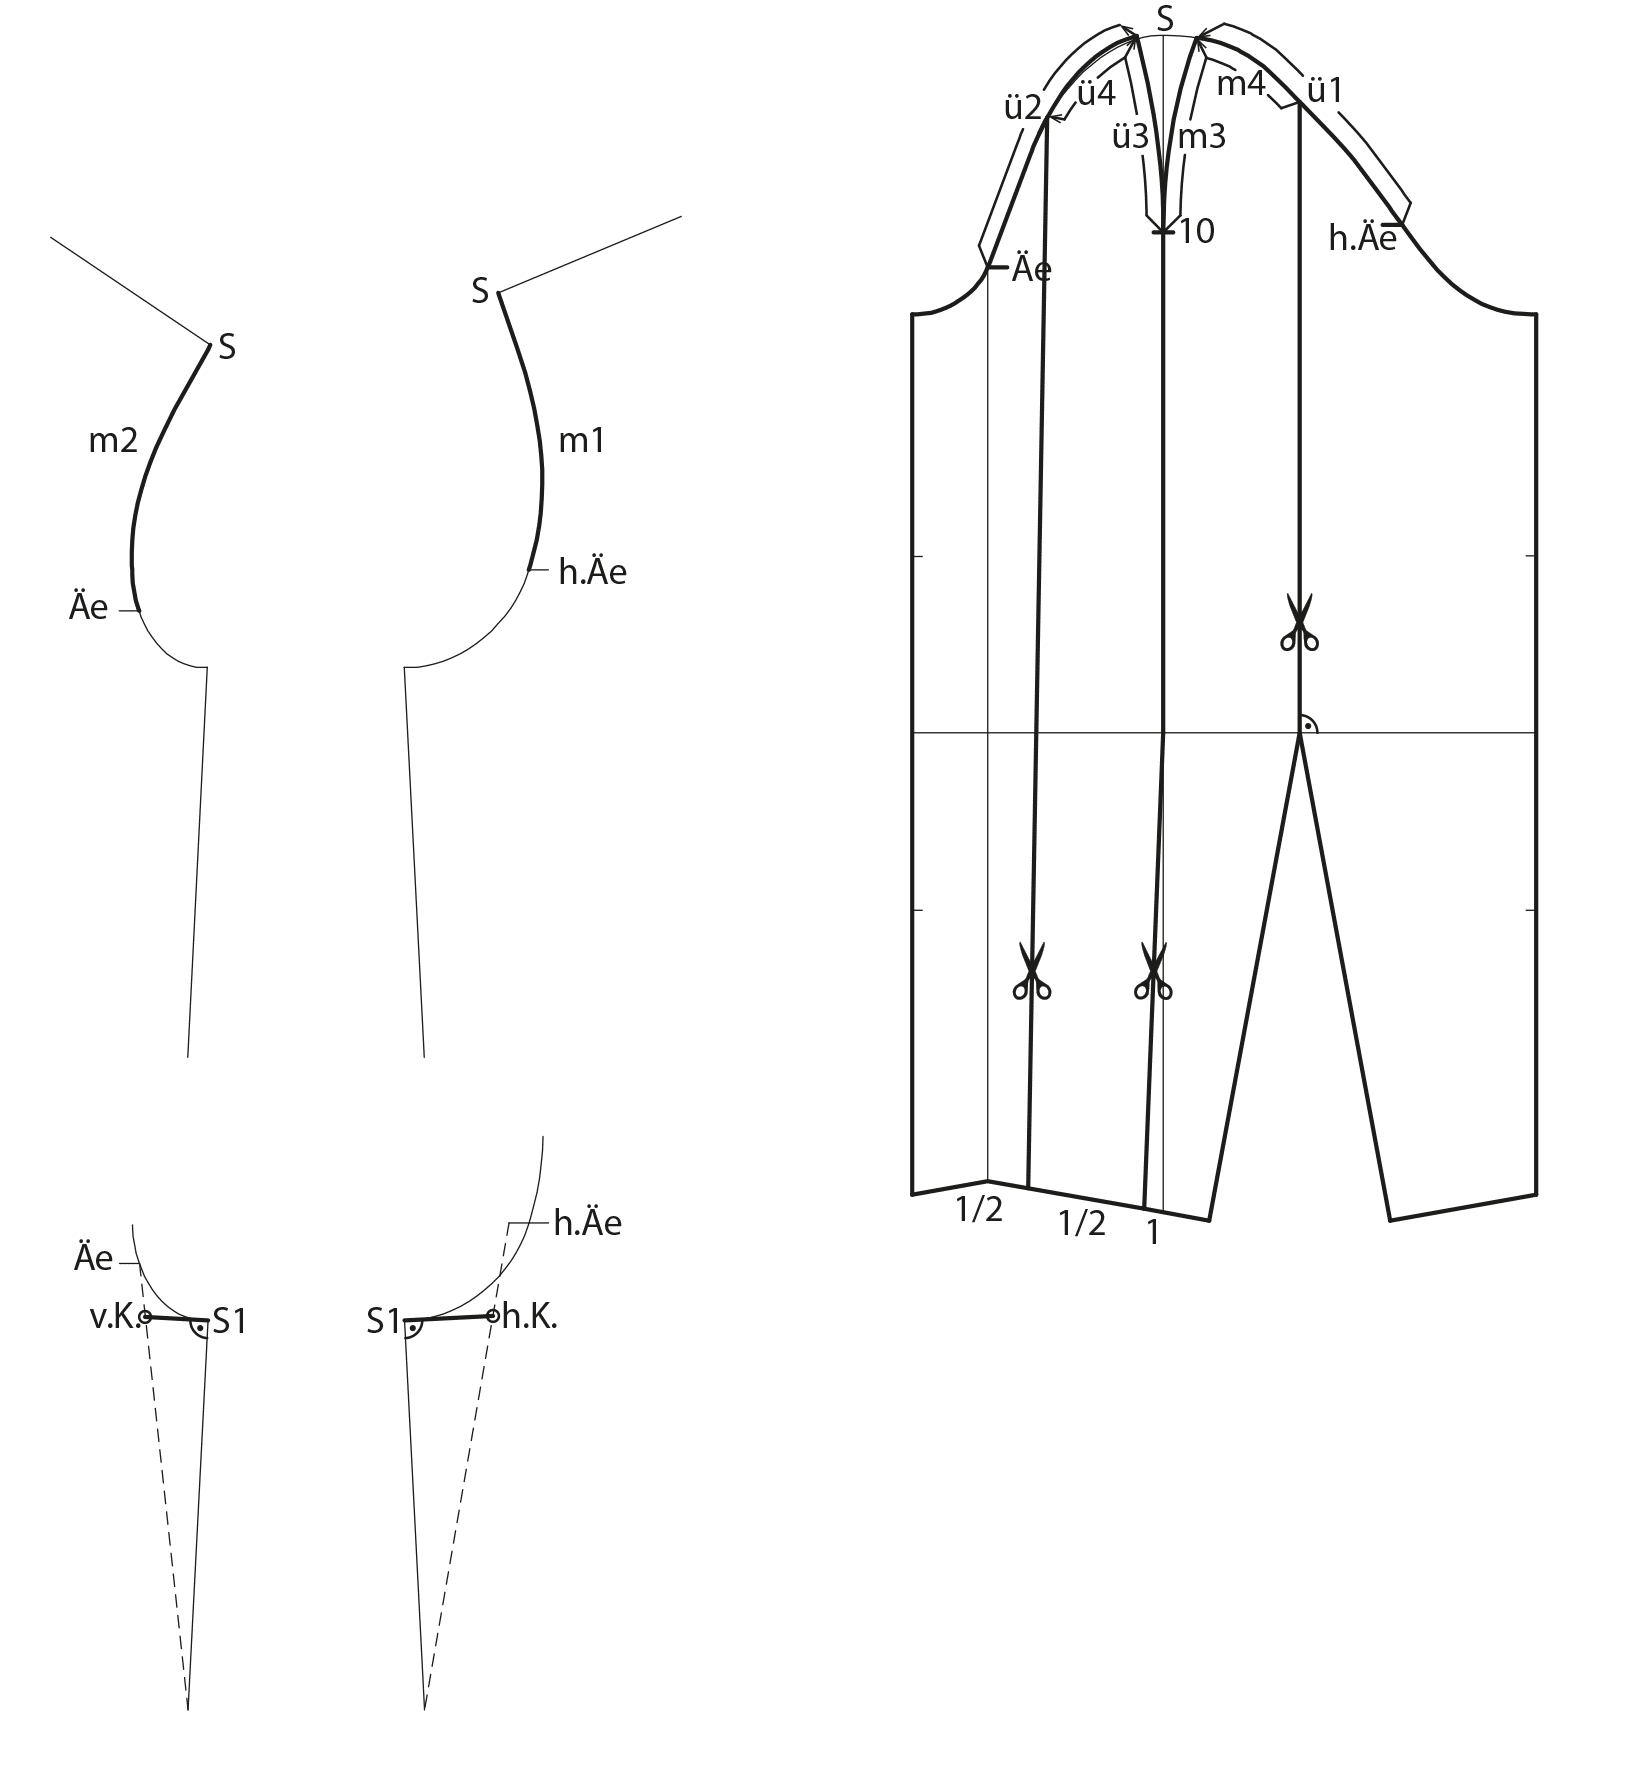
-
Draw a vertical line from point S to the hem and shift it forward 1 cm at the hem.
-
Measure the armhole from the back armhole notch (h.Äe) to the sideseam (m1) and from the front armhole notch (Äe) to the sideseam (m2). Transfer these amounts to the sleeve cap (ü1 and ü2).
-
Draw the overarm seam slightly curved to the 10-cm mark. Measure the back overarm seam curve (m3) and draw the front overarm seam the same length (ü3).
-
Draw a vertical line from the elbow dart to the sleeve cap. Measure the distance from the vertical line to the shoulder point (m4) and transfer this measurement to the front sleeve (ü4). Draw a line from this point to the hem as shown in the illustration.
3.+4. Gusset Template and Sleeve Gusset Points
- Draw a horizontal line and measure the front gusset width (S1-v.K.) from the centre of the line (S1) to the left. Measure the back gusset width (S1-h.K.) to the right.
- Draw a vertical guideline 20 cm long upwards from point S1. Square out 2 cm to the left and draw a slanted guideline from this point to S1.
- Place the sleeve pieces with the sleeve seams on the slanted line of the gusset template with the armhole corners on point S1. The sleeve pieces are touching at the sleeve seams up to the elbow line and then overlapping at the hem.
- Transfer the front and back gusset points (v.K. and h.K.) to the sleeve pieces.
5. Sleeve/Bodice Combination

-
Place the sleeve pieces on the front and back pattern with front and back gusset points (v.K. and h.K.) matching and the shoulder point 2 cm within the front and back pattern. Slash and spread the back sleeve piece as shown.
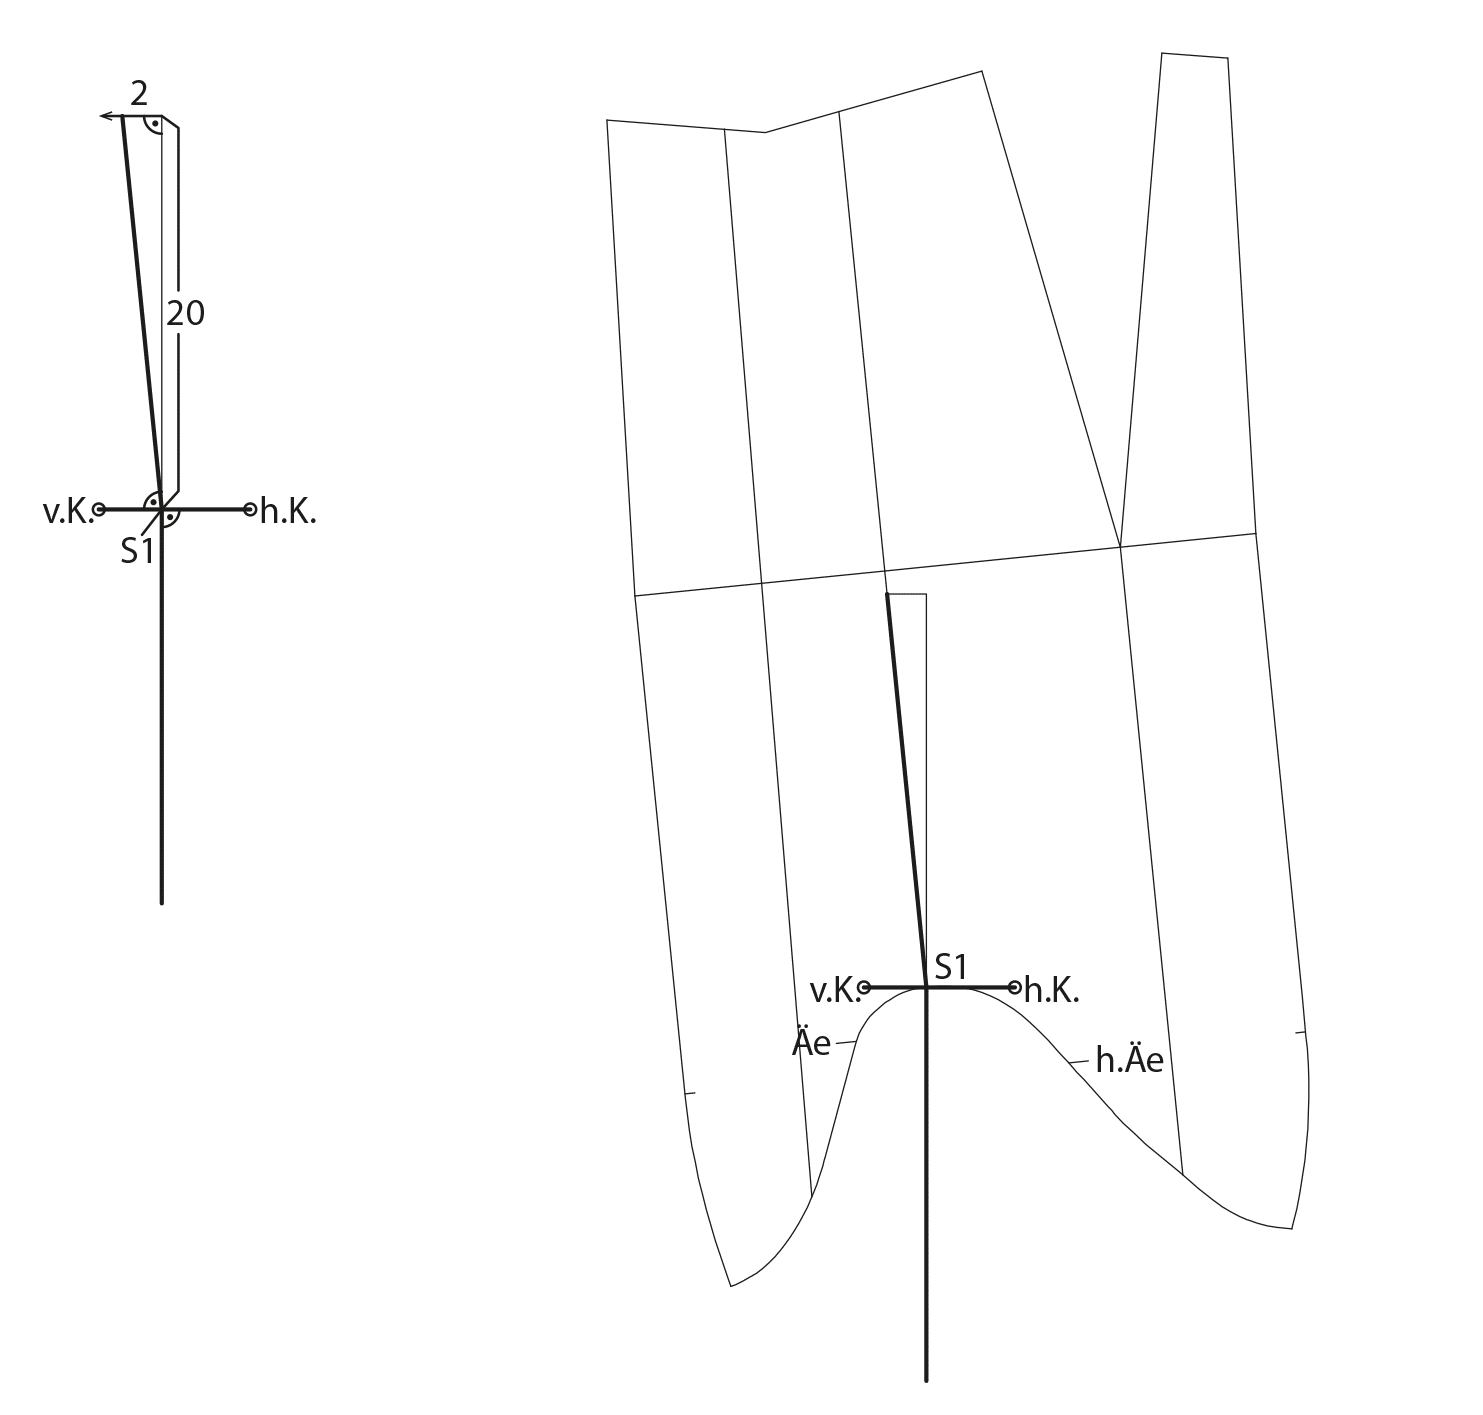
6. Gusset Preparation
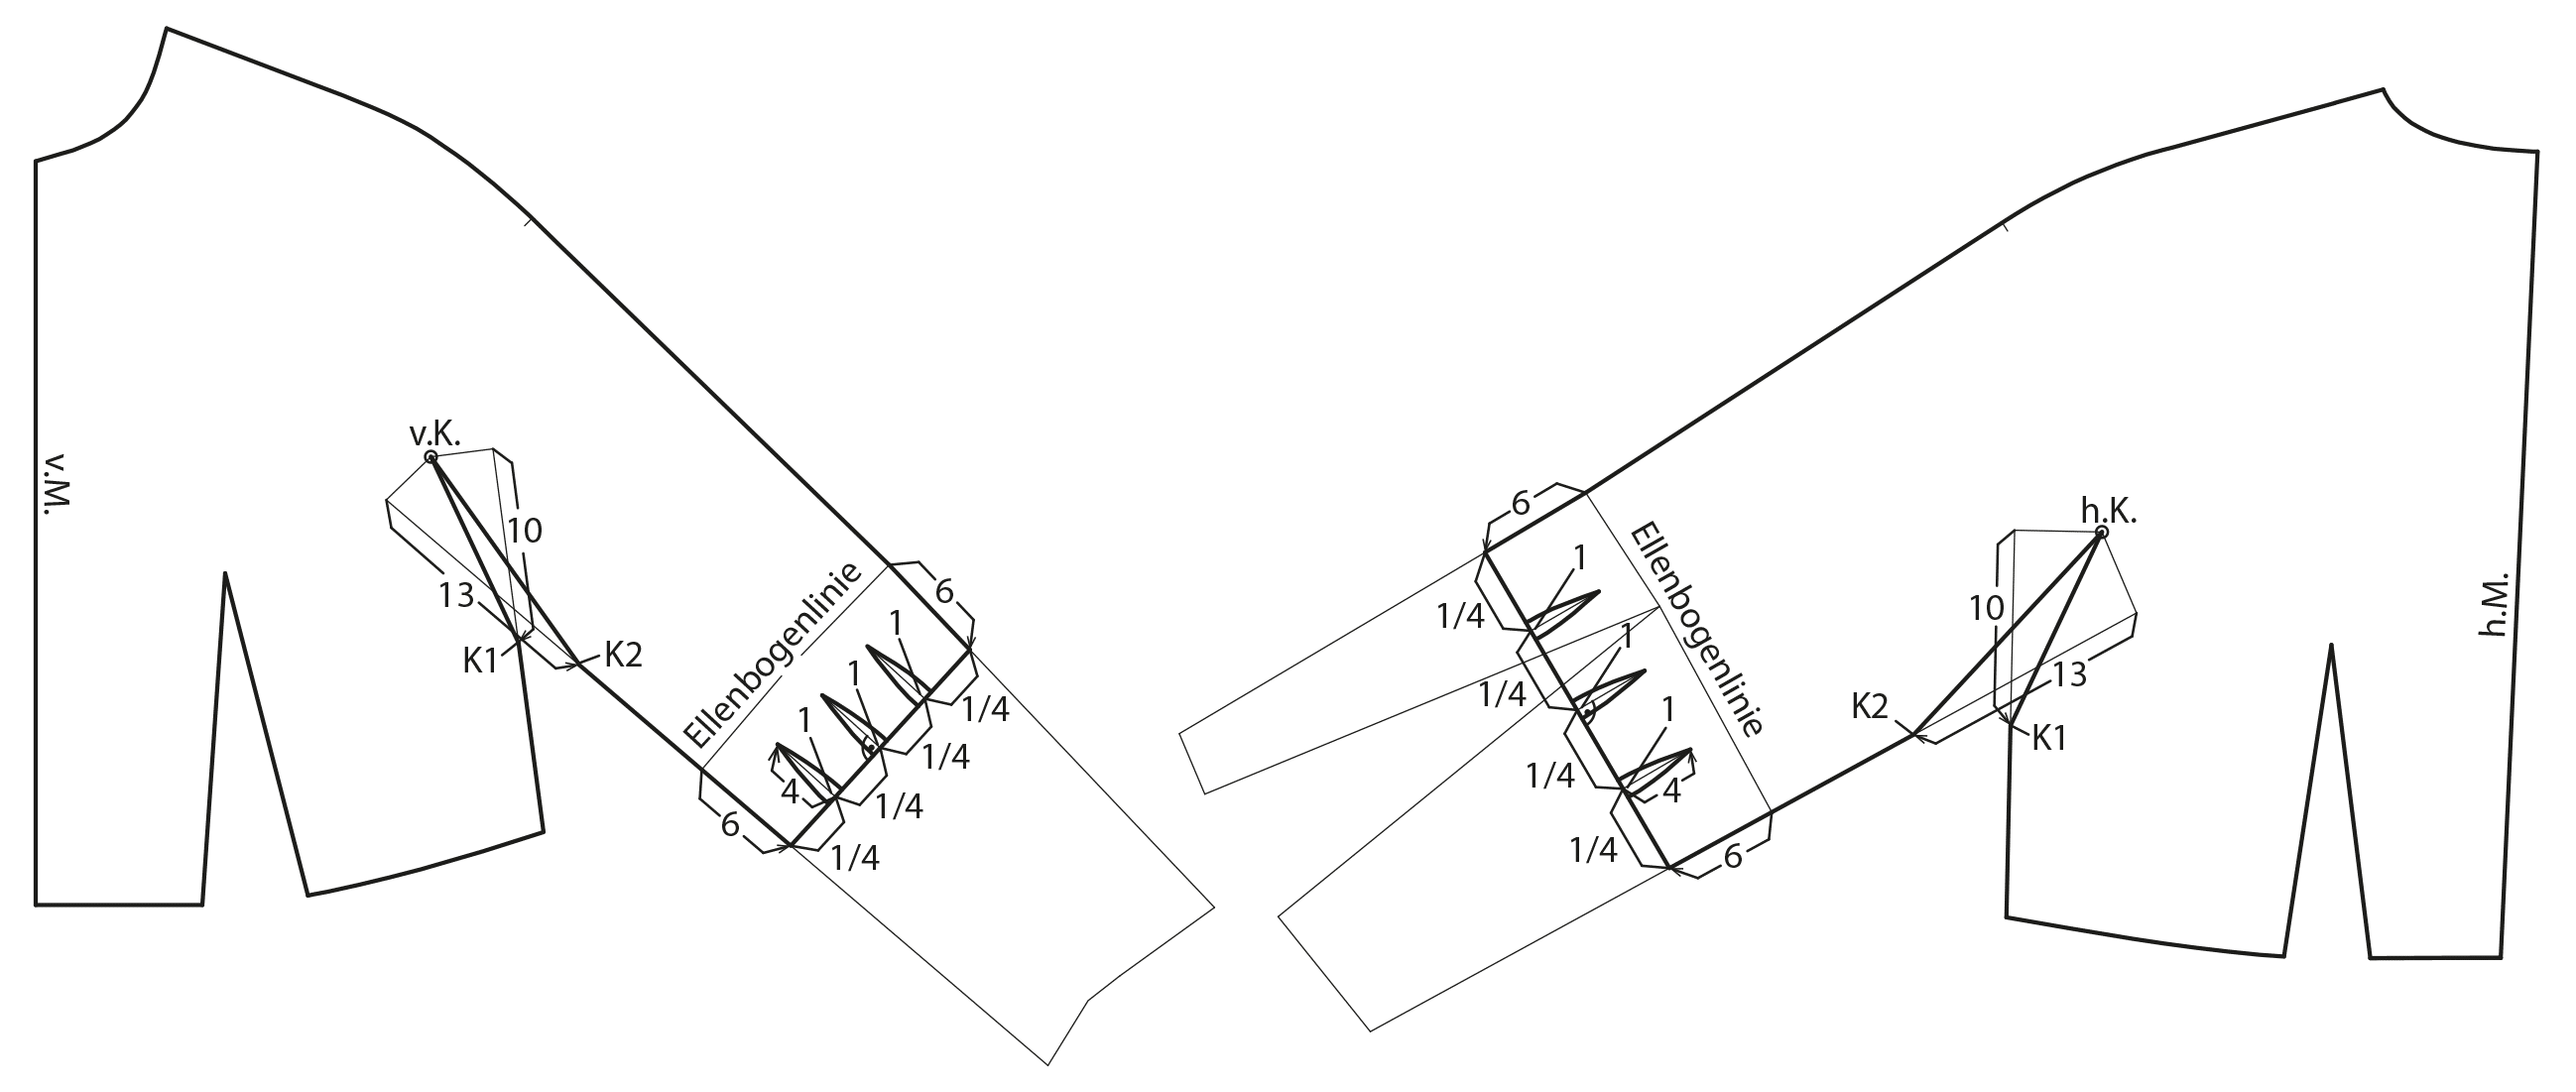
- Measure 10 cm for the gusset length at the sideseam and connect this point (K1) and the front and back gusset corners (v.K. and h.K) with a line.
- Measure 13 cm for the gusset length at the sleeve seam and connect the point K2 and the front and back gusset corners (v.K. and h.K) with a line.
- Shorten the sleeve to 6 cm below the elbow line.
- Divide the sleeve hem and mark three darts, each 4 cm long and 1 cm deep.
7. Diamond Gusset
- Trace a copy of the gusset pieces on the front and back pattern or measure the seam lengths and transfer the gusset pieces to the gusset guidelines.
- Finish the diamond gusset by placing the gusset pieces on the gusset template. Below the horizontal line, place the gusset pieces with the sideseams touching the lower vertical line.
- The front and back gusset corners (v.K. and h.K.) of the gusset pieces are placed exactly on the front and back gusset corners (v.K. and h.K.) of the gusset template.
- The gusset pieces touch at point K1. Place the copied gusset pieces of the sleeves on the diagonal line of the template with the sleeve seams touching. The front and back gusset corners (v.K. and h.K.) of the gusset pieces are placed exactly on the front and back gusset corners (v.K. and h.K.) of the template. The gusset pieces touch at point K2.
8. Collar

- Mirror the front waistline and the front waist dart leg over the centre front.
- Lower the front neckline 1 cm at the shoulder and draw the front neckline slightly curved to the mirrored dart leg.
- Draw a circular arc over the lowered neck point with pivot point Z. Measure two times 1.5 cm along the circular arc for the collar stand width.
- Lower the back neckline 1 cm at the shoulder and 0.5 cm at the centre back. Draw the new back neckline.
- Lengthen the centre back two times 2 cm upwards for the collar stand width. Measure two times the collar stand width (1.5 cm) upwards from the lowered neck point. Draw the collar line and the collar roll.
In this e-dossier, you will find the instruction on pattern construction for tree bridal gowns.
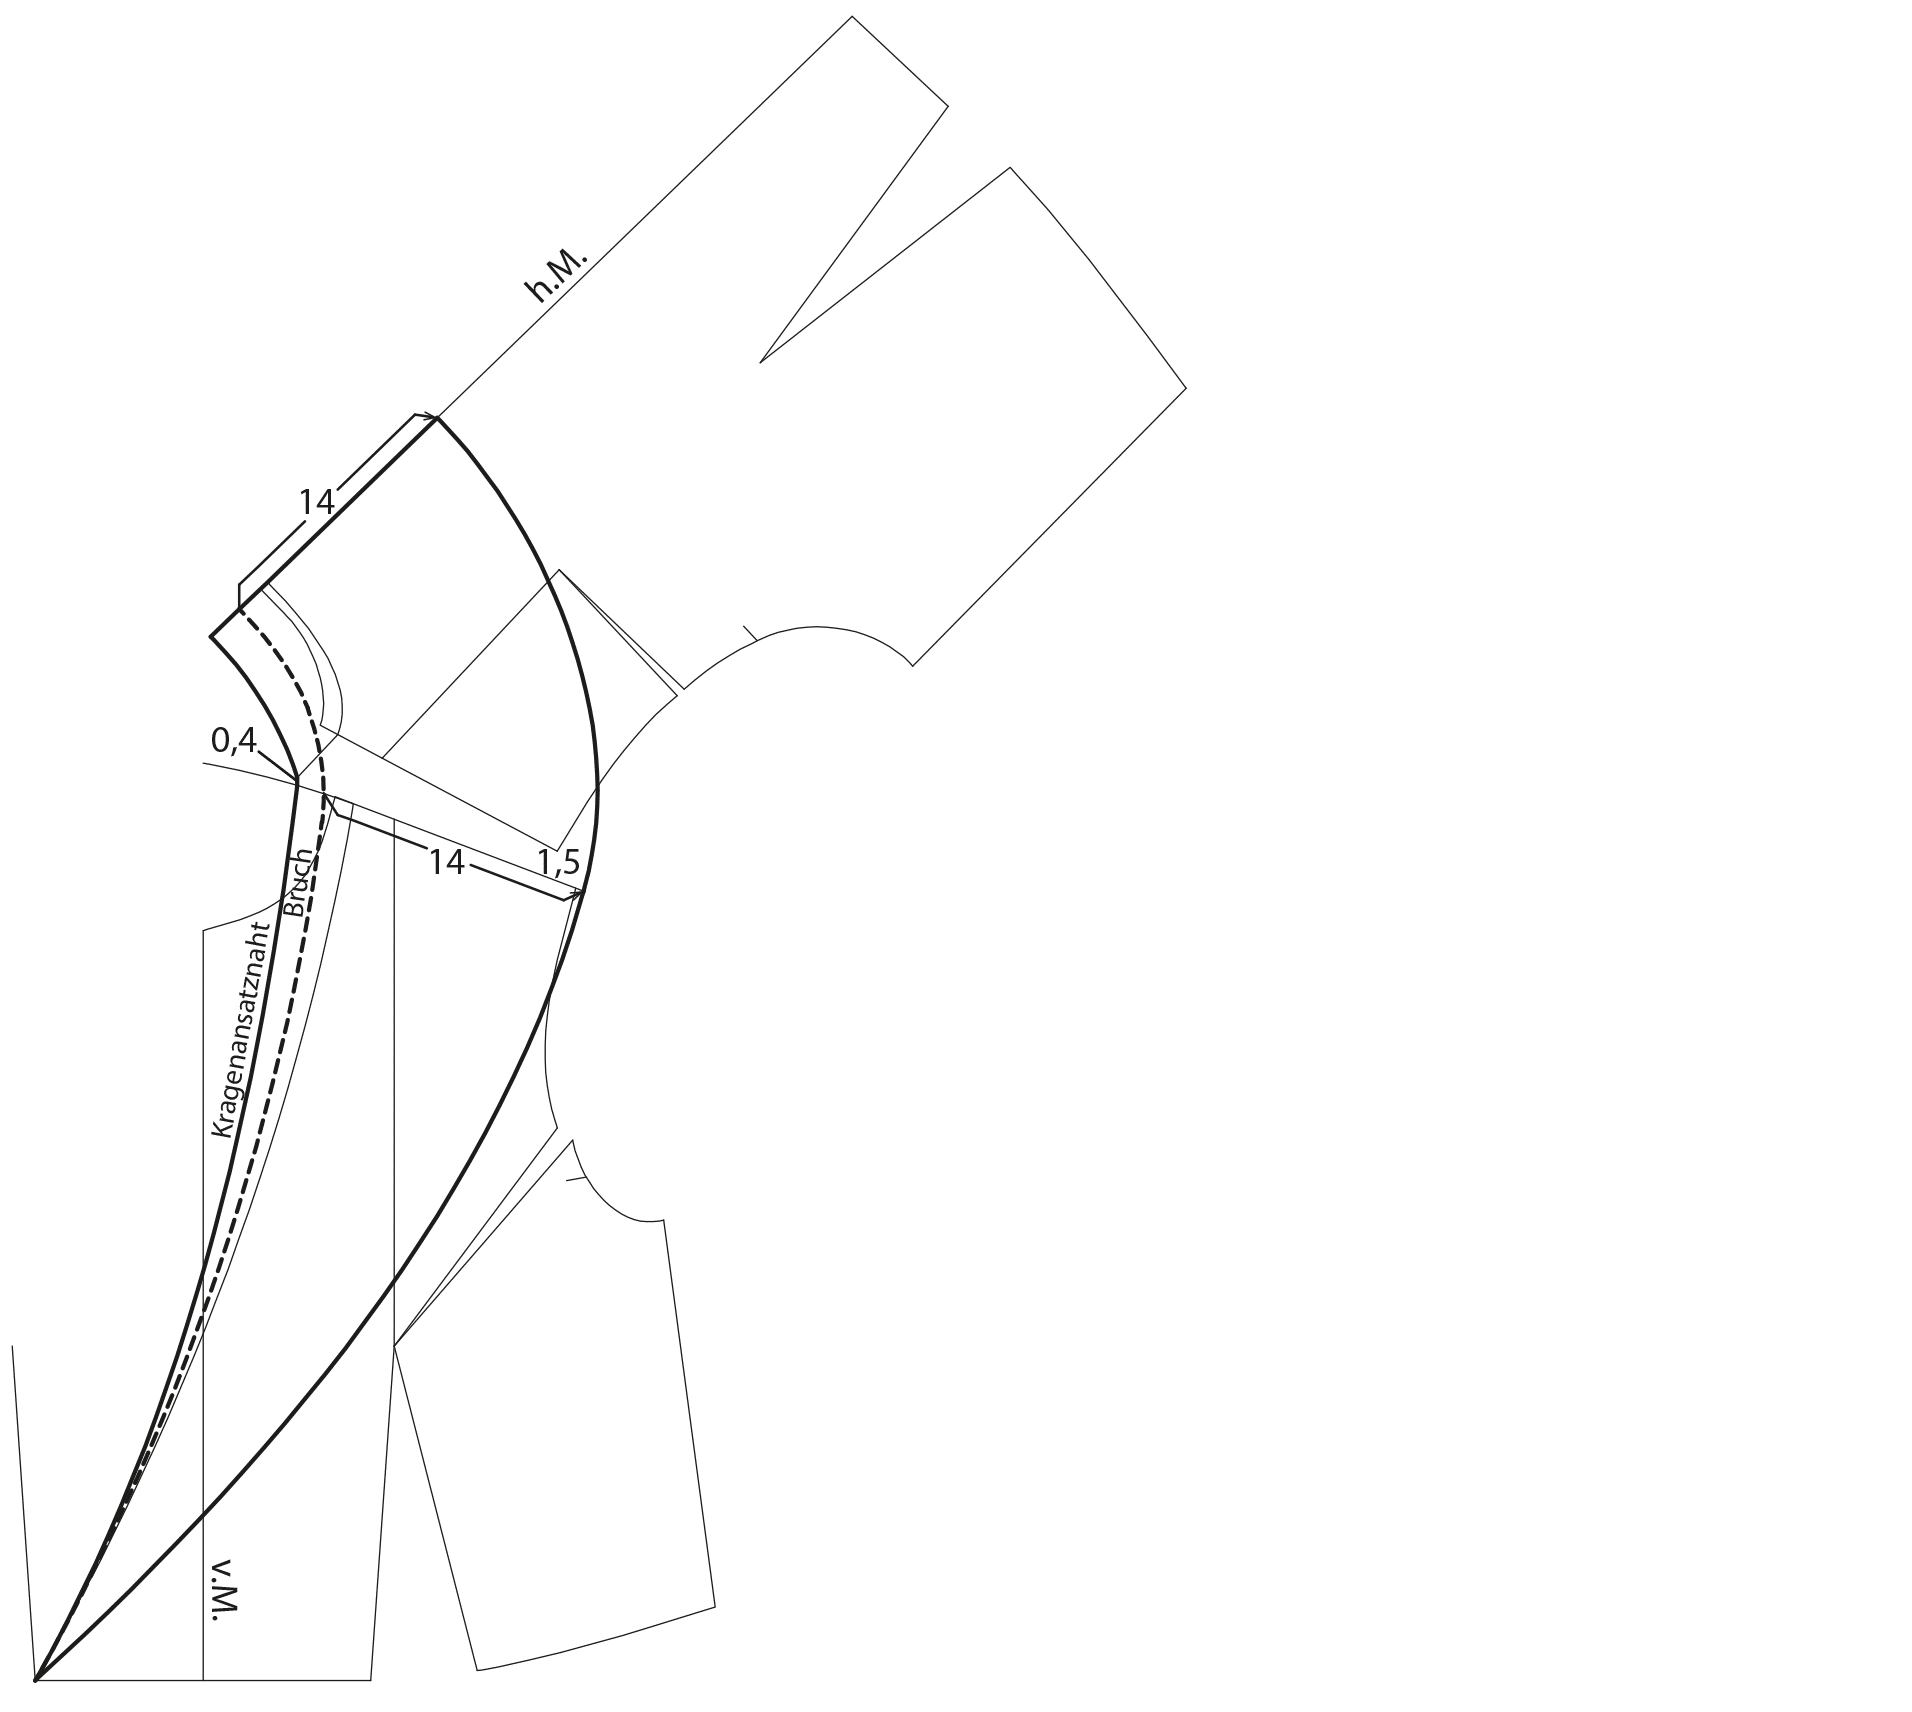
9. Collar on the Joined Front and Back Pattern
-
Place the back pattern on the front pattern with 0.4 cm distance at the collar line and 1.5 cm distance at the shoulder seams. Choose the distance between the front and the back neck point so that the length of the collar line corresponds with the length of the front and back neckline.
-
Mark the collar 14 cm wide at the shoulder and at the centre back. Draw the collar shape as shown in the illustration.
10. Finished Pattern Pieces
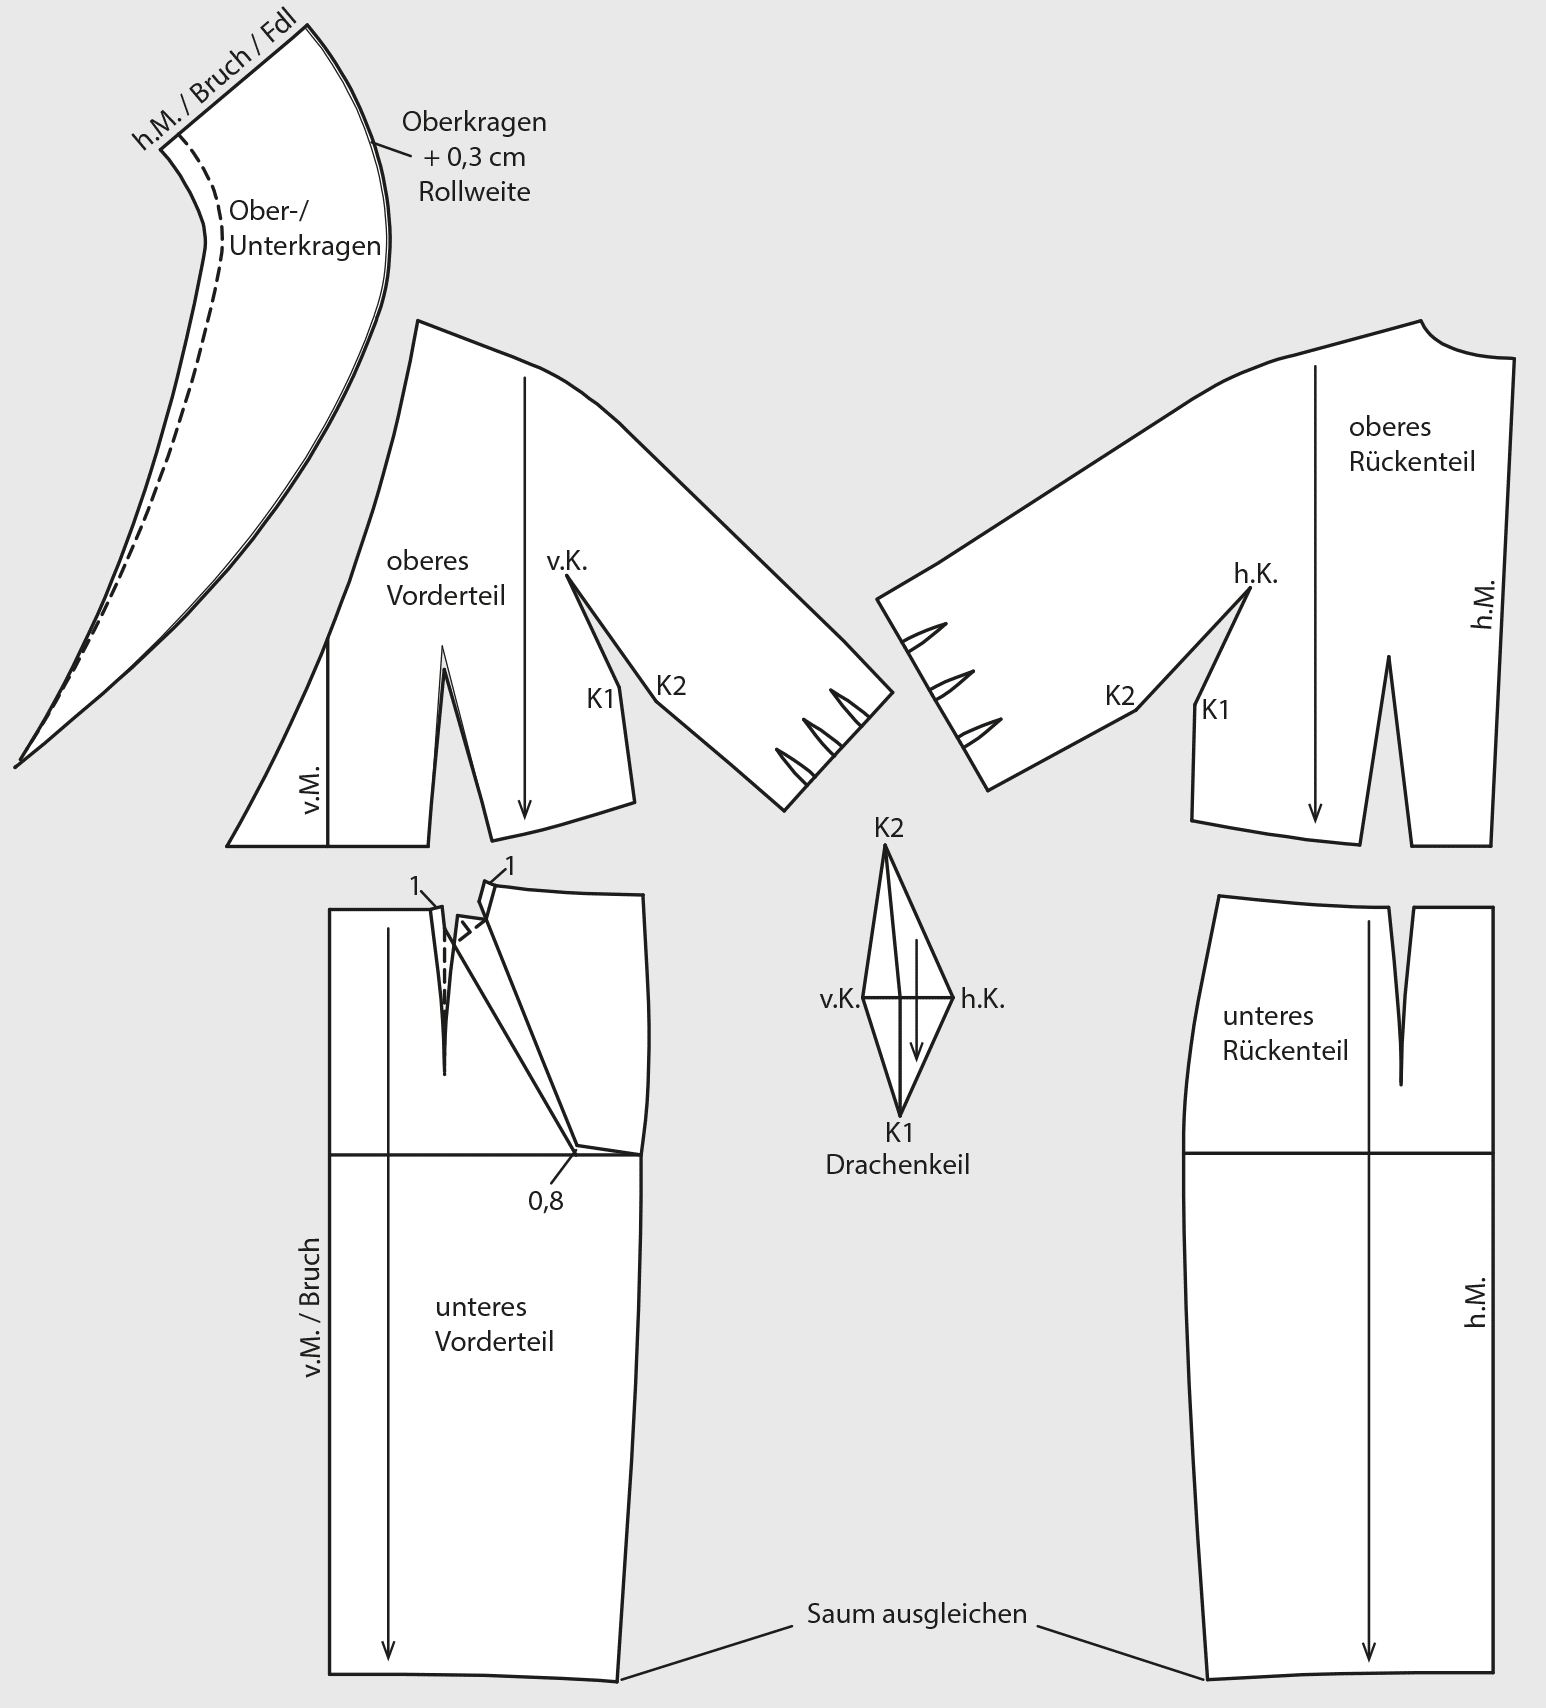
- Copy all pattern pieces.
- Shorten the bust dart 2 cm and shape the new dart as shown.
- Slash and spread the front pattern 0.8 cm at the hip for the front pleat intake.
- Add 0.3 cm roll width to the upper collar (depending on the material).
- Join the pattern pieces at the sideseam and blend the hemline.
- Mark the grainline.

Dress with Pleated Neckline
Template: Basic Dress Block, Size 40
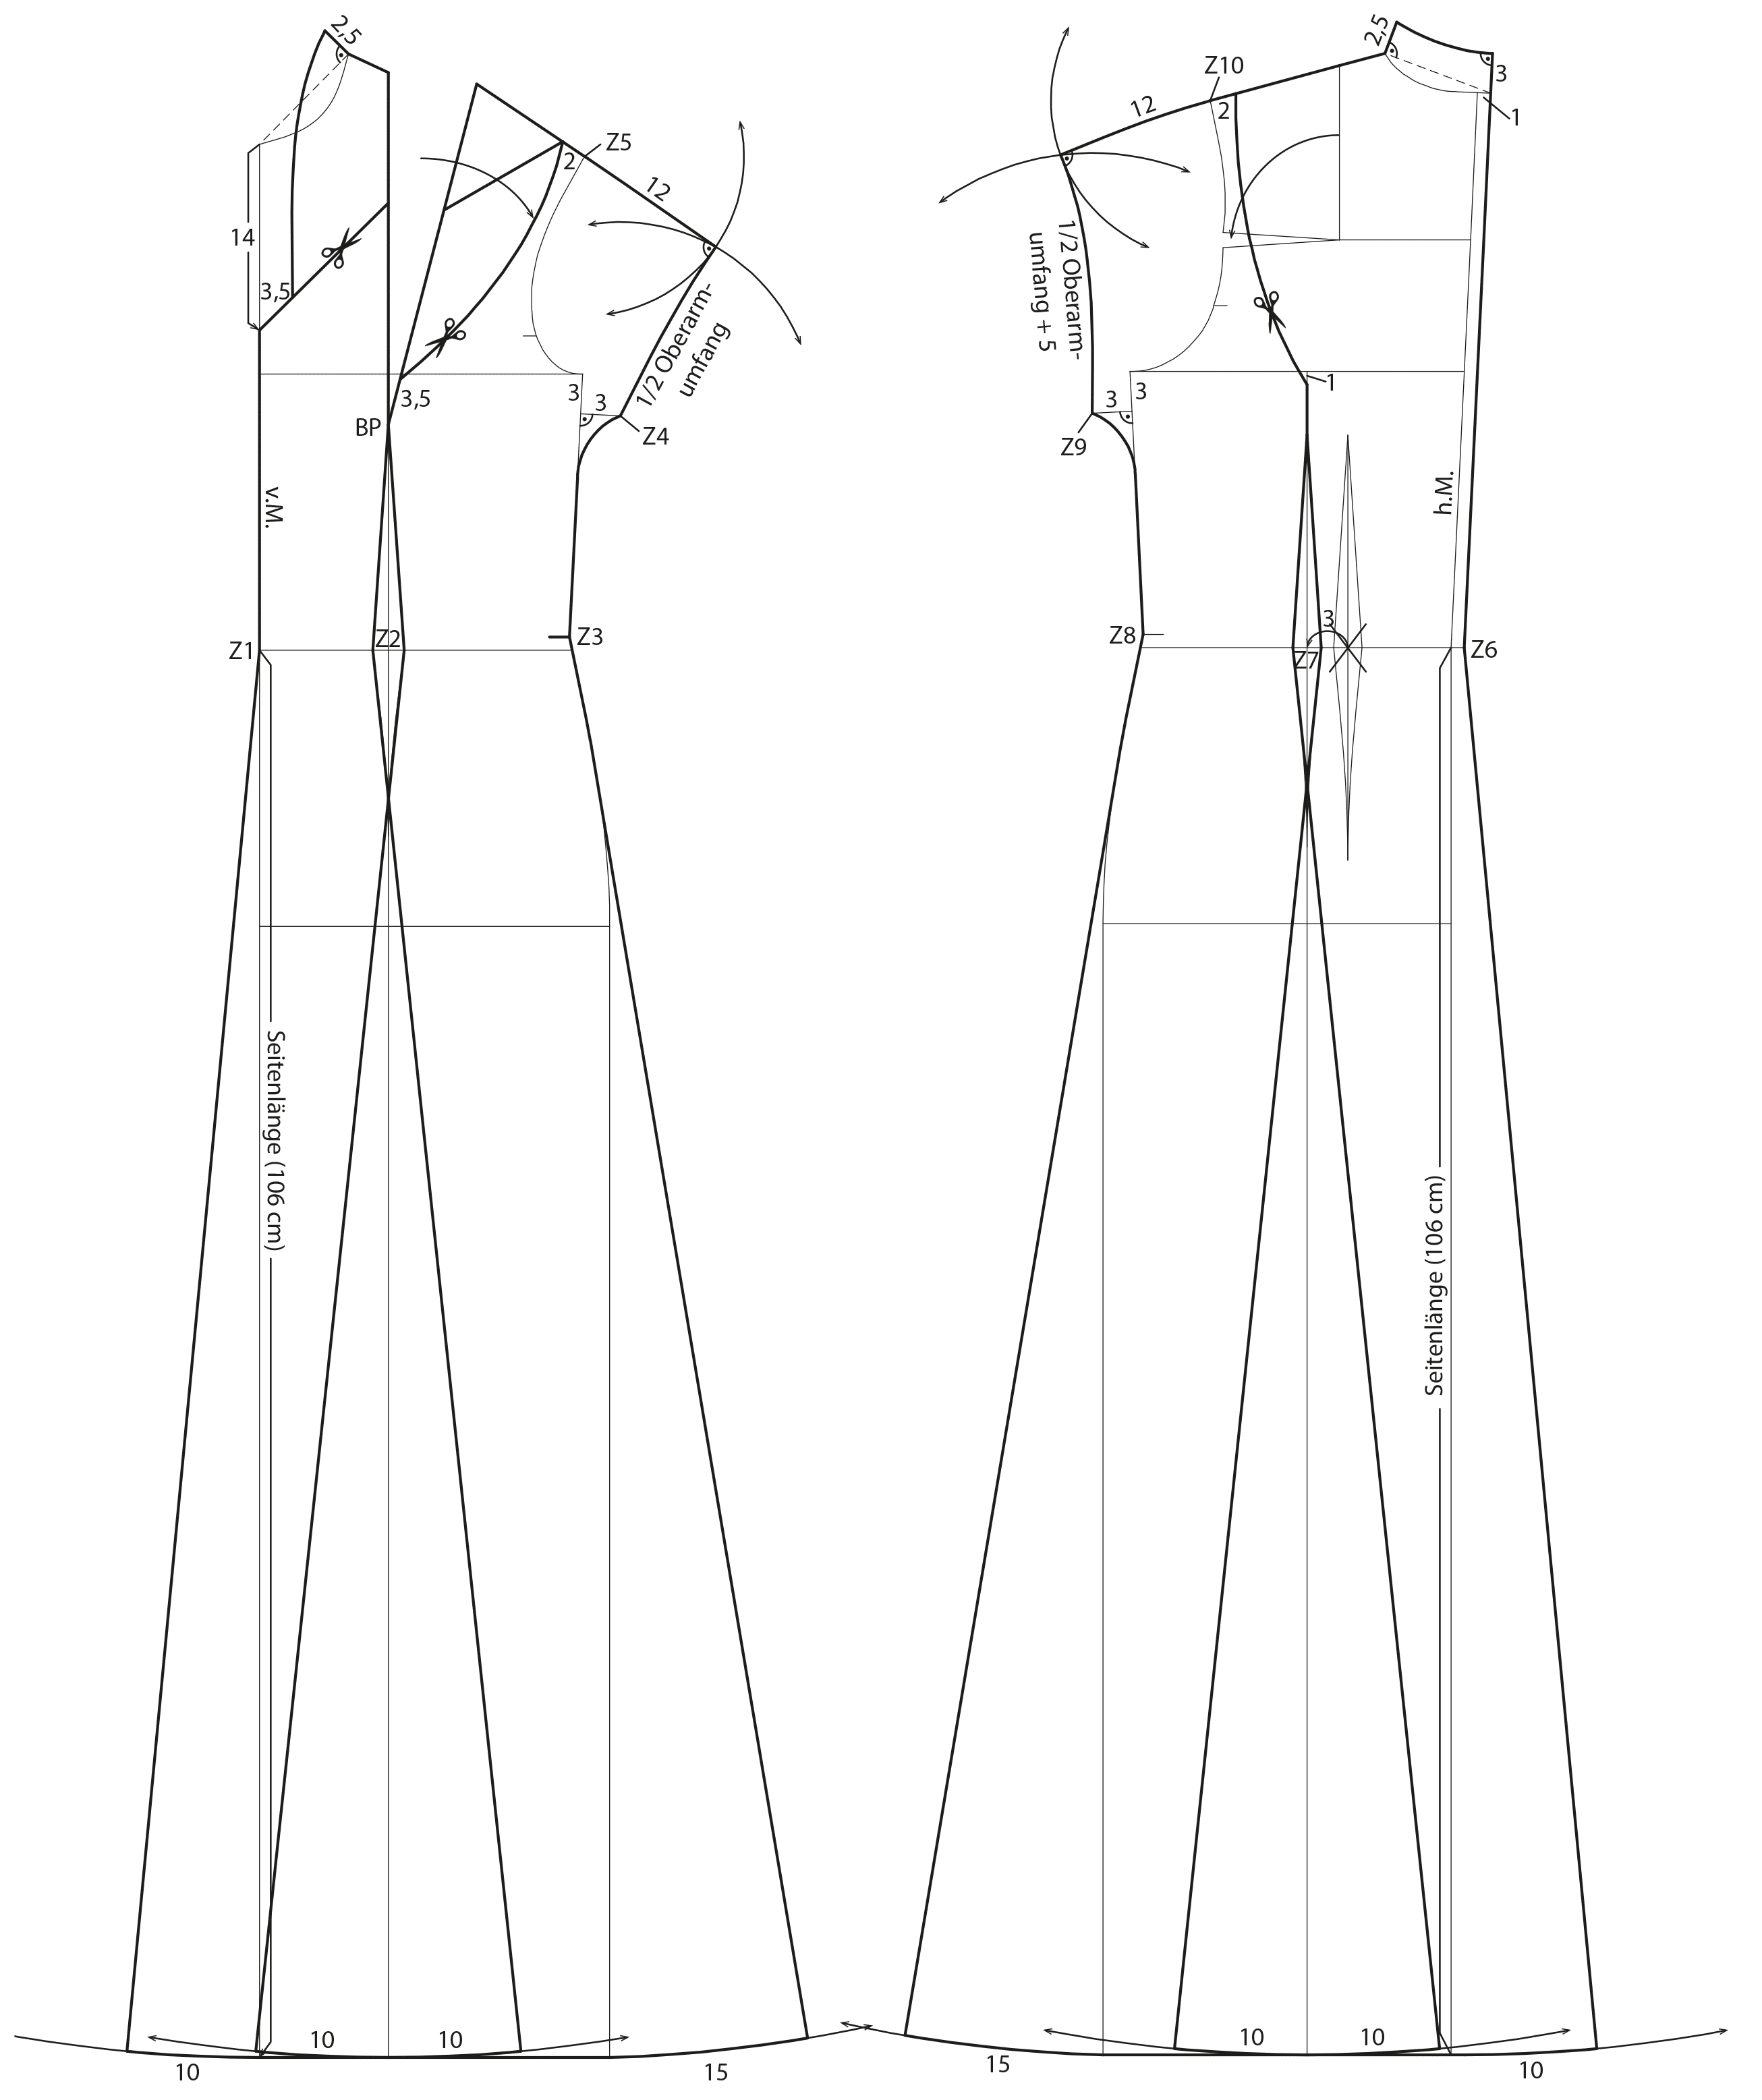
1. Front and Back Pattern
-
Lengthen the centre front and the centre back from the waist downwards to match the sideseam length of 106 cm.
-
Rotate the back shoulder dart to the armhole.
-
Relocate the back waist dart 3 cm to the side.
-
Add 1 cm overlap and underlap parallel to the centre back.
-
Measure 2 cm from the armhole along the shoulder line for the position of the shoulder yoke.
-
The yoke line ends 3.5 cm above the bust dart on the front pattern and 1 cm below the chestline on the back pattern.
-
Draw circular arcs for the hem flare with pivot points Z1, Z2 (dart centre point), Z3 (raised waist point), Z6, Z7 and Z8. Extend the hem 10 cm at the centre front and centre back as well as at the panel seams. Extend the hem 15 cm at the sideseams. Draw the extended seam lines from
the hem to the waist.
-
Connect the neck points on the front and back pattern with a guideline and square up 2.5 cm for the collar width. Extend the centre back 3 cm upwards and draw the build-up neckline on the back pattern as shown in the illustration.
-
Measure 14 cm downward along the centre front for the front neckline and the position of the neckline pleat. Close the bust dart temporarily and draw a line from this point to the yoke line at the shoulder.
-
Measure 3.5 cm along this line and draw the neckline parallel to the centre front to the raised neck point.
-
Lower the armhole 3 cm and square out 3 cm for the sleeve.
-
Draw a circular arc with pivot point Z4 and radius = ó of the upper arm girth and another circular arc with pivot point Z9 and radius = ó of the upper arm girth plus 5 cm.
-
Draw a circular arc over each shoulder point (Z5 and Z10) with radius = 12 cm. Draw the sleeve according to the illustration.
2. Finished Pattern Pieces

-
Copy all pattern pieces.
-
Blend the seam transition at the build-up neckline and the bust point.
-
Relocate the bust dart to the shoulder yoke.
-
Slash and spread the pleat 3.5 cm at the neckline.
-
Mark the grainline.
Dress with Balconette Neckline
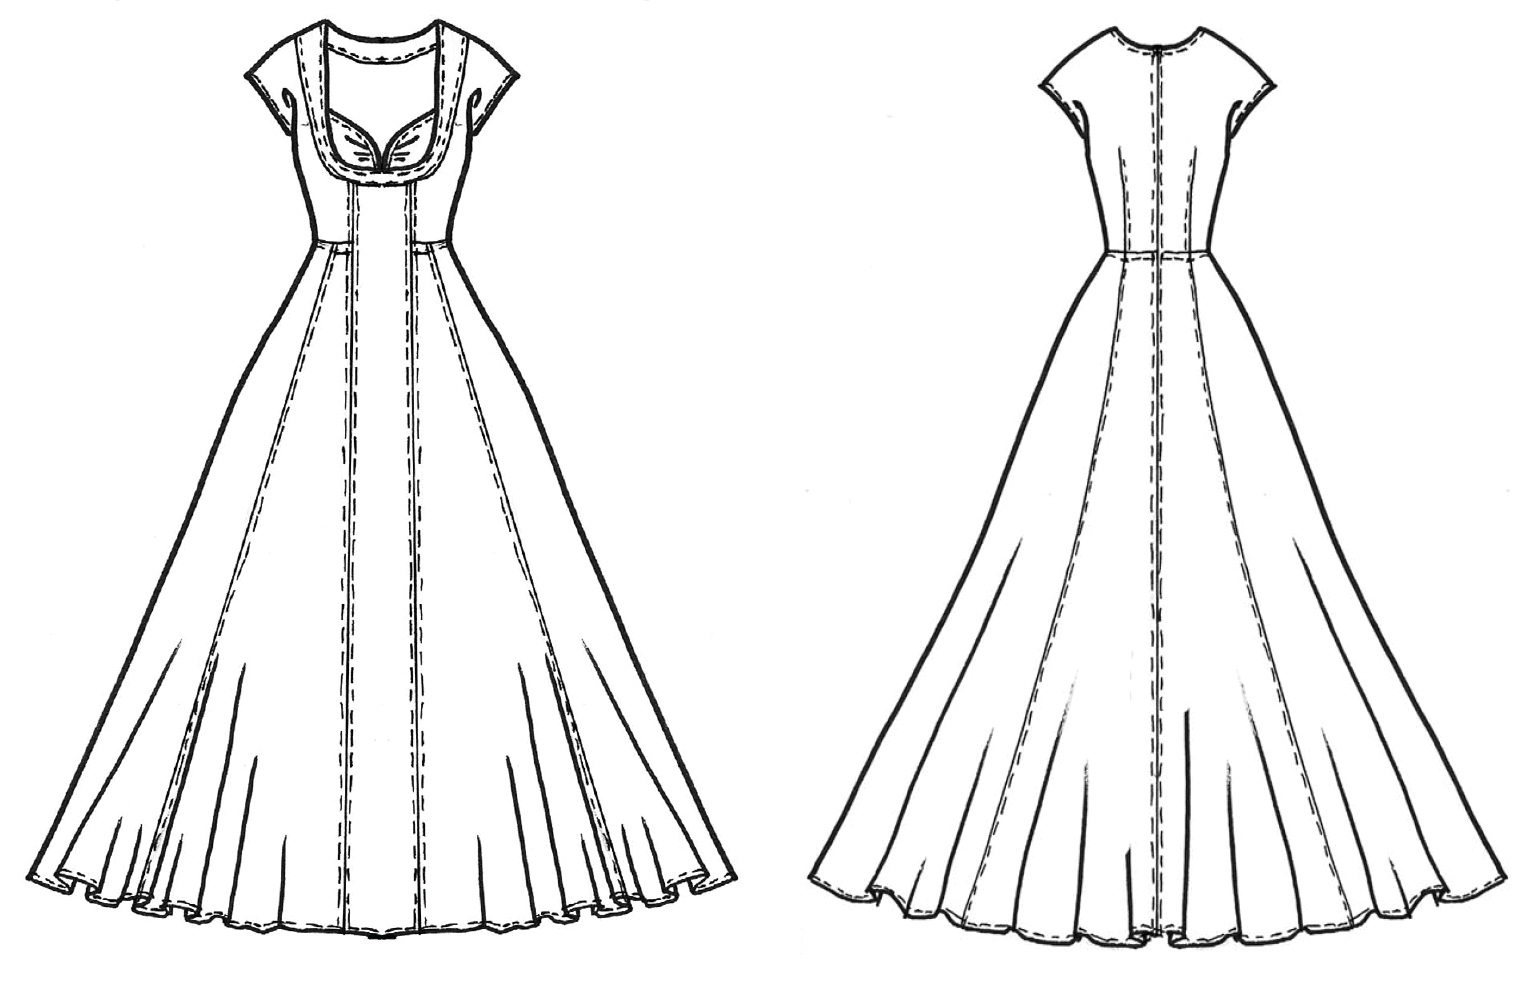
Dress with Wide Stand-up Collar
Two more wedding dresses (Dress with Balconette Neckline and Dress with Wide Stand-up Collar) can be found in Damen-Rundschau 5/2016.