
Pattern Construction for Trouser Suits
Deutsch

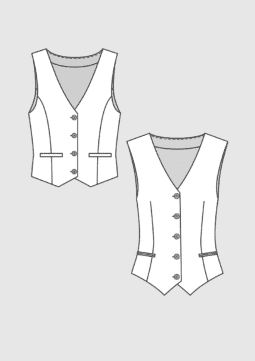
The trouser suit is an essential everyday companion for every woman. Unlike its male counterpart, trouser suits for women can be worn to any occasion, without feeling overdressed. As the line between business and casual wear is getting blurrier, trouser suits can be styled with the right accessories for every occasion. In this article you will get an insight on the e-dosssier Schnitt-Technik Hosenanzüge.
 (Photo Credit: Drawing V. Feyerabend)

Discover M. Müller & Sohn Magazine as a digital edition on your smartphone, tablet and desktop computer.
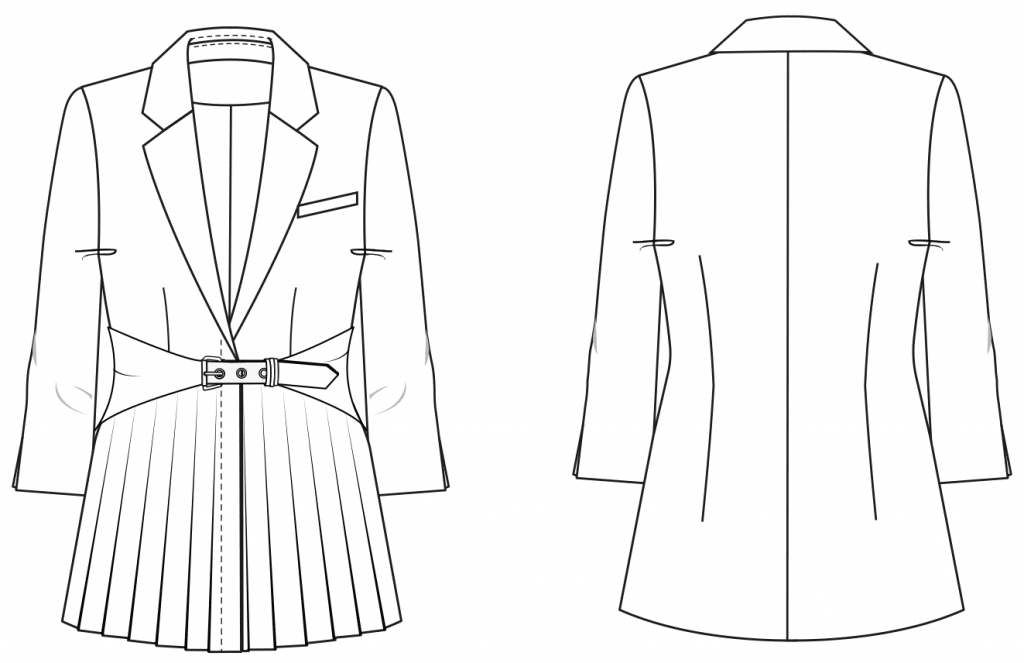
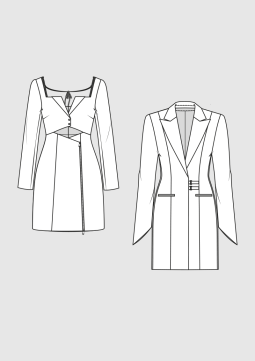
Blazer with Pleats
Template: Basic Bodice Pattern in Size 40 with the following wearing ease included:
Scye depth Rh 3.5 cm, back width Rb 1.5 cm, scye width Ad 3.5 cm, chest width Bb 1.5 cm
 (Photo Credit: Technical Drawing S. Lindner)
- Long lapel collar
- Waist belt
- Knife pleats at the front panel
- Sleeve with overarm seam
Front and Back Pattern
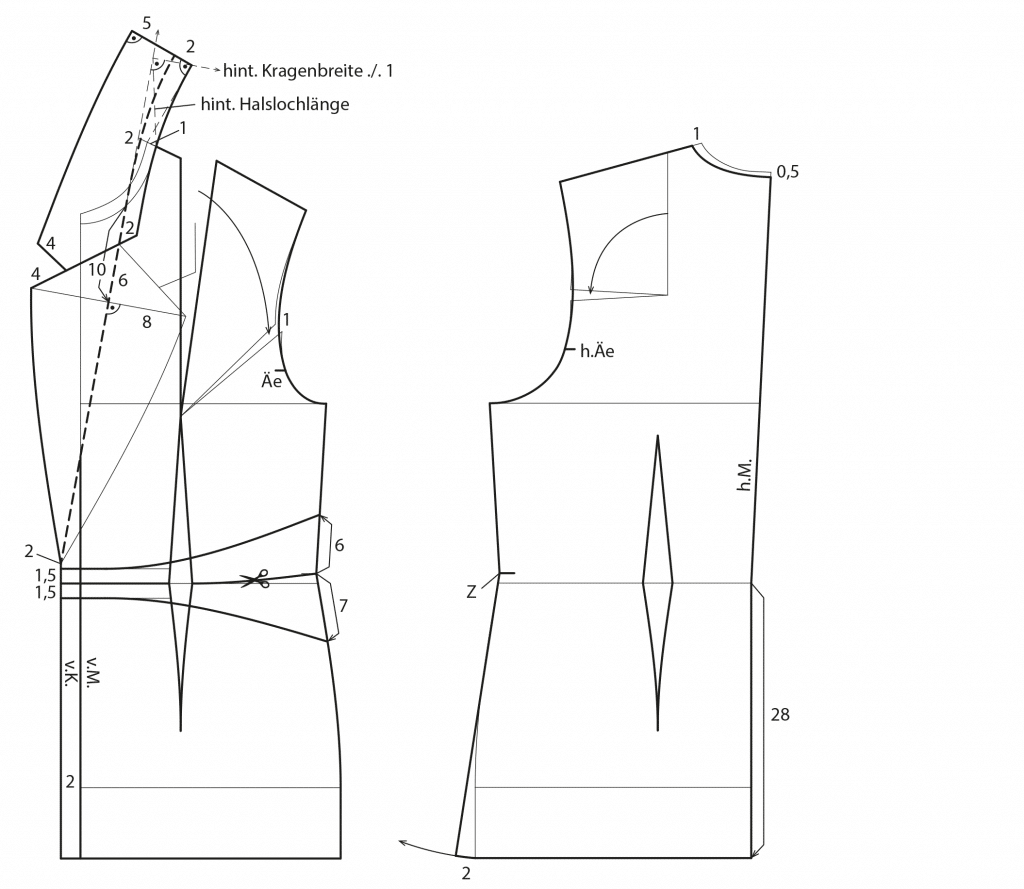
Mark the finished length 28 cm below the waist. Rotate the shoulder dart to the armhole. Open the front armhole 1 cm. Draw the new front and back armhole curve. Lower the neckline 1 cm at the centre front and at the shoulder. Lower the neckline 0.5 cm at the centre back. Draw the new neckline. Add 2 cm overlap and underlap. Mark the beginning of the lapel break 2 cm above the waist. Measure 1.5 cm above and below the waist belt along the front edge for the waist belt. Mark the waist belt 6 cm above the raised waist point and 7 cm below the raised waist on the sideseam. Draw the waist belt as shown. On the front pattern, measure 2 cm from the lowered neck point to the left for the collarstand width. Draw the lapel break line over this point and extend it upwards. Measure the length of the lowered back neckline from the lowered front neck point to the lapel break line to determine the collar length.
Square out to the right from this point and measure the back collar width minus 1 cm for the collar roll. Measure 1 cm from the lowered front neck point and connect this point and the collar roll point with a guideline. Draw the collar centre back perpendicular to this guideline and measure 2 cm for the collarstand and then 5 cm for the collar width. Mark the lapel width 10 cm below the lowered neckline on the lapel break and square out 8 cm to the right for the lapel width. Draw the lapel onto the front pattern and then mirror the lapel shape to the outside. Draw the collar edge as shown in the illustration. Extend the gorge seam 2 cm over the lapel break and draw the collar seam. On the back pattern, draw a circular arc over the sideseam/hem corner with pivot point at the raised waist (Z) and extend the hem 2 cm at the sideseam. Draw the sideseam straight.
Sleeve
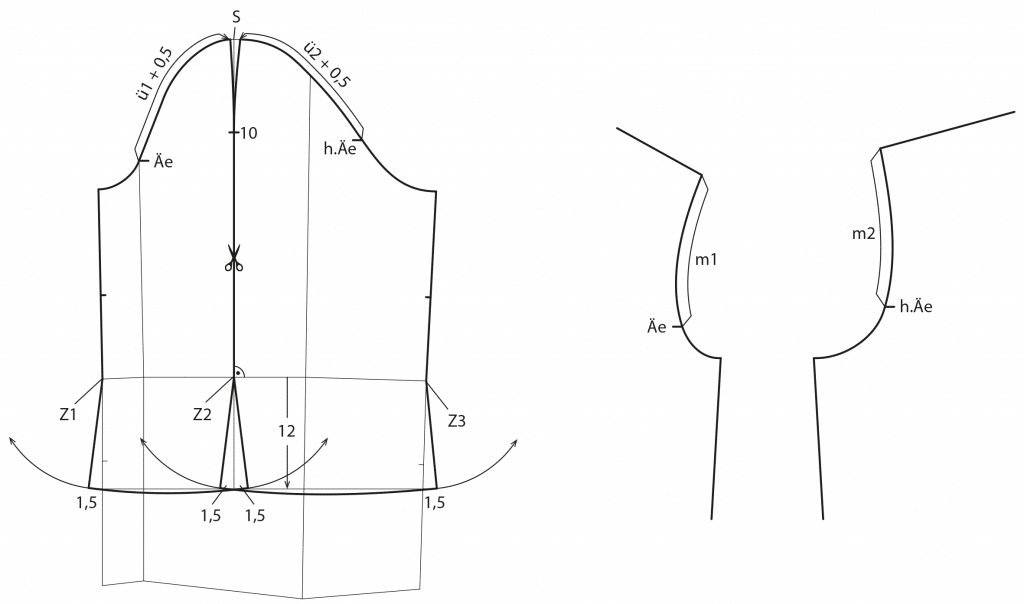
Shorten the sleeve to a finished length of 12 cm below the elbow line. Draw a vertical line from the shoulder point (S) to the new hemline. Measure the front armhole from the front armhole notch Äe to the shoulder (m1) and transfer this measurement plus 0.5 cm to the sleeve cap (ü1 + 0.5). Measure the back armhole from the back armhole notch h.Äe to the shoulder (m2) and transfer this measurement plus 0.5 cm to the sleeve cap (ü2 + 0.5). Draw the overarm seam from these points curved to the vertical line. Draw three circular arcs over the new sleeve hemline with pivot points (Z1, Z2, Z3) on the elbow line. Extend the sleeve hem 1.5 cm each side and draw the new seamlines.
Completion Front Pattern
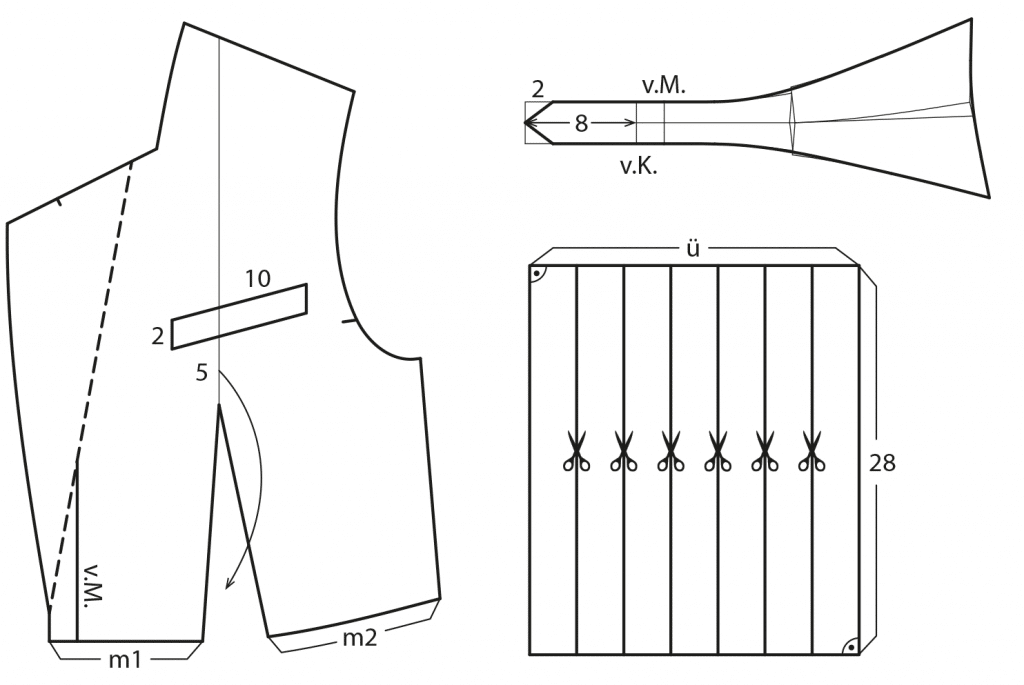
Copy the upper front pattern up to the waist seam. Rotate the bust dart intake to the waist. Draw the welt pocket as shown. Measure the waistline (m1 + m2) and draw a horizontal line in the same length (ü). Square down 28 cm for the finished length below the waist. Complete the rectangle and mark 6 vertical cutting lines evenly apart from each other. Copy the waist belt and join the pattern pieces together. Blend the seamlines. Add 8 cm for the belt overlap and draw the pointed belt front as shown.
Note: Due to the already matched overarm seam, you don’t need to adapt the sleeve cap to the armhole opening.
Finished Pattern Pieces
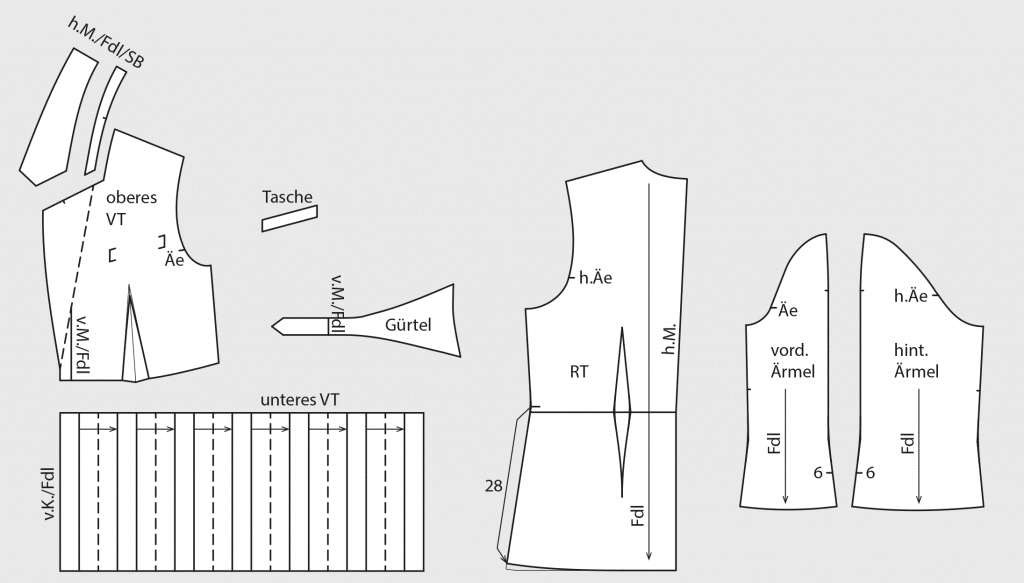
Copy all pattern pieces. Blend all seam transitions. Shorten the dart 2 cm at the bust point and add the dart hood. Slash and spread the lower front pattern around 2 times the pleat depth at each cutting line. Mark the length at the back sideseam with 28 cm below the waist and draw the new back hemline. Mark the grainlines.
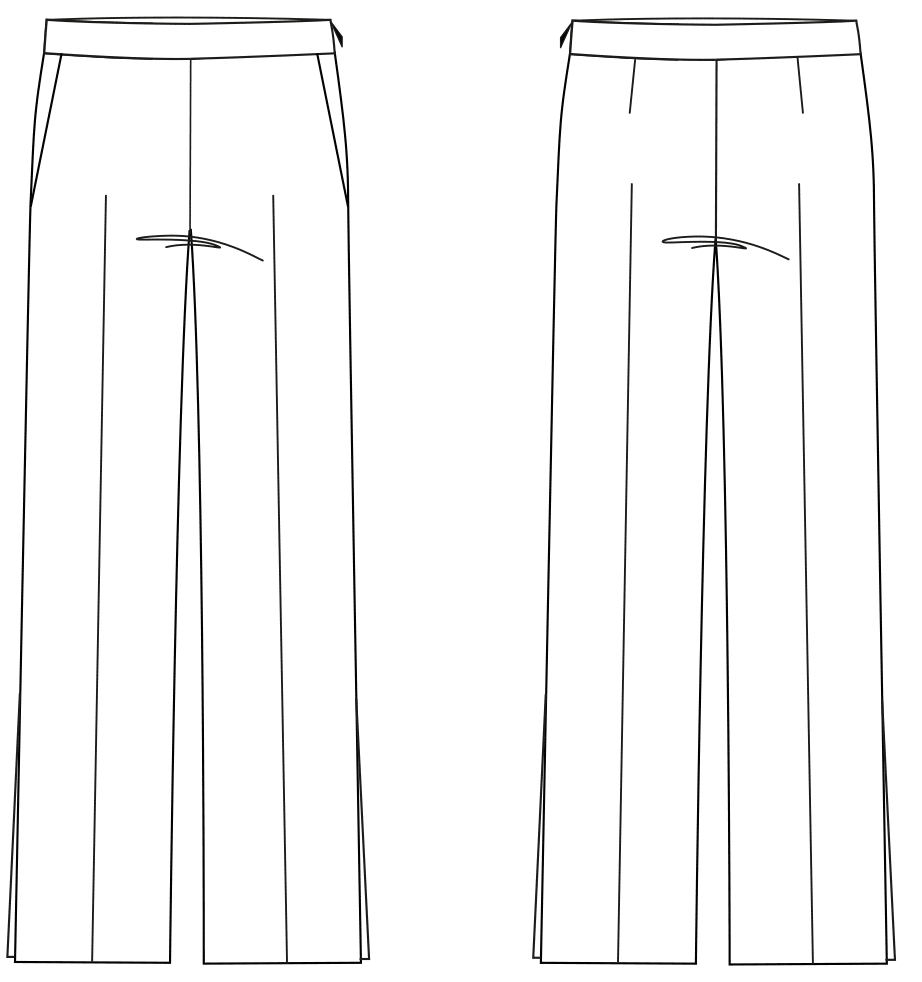
Wide Trousers
Template: Basic Trouser Block in Size 40
 (Photo Credit: Technical Drawing S. Lindner)
- Wide, straight leg
- Long slits at the hem
- Wide contoured waistband
- Sideseam zipper
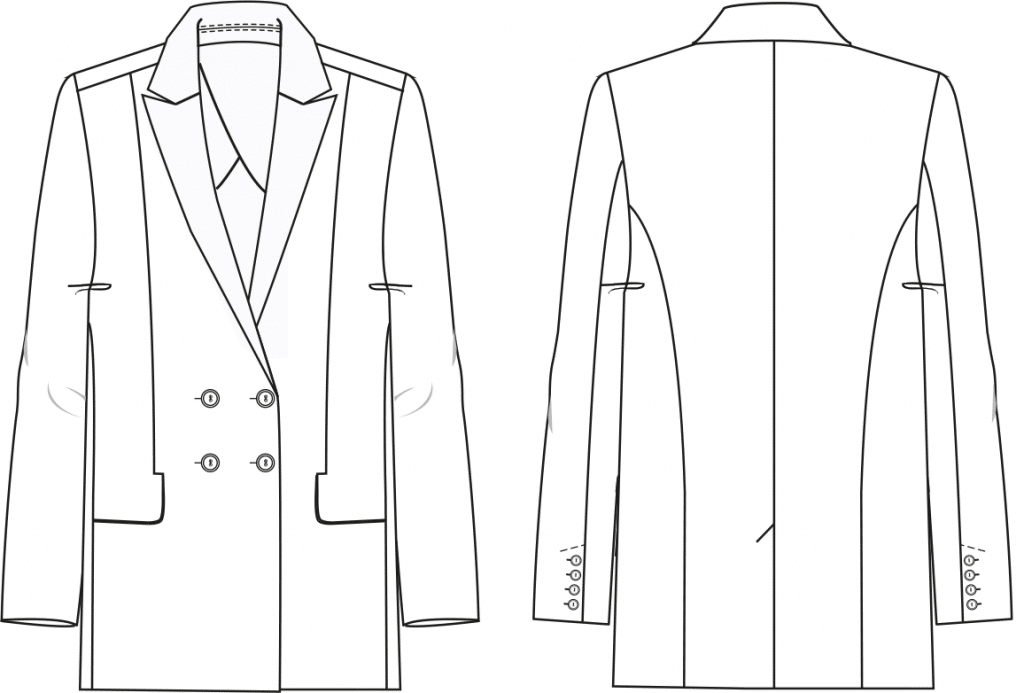
Straight Blazer with Pointed Lapel
Template: Basic Bodice Pattern in Size 40 with the following wearing ease included:
Scye depth Rh 4.0 cm, back width Rb 2.0 cm, scye width Ad 4.0 cm, chest width Bb 2.0 cm
 (Photo Credit: Technical Drawing S. Lindner)
- Double-breasted
- Pointed lapel
- Straight pockets
- Two-piece sleeve
7/8-Trousers with Galon Stripes
Template: Basic Trouser Block in Size 40
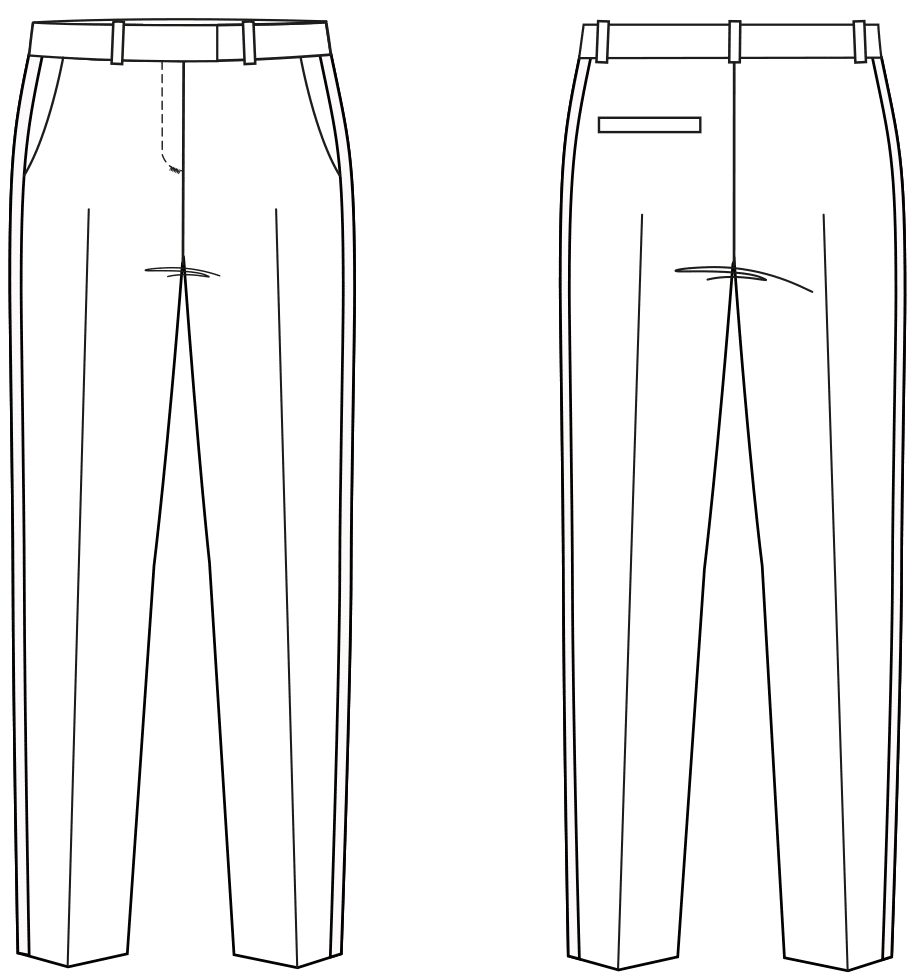 (Photo Credit: Technical Drawing S. Lindner)
- 7/8 length
- Galon stripes
- Wide contoured waistband
Educative
Thank you for your comment! So glad you liked the post and found it to be educative.
Best regards, M. Müller & Sohn Team