Pattern Design for Plaid Fabrics
Deutsch
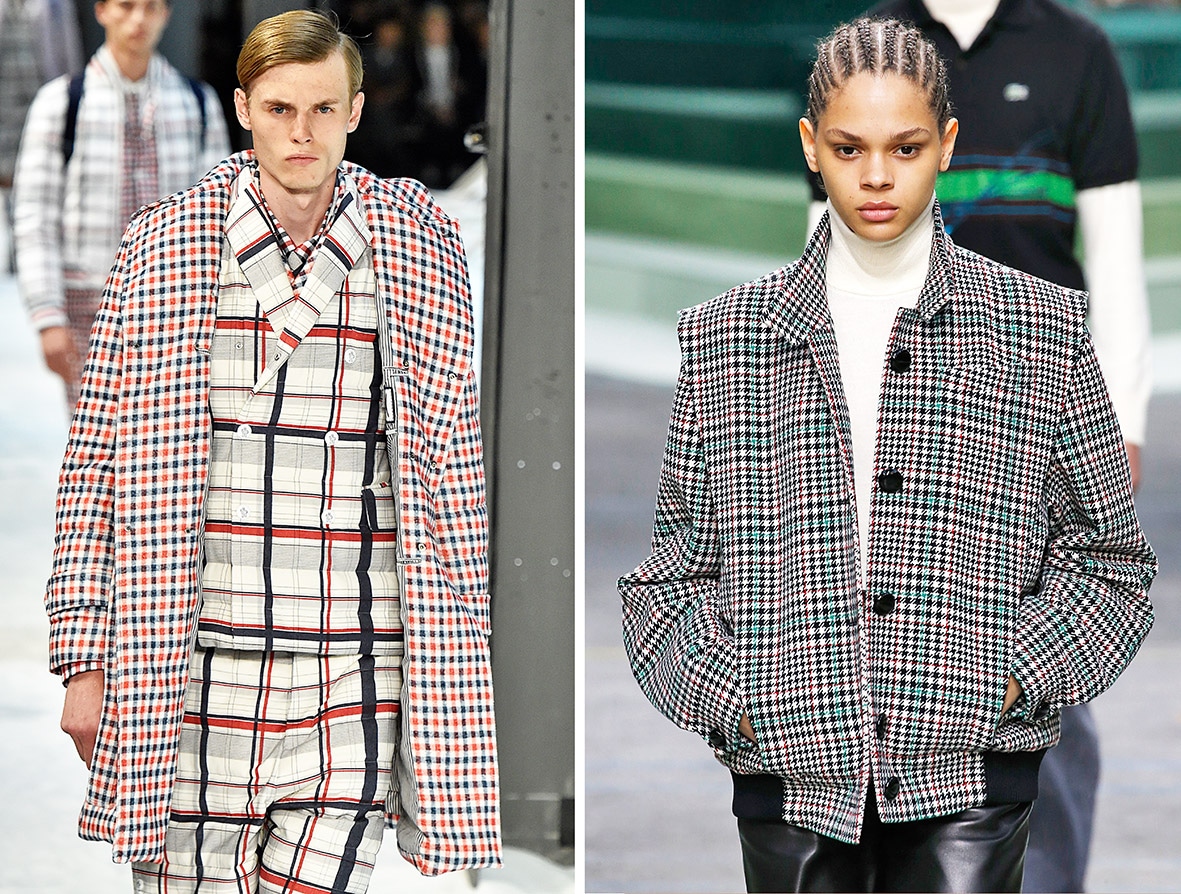
Working with plaid fabrics requires not only special considerations to the pattern layout and cutting in the matching repeat, but also affects design and pattern construction. Select the location of darts, seamlines and pockets carefully to receive a balanced look. Equalize the seam lengths of shaping seams for matching the plaids.

Discover M. Müller & Sohn Magazine as a digital edition on your smartphone, tablet and desktop computer.
Draft vertical seamlines perpendicular to the hemline. Mark the grainline perpendicular to the hemline and parallel to the front edge and the centre back. Of course, there are Always exceptions to the rule, and there should be no Limit for creativity. An important element is cutting design details on the bias, such as pockets, lapels and collars for fashionably accents.
You find the full article in our magazine Rundschau for women 10/2012.
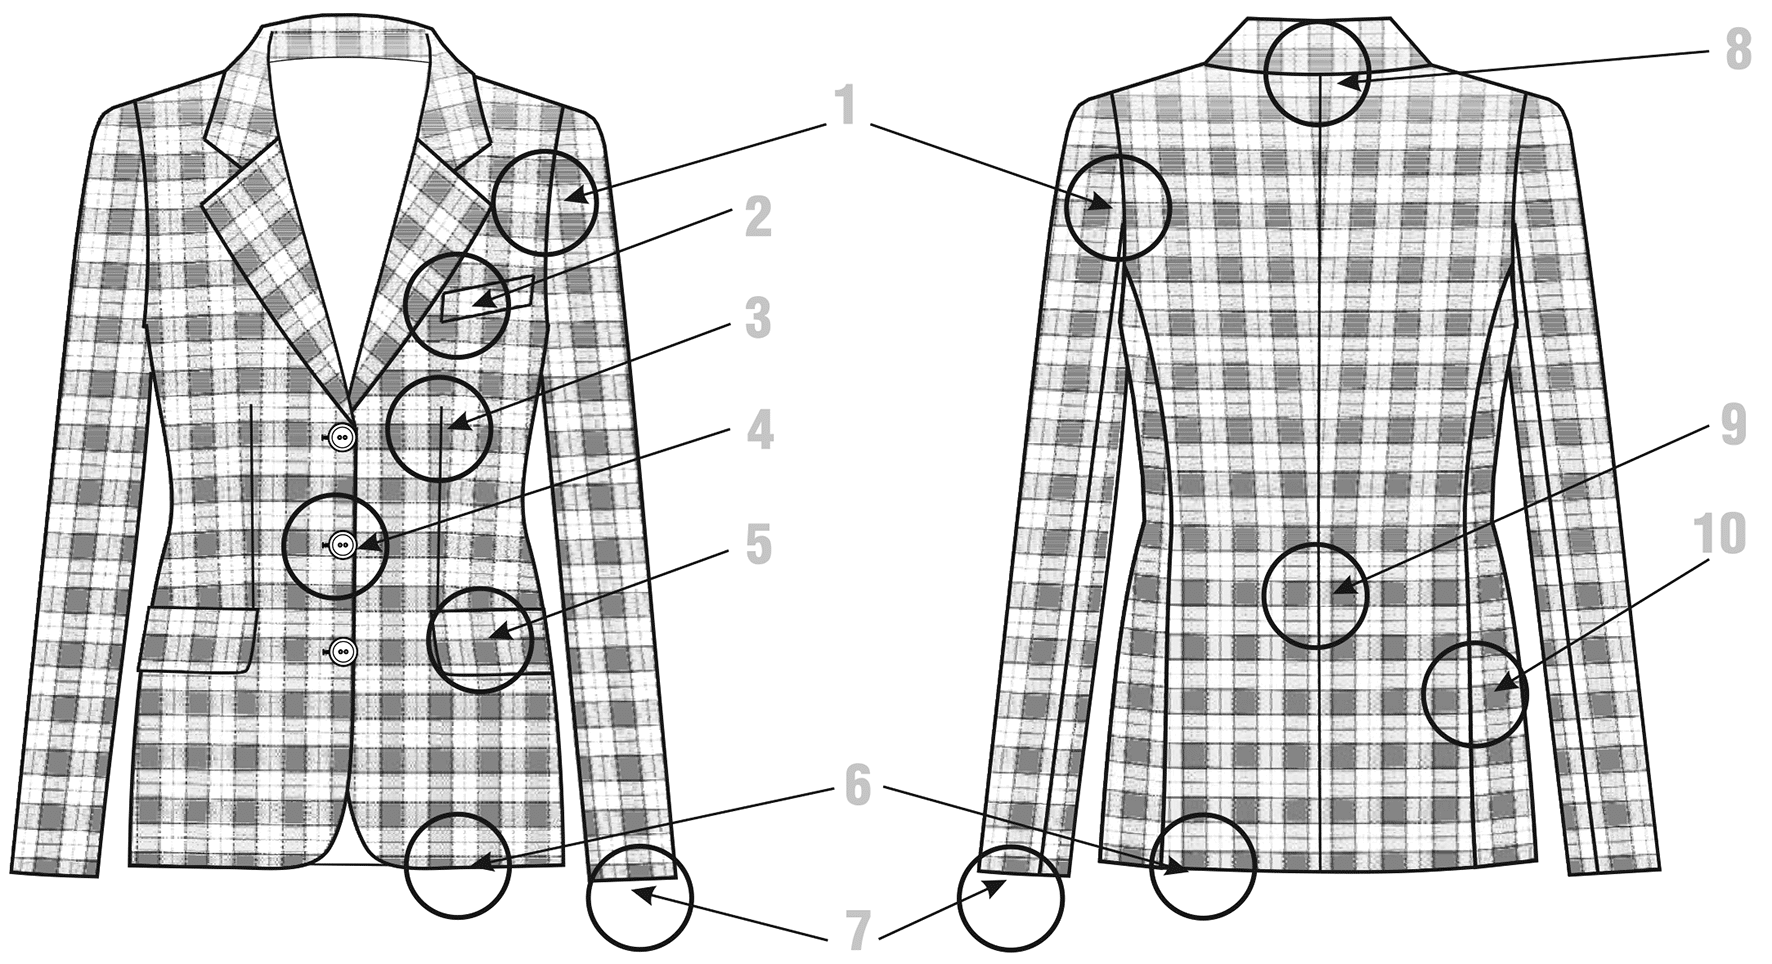
1 The horizontal bars at the sleeve cap match the horizontal bars at the front and back armhole and run exactly horizontally.
2 The lapel facings and the chest welt pocket are matched exactly to the pattern.
3 The waist dart is placed in the middle of the vertical plaid for a balanced appearance. The bust dart should be reduced and can be not rotated into the waist dart, as the plaids would be otherwise too far off. A hidden dart under the lapel is more suitable for shaping the bust area.
4 The closing button is located in the middle of the plaid for a balanced appearance at the front. All other buttons should be distributed evenly. Depending on the plaid width it might be possible to mark all other button positions also in the centre of the plaid. The front edge is parallel to the plaid bars.
5 The flap pocket is matched exactly to the Plaid repeat on the front panel.
6 The hemline is aligned all the way around in the middle of the horizontal plaid.
7 The sleeve hem can be aligned with the horizontal plaid if the pattern design as well as the plaid repeat allows it and the plaids match at the sleeve cap and the armhole.
8 To match the collar, align the centre back at the neckline in the middle of the vertical plaid for a complete plaid at the transition to the collar.
9 From the waist down the centre back seam runs parallel to the vertical plaid bar and in the middle of a plaid if plaid repeat and design allow for it.
10 The horizontal plaids on the side panel match the plaids on back panel below the waist and the plaids on the front pattern below the pocket.
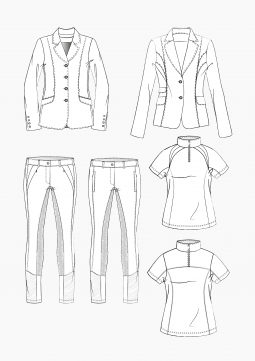
Jacket Pattern Design
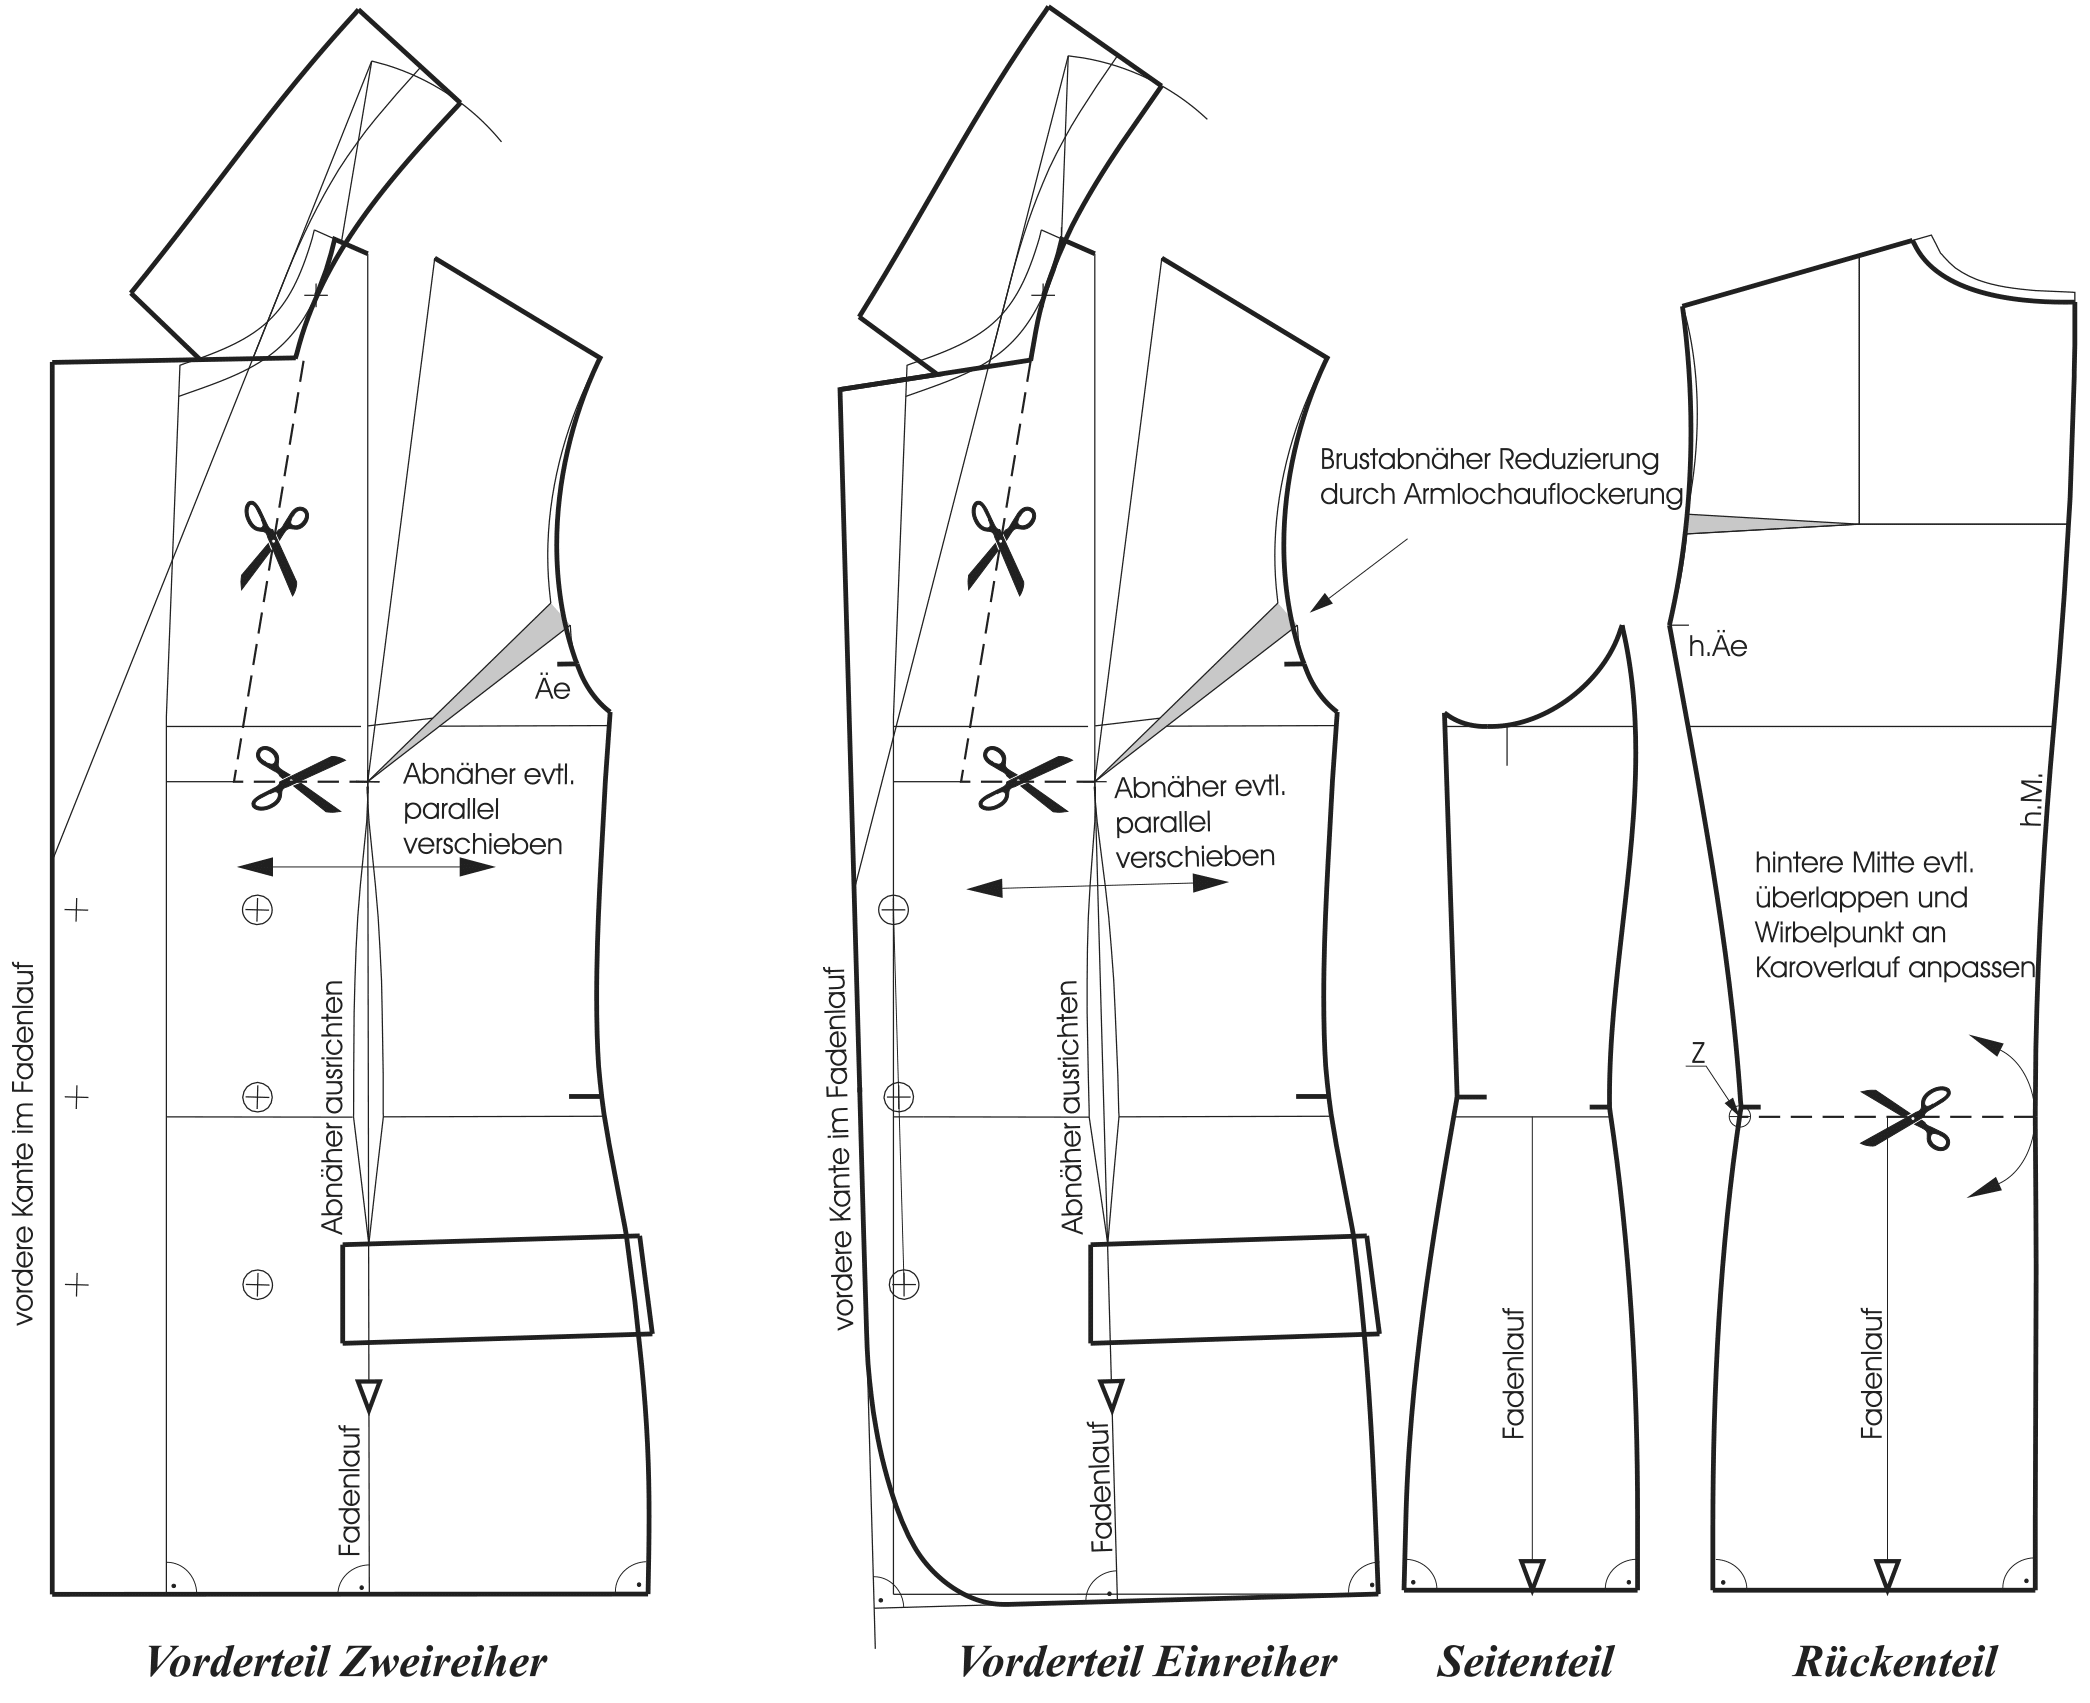
The three-panel jacket block is especially suited for plaids since it can be fitted evenly at several seams and darts. The pattern should be nevertheless designed with as few seams and darts as possible. Curved seamlines such as princess seamlines combined with a fitted waist are not recommended since matching the plaids is almost impossible and the overall appearance is very unbalanced. Copy the three-panel jacket block and adjust it for the plaid fabric. Reduce the bust dart and open the armhole. Draw the overlap parallel to the centre front for the buttonstand of a double-breasted jacket. Draw the hemline perpendicular to the front edge. The hemline at a double-breasted jacket runs horizontally whereas the hemline for a singlebreasted jacket with rounded cut-away front is lowered around 0.7 cm at the centre front. All vertical lines such as the dart middle line, the front edge and the new centre front are marked perpendicular to the hemline. Mark the grainline also perpendicular to the hemline.
This also marks the direction of the vertical plaid bars. Place all bodice pattern pieces with the hemline on the centre of a horizontal plaid. The closing button as well as the dart centre line should fall in the middle of a vertical plaid. Draw the front dart running to nothing down to the pocket entry to get a full plaid at the pocket flap. The dart position can be adjusted slightly to the left or right depending on the plaid repeat. If this is not possible due to the plaid repeat, you have to decide whether the closing button or the dart centre should be placed on a vertical plaid. This depends on the overall appearance. It is best to hide the remaining bust dart under the lapel. Bust darts coming from the shoulder or from the sideseam are not suitable. However, take care that the dart intake is not too large, so that the plaids are not warped at the upper chest area. Mark the grainline perpendicular to the hemline on the side panel and the back pattern. Slash and overlap the centre back slightly at the waistline to place the centre back at the neckpoint in the middle of a vertical plaid.
Pattern Layout and Cutting
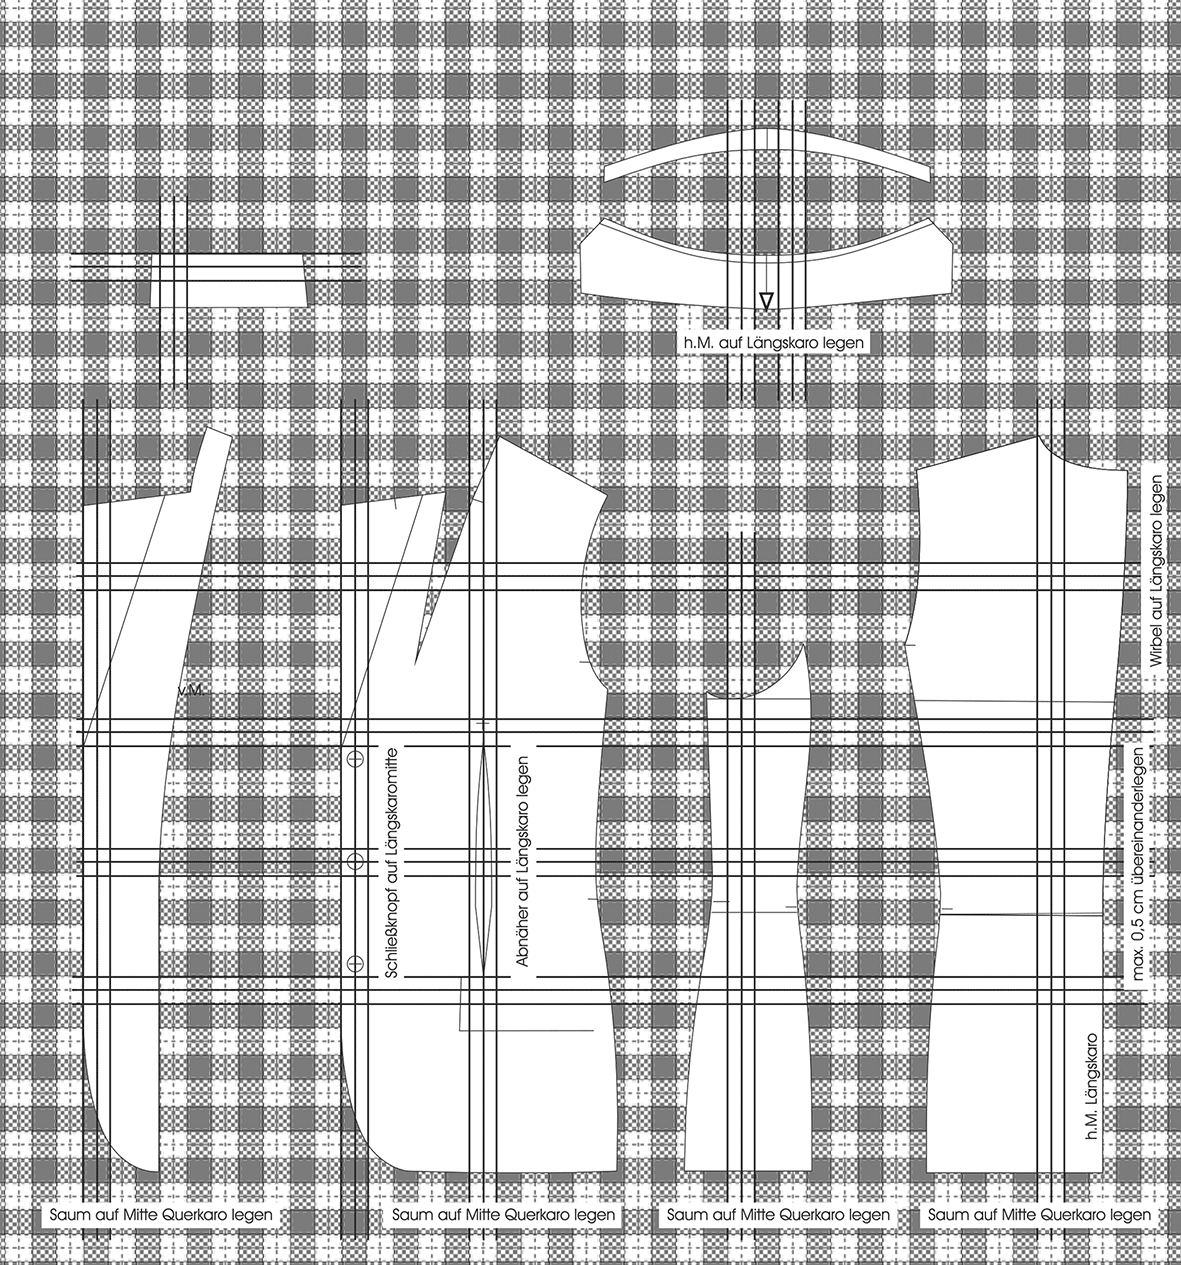
If the back pattern is cut on the fabric fold, it is placed first. The hemline falls in the middle of the horizontal plaid bar. For cutting the back pattern with a seamline at the centre back, place the back pattern below the waist in the middle of a vertical plaid bar and with the hemline in the middle of the horizontal plaid bar. Then slash and overlap the waistline at the centre back so that the centre back falls at the neckpoint in the middle of the vertical plaid bar. The overlap should be not more than 0.5 cm or it might affect the fit. If the plaid repeat is too large for this, align the centre back first at the neckpoint for a balanced transition to the collar.
The front pattern and the side pattern are also placed with the hemline in the middle of a horizontal plaid bar. The front pattern is also aligned to the vertical plaid. First the closing button is placed in the middle of a vertical plaid bar, and then the dart is aligned as well as in the centre of a vertical plaid if the repeat permits it. The front facing is also placed like the front pattern with the hemline in the middle of a horizontal plaid and with the Closing button in the centre of a plaid. Place the upper collar with the centre back in the same plaid bar as the back panel. Mark the horizontal and vertical plaids the pattern pieces for matching the plaids. Copy the pocket flap with the horizontal and vertical markings and place it on the fabric according to the plaid markings.
Plaid Direction on the Sleeve
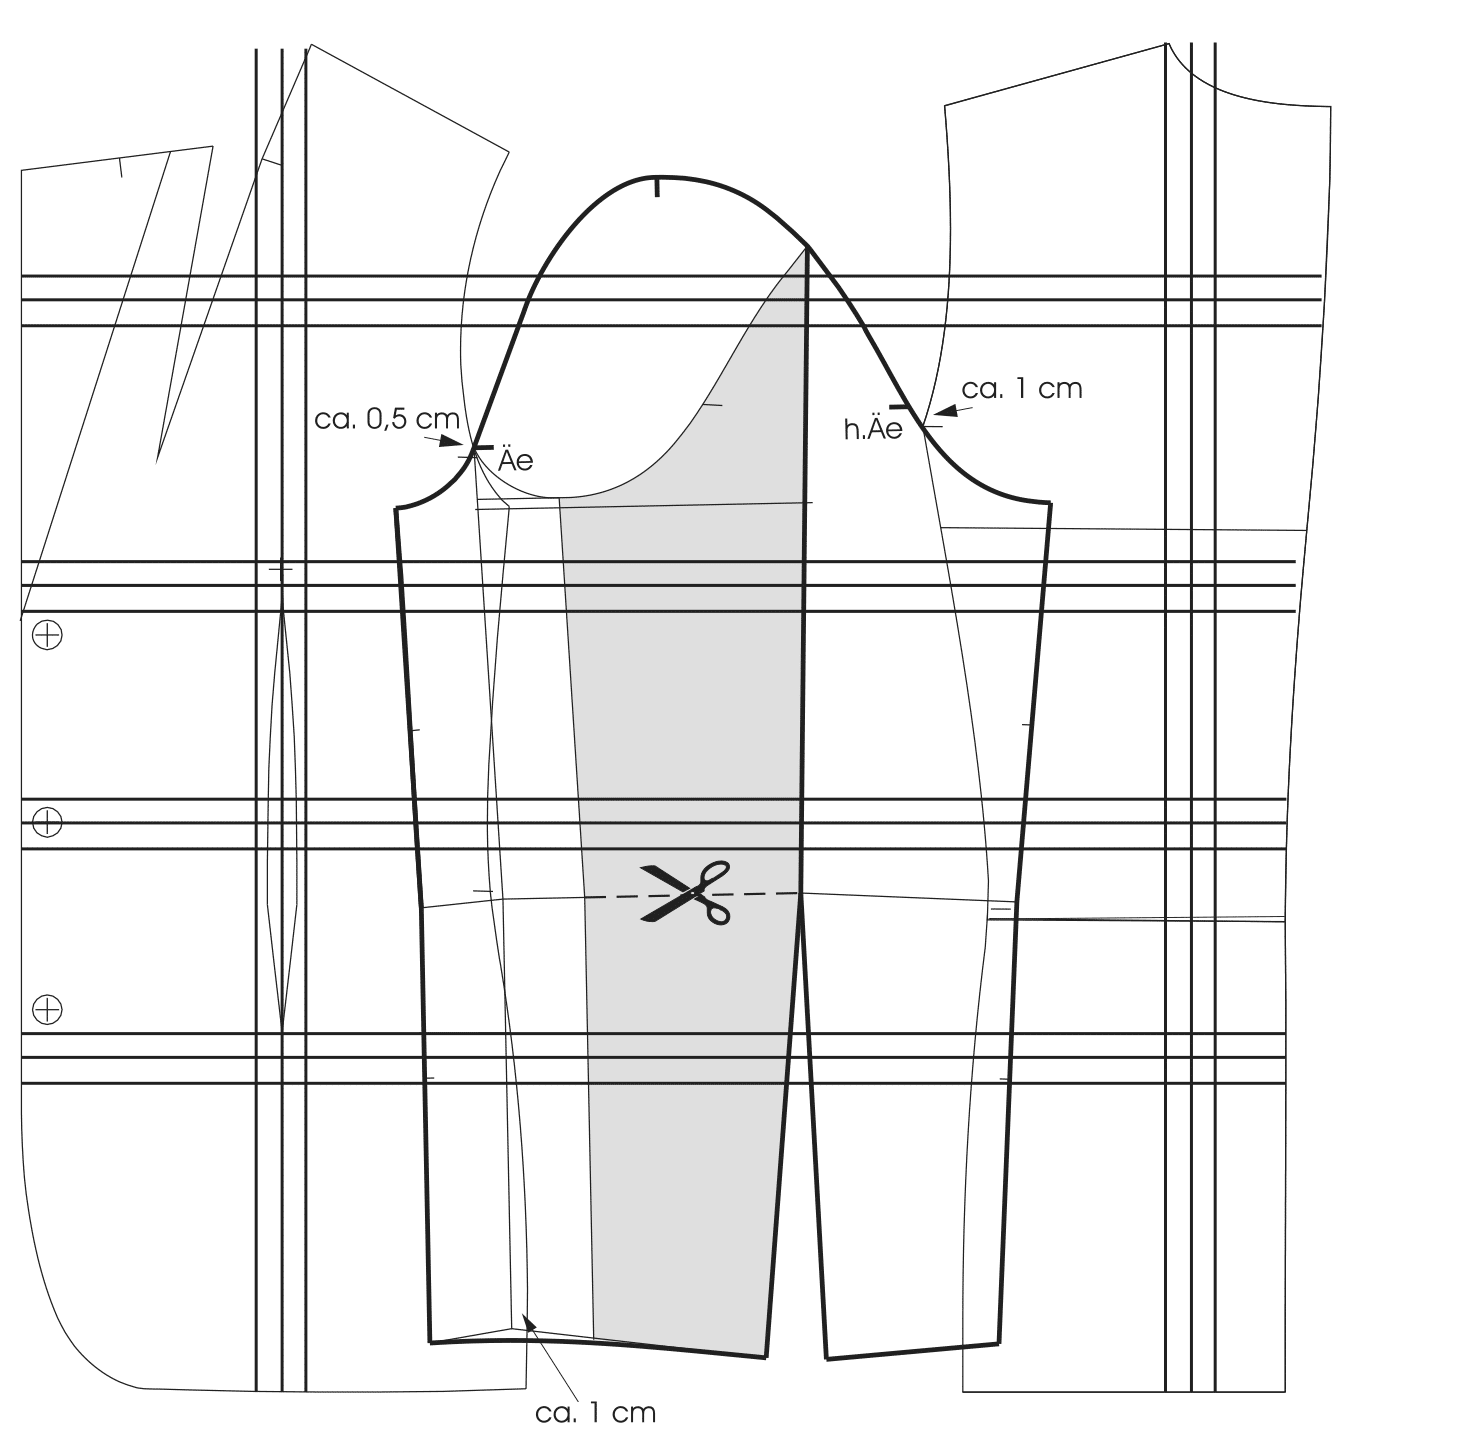 The most reliable and accurate method of matching the plaids on the sleeves is the adaptation of a test sleeve from muslin. Marking the plaid direction on a test sleeve is particularly recommended for one-sided figure deviations or other figure problems. The horizontal Plaid direction can be determined during the fitting by taking the sleeve cap ease and the sleeve fall exactly into account. If this is not possible or not wanted, the plaids can also be matched by placing the sleeve pattern on the front and back armhole. For this, place the sleeve on the front armhole with the front armhole notch 0.5 cm above the front armhole notch of the bodice.
The front sleeve fold at the sleeve hem lies 1 cm in front of the shifted sideseam on the front pattern. At the same time, the back armhole notch of the sleeve should be about 1 cm above the back armhole notch of the back pattern. These amounts are only valid for the one-piece and twopiece sleeve shown here. Other sleeve constructions with a more or less tapered sleeve fold can change these requirements and need to be reviewed. Furthermore it makes sense to walk the sleeve pattern along the armhole curves from the front and back armhole notches to the shoulder point and Transfer the plaid markings accordingly.
Sleeve Pattern Layout
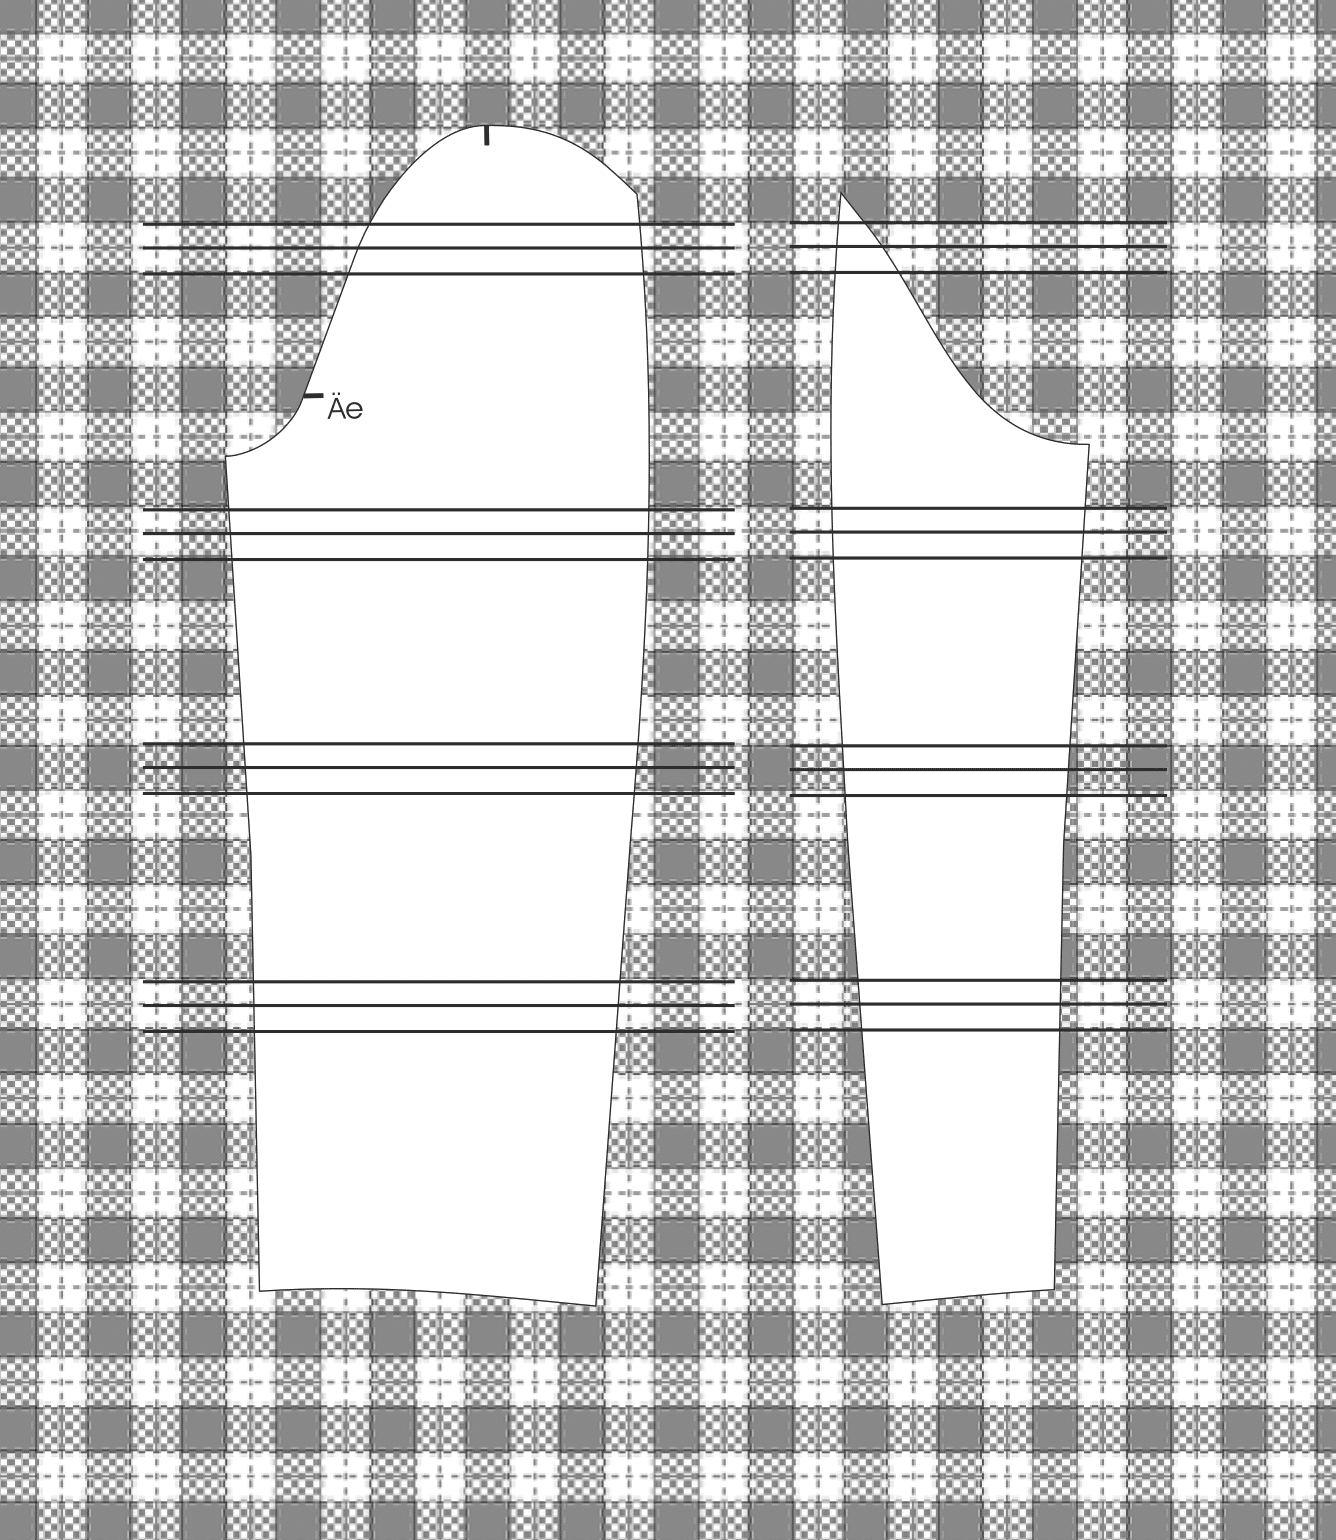
Copy the sleeve pattern pieces with the Plaid markings. Place the sleeve pattern pieces on the plaid fabric with the markings matching the plaids as shown in the illustration. Place the shoulder point of the upper sleeve in the middle of the vertical plaid.
Seam Allowances, Hem Allowances and Cutting
Matching the plaids is always carried out on the seamline and not on the seam allowance. Add the required seam allowances and hem allowances before cutting the fabric. In addition, it is essential to provide sufficient allowances forfitting made-to-measure orders so that balance adjustments for the plaids are easily possible. Before the cutting it is absolutely necessary to check the material for a straight grainline.
If it is not possible to align the plaids perfectly when doubling the fabric, cut each pattern piece out of a single fabric layer. If it is possible to cut from a double layer, pin the plaids exactly on top of each other to avoid shifting. Plaids can also differ in the pattern direction. There are even and uneven plaids, where it is necessary to tailor mirrored. The illustration shows an uneven plaid fabric where it is necessary to mirror the fabric for the right and the left side of the body.