Pattern Construction for a Raglan Shirt for Plussizes
Deutsch

Front and Back Pattern
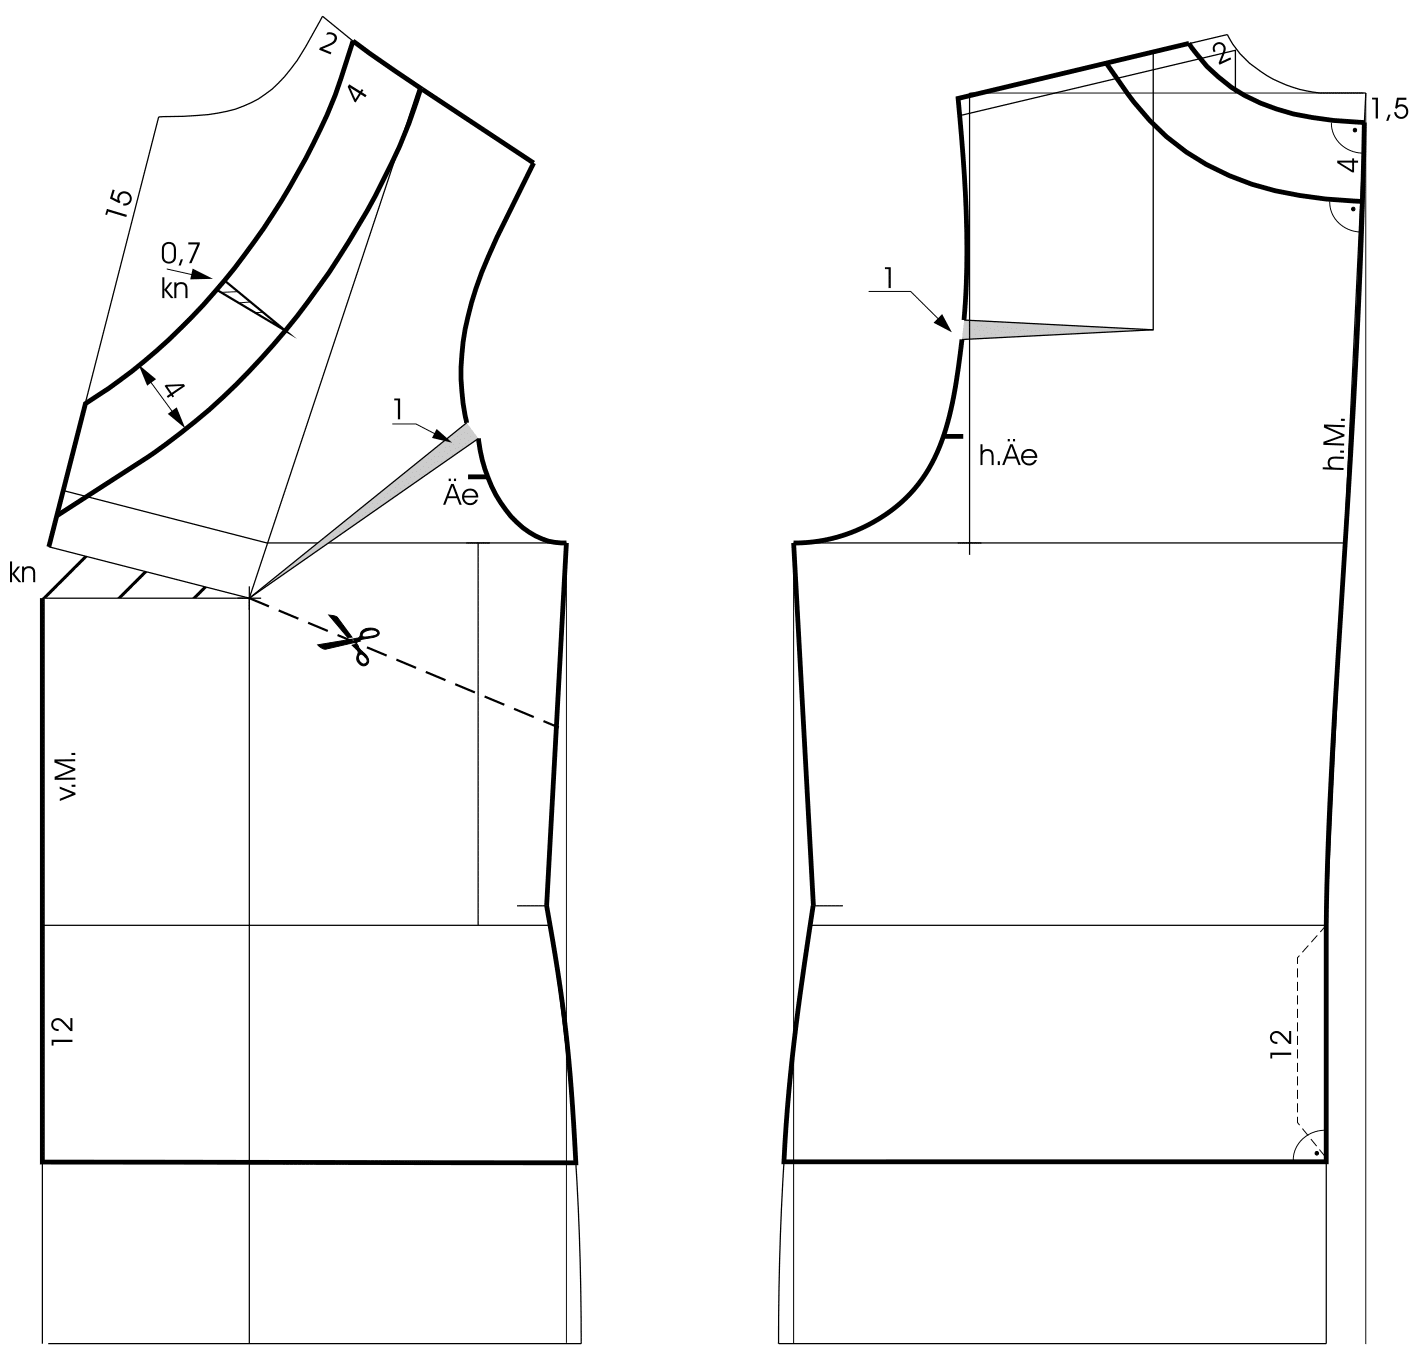
Use a basic dress pattern and a matching onepiece sleeve in size 44 as a template (see measurement chart). Mark the length at the centre back 12 cm below the waist and square out to the left for the hemline. Relocate the bust dart temporarily to the centre front. Leave the shoulder dart in the back to extend the armhole. Extend the armhole on the front pattern 1 cm. Lower the neckline 2 cm at the shoulder and 1.5 cm at the centre back. Draw the new back neckline perpendicular to the centre back.
Mark the neckline at the centre front 15 cm deep and draw the front neckline as illustrated. Draw the neckline band 4 cm wide. Mark 0.7 cm as the pinching amount to contour the neckline. The neckline can be finished with a straight knitted band or a contour band depending on the material. Measure the outer edge of the neckline band without the pinching amount and cut the straight knit band the same length. Mark the cutting line from the sideseam to the bust point.
Preparation Sleeve
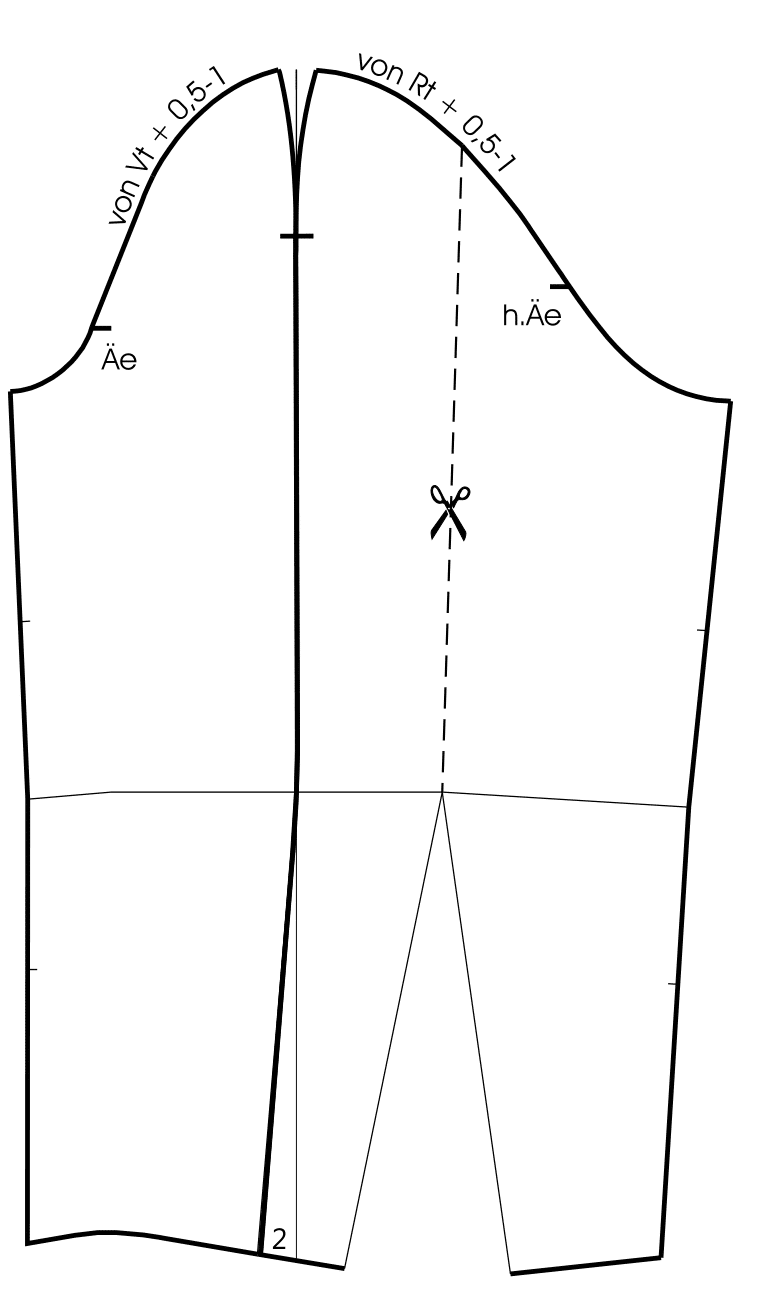
Use a matching one-piece sleeve as a template (see measurement chart). Draw the overarm seam from the shoulder point downward and shift it 2 cm to the front towards the hem. Measure the front and back from the armhole notches to the shoulder. Transfer the armhole measurements + 0.5-1 cm to the sleeve cap line. Draw the round overarm seam as illustrated. Separate the sleeve pieces.
Sleeve and Front Combined
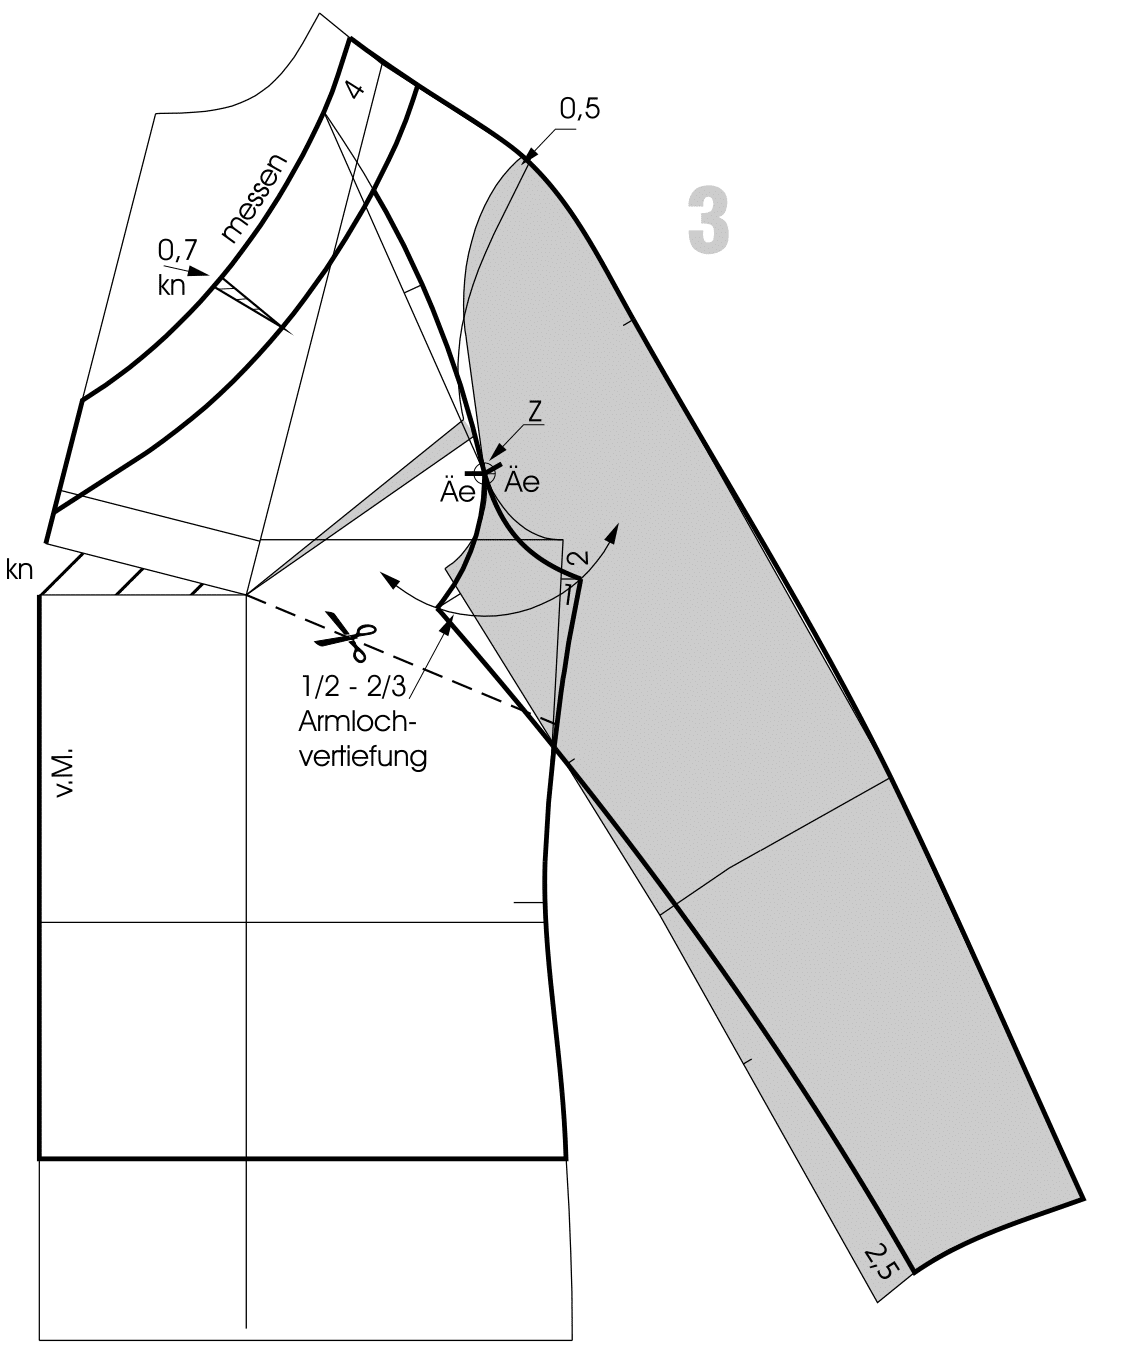
Place the front sleeve on the front pattern with the armhole notches touching and the sleeve cap 0.5 cm within the front pattern at the shoulder seam. Blend the shoulder seam and the overarm seamline. Lower the armhole around 2 cm and extend the sideseam 1 cm. Draw an arc with pivot point Z over the lowered armhole. Mark pivot point Z on the front armhole notch.
Lower the sleeve curve one-half to two-thirds of the amount that the armhole is lowered (Mark the extension of the sleeve seam at the intersection with the arc). Draw the raglan seam from the neckline to point Z and further to the lowered armhole and sleeve curve as shown in the illustration. Taper the sleeve seam 2.5 cm at the hem and draw the new seamline as illustrated.
Sleeve and Back Combined

Lower and extend the armhole as on the front pattern. Transfer the extended and lowered sleeve seam shape to the back sleeve pattern. Mark pivot Z about 1 cm next to the back armhole notch and draw a circular arc 0-1 cm below the lowered armhole. Place the back sleeve on the back pattern with the armhole notches touching and the sleeve cap 0.5 cm within the back pattern at the shoulder seam.
Blend the shoulder seam and the overarm seamline. Draw the raglan seam from the neckline to point Z and further to the lowered armhole and sleeve curve as shown in the illustration. Taper the sleeve seam 2.5 cm at the hem and draw the new seamline as illustrated. Cross-out the sleeve dart. Blend the hemline.
Finished Pattern Pieces
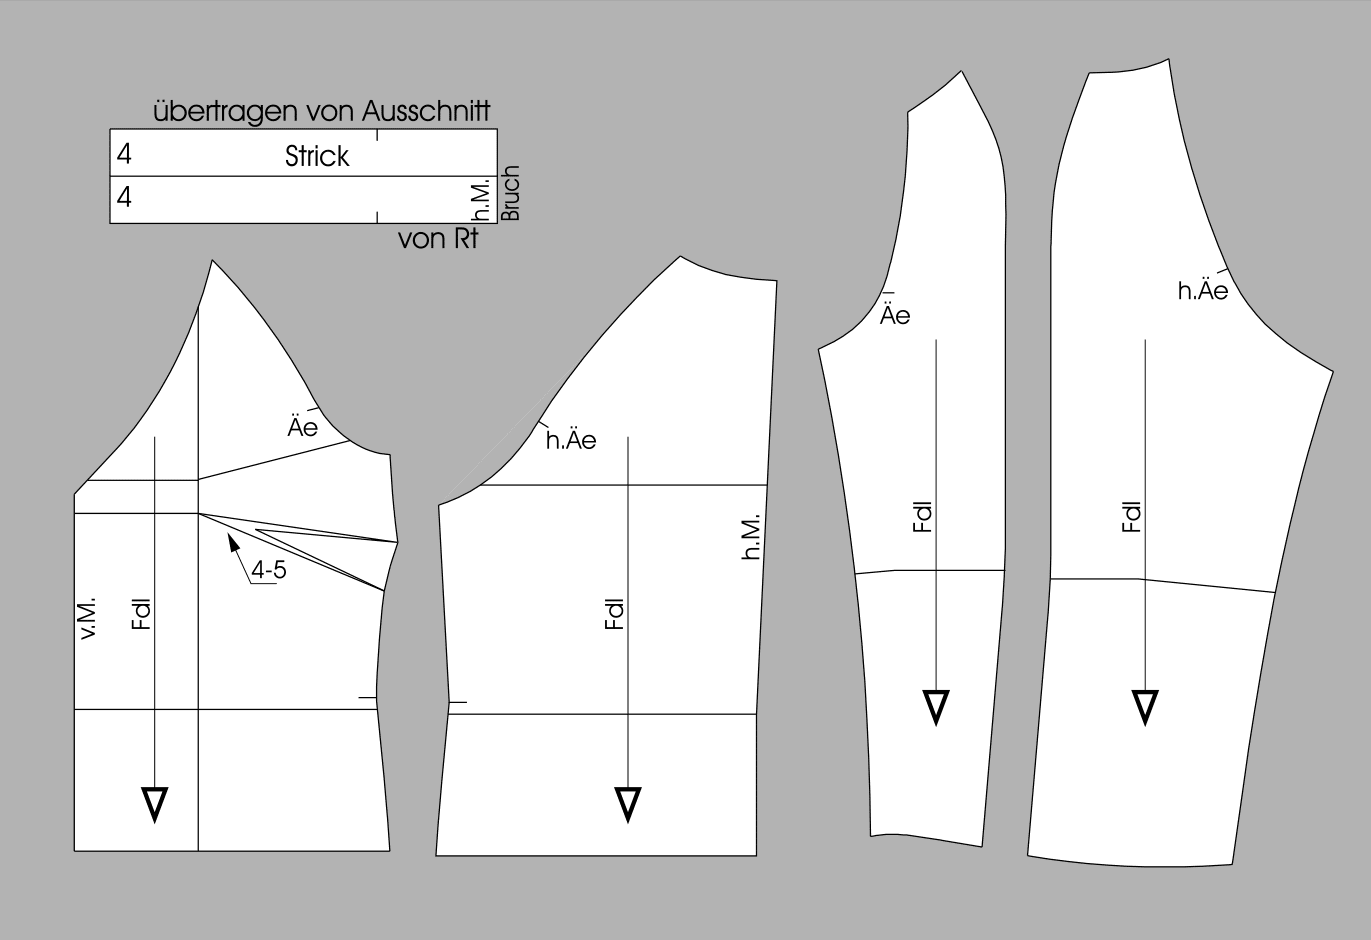
Copy and separate all pattern pieces. Complete overlapping sections. Cut through the front pattern from the sideseam to the bust point. Relocate the bust dart to the sideseam and shorten the dart. Cut the knit band according to the length of the neckline edge. Stretch the neckline band when sewing it to the neckline seam. Blend all seamlines. Mark the grainlines.