Vintage Dresses – Pattern Construction for Figure Deviations
Deutsch
Schnittkonstruktion von Vintagekleidern für besondere Figuren
In the case of special figures that differ from the sizes of the ready-made garments, there are a few things to consider when setting up the pattern. This article is an excerpt from the technique part of the Damen Rundschau 3/2016. You can find the complete article with a detailed instruction for the pattern design in case of figure deviation in the booklet, which is available as a download in our online shop. The english translation is available thru the customer service.

Pattern Construction for Figure with narrow Waist and wide Hips
For a figure with a narrow waist and relatively wide hips, add the missing width at the hip line not only at the side seam but also at the centre back and at the back panel seam. Taper the centre back less at the hip than usual. Here 1-1.5 cm at the hip instead of 2 cm at the waist and hip. For a design with back panel seam, add part of the missing width not only to the side seam but also as overlapping seam lines to the back panel seam.

Pattern Construction for Petit Size
The waist is positioned higher in petite sizes due to the shorter back and front length. Pockets should be placed proportional higher. Short and narrow lapels are favourable. Skirt and sleeve lengths must be adapted to reduced length measurements.
Pattern Construction for Figure with Figur full Bust and narrow Hips
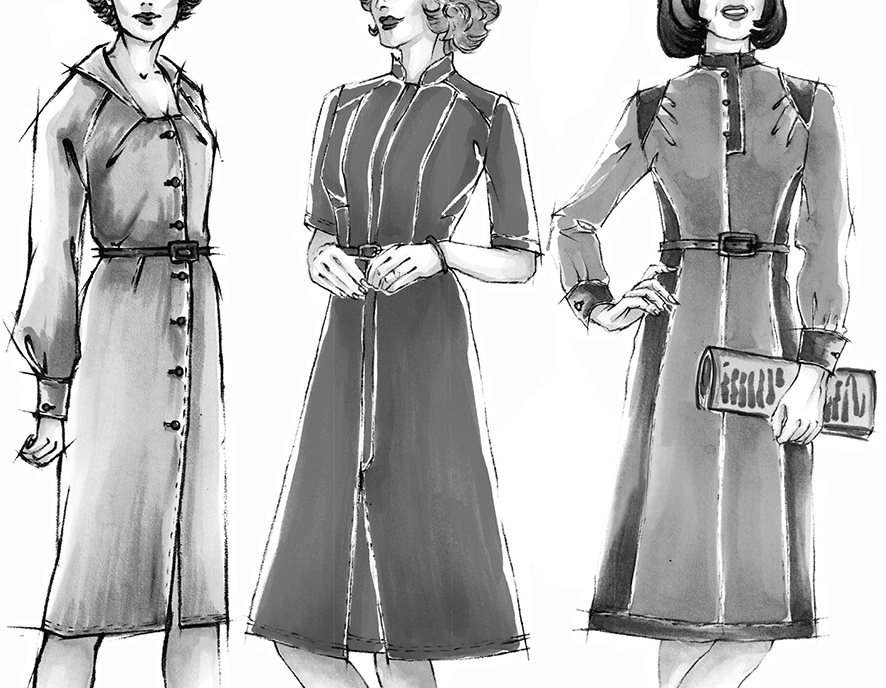
For a figure with a full bust and narrow waist and hip girth, remove the surplus at the waist and the hips mostly at the front waist dart and also by tapering the centre back more than usual (2-3 cm).
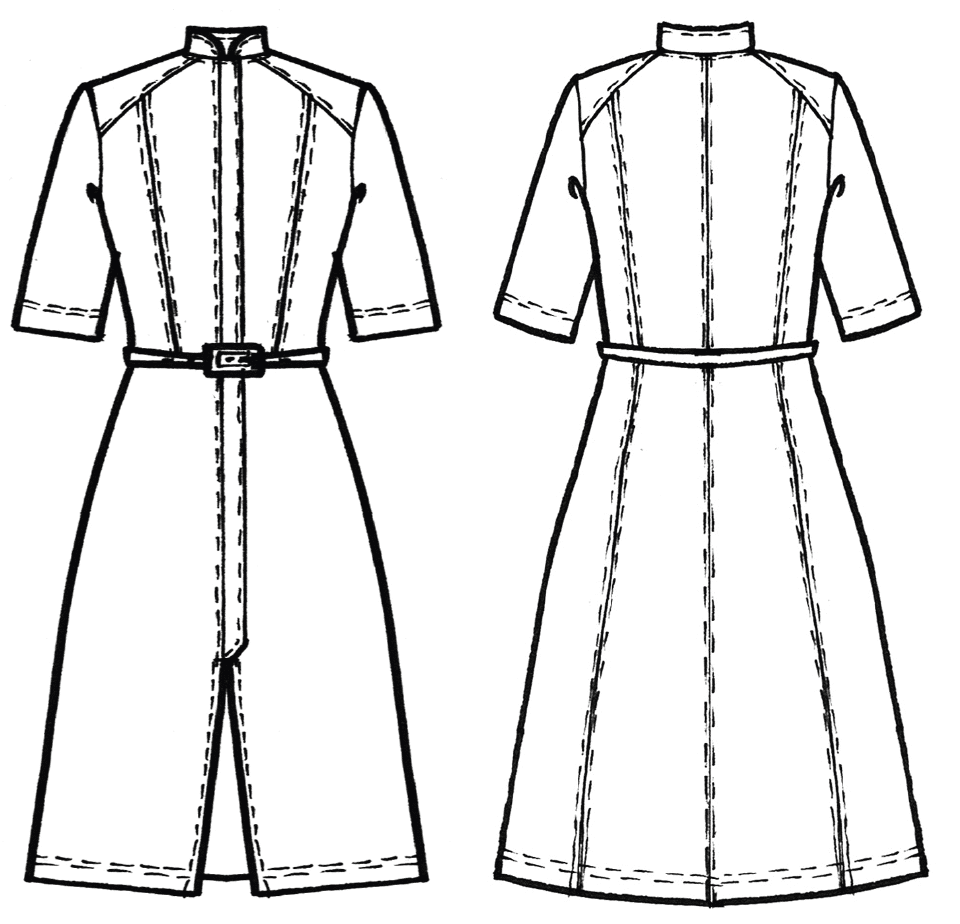
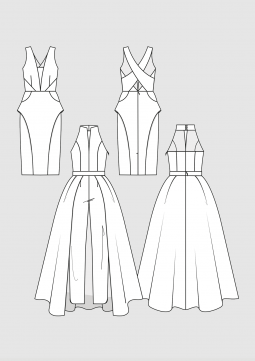
Panel Seam Dress
For a figure with a narrow waist and relatively wide hips, add the missing width at the hip line not only at the side seam but also at the centre back and at the back panel seam. Taper the centre back less at the hip than usual. Here 1-1.5 cm at the hip instead of 2 cm at the waist and hip. For a design with back panel seam, add part of the missing width not only to the side seam but also as overlapping seam lines to the back panel seam.
Basic Pattern for the Dress with Narrow Waist and Wide Hips
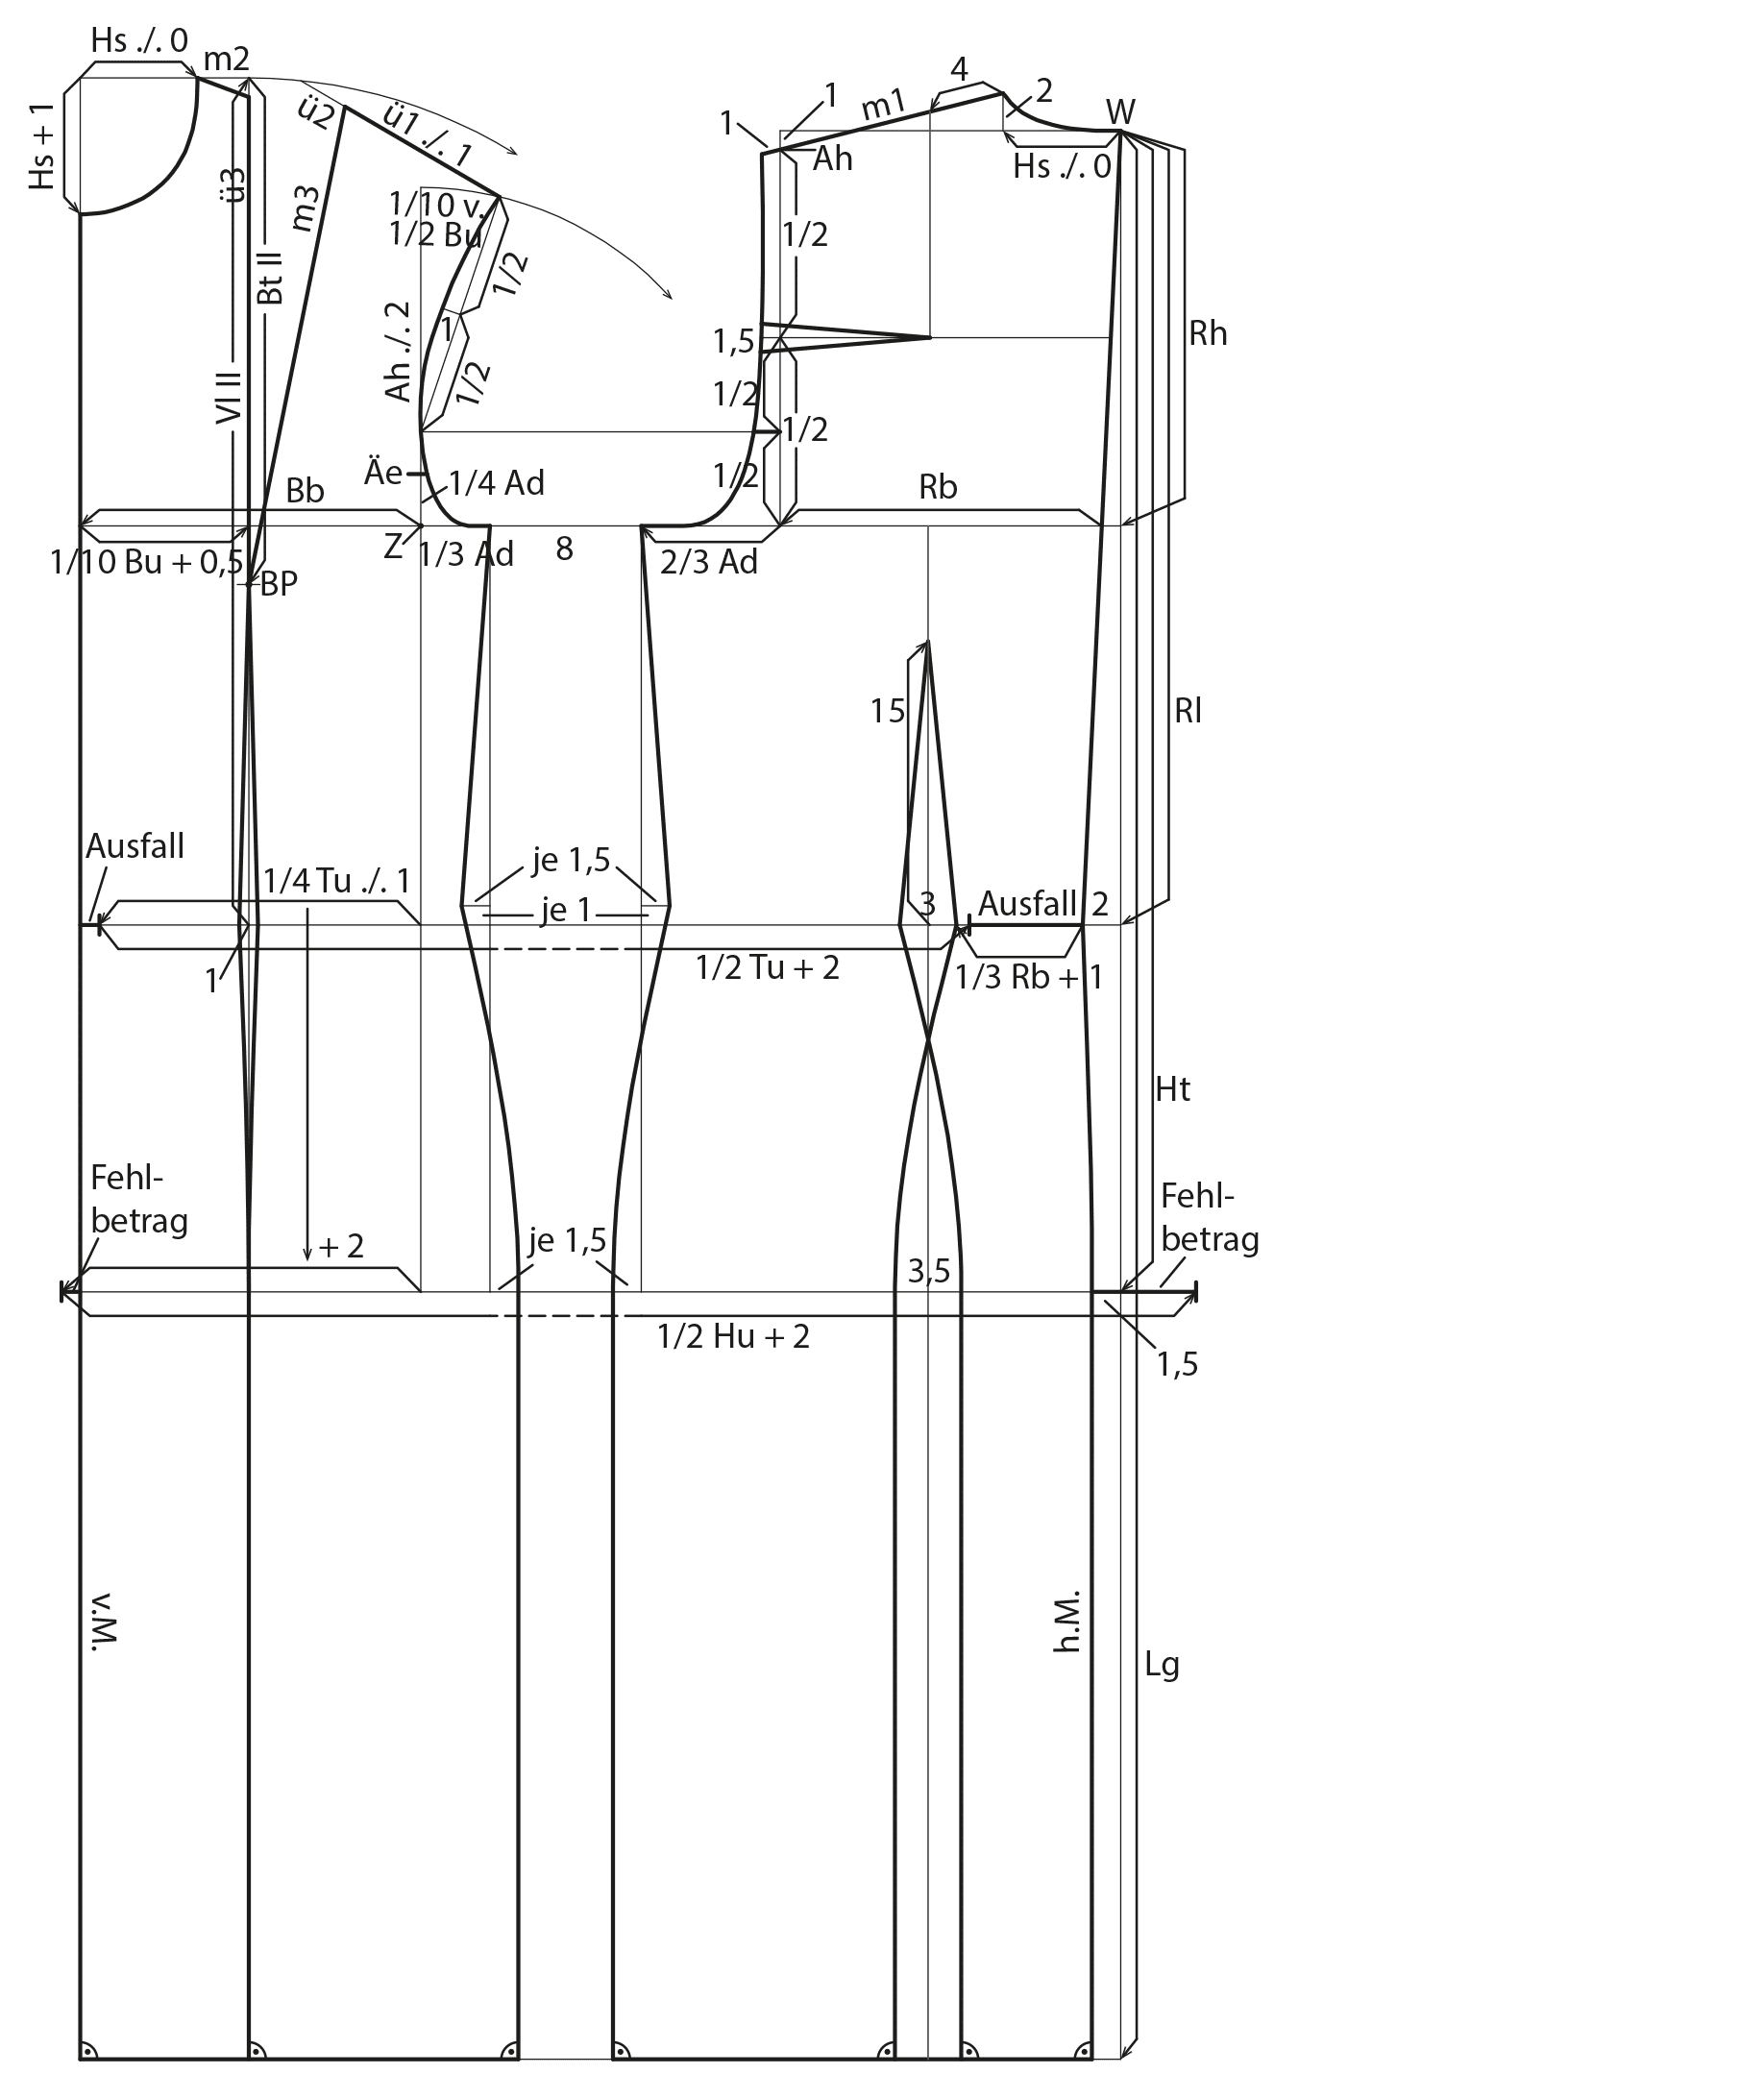
- On a vertical line, measure the scye depth (Rh), the back waist length (Rl), the hip depth (Ht) and the length (Lg) from the neck point W downwards. Square out to the left from all points.
- Taper the centre back 2 cm at the waist and 1.5 cm at the hip and draw the centre back from the neck point W to the hem.
- On the chest line, measure the back width (Rb) plus ease, 2/3 of the scye width (Ad), 8 cm gap, 1/3 of the scye width and the chest width (Bb) plus ease from the centre back to the left. Square down from all points. The centre front is the perpendicular line at the chest width.
- On the chest line, measure 1/10 of the chest girth plus 0.5 cm from the centre front to the right.
- Measure the neck width to the left for the back neckline and square up 2 cm. Draw the back neckline.
- Measure 1 cm downward from the intersection of the neck width line and the back width line for the shoulder slope.
- Draw the shoulder line and extend it 1 cm towards the armhole.
- Mark the halfway point of the armhole height and divide the lower part of armhole height in half. Measure 1.5 cm to the left.
- Square out to the left at 1/4 of the armhole height and draw a perpendicular guideline to the front pitch line.
- Measure the back width line from the chest line to the shoulder line and transfer this measurement minus 2 cm to the front armhole height. Draw a circular arc with pivot point at the front pitch line over the armhole height and measure 1/10 of ó chest girth along the circular arc to the right for the front shoulder length.

- On the bust dart line, measure the front length II (Vl II) from the waist line upwards and the bust length II (Bt II) downward from this point.
- Draw a circular arc over the front length with pivot point at the bust point (Bt).
- Measure the back shoulder width (m1) minus 1 cm from the shoulder point of the first arc to the second arc (ü1).
- Draw the front and back armhole as shown in the illustration.
- Measure the neck width minus 0 cm from the centre front to the right and the neck width plus 1 cm downward.
- Draw the front neckline. Measure the distance from the neck width to the bust dart line (m2) and transfer this length to the shoulder line (ü2).
- Draw the right bust dart leg and transfer the length (m3) to the left bust dart leg (ü3). Connect this point and the neck point with a straight line.
- On the front pitch line, measure 1/4 of the scye width from the chestline upwards and mark the front armhole notch (Äe).
- On the waist line, measure 1/4 of the waist girth minus 1 cm from the front pitch line to the left. From this point, measure 1/2 of the waist girth plus 2 cm to the right. Omit the gap.
- On the hip line, measure the same distance as on the waist line plus 2 cm from the front pitch line to the left. From this point, measure 1/2 of the hip girth plus 2 cm to the right. Omit the gap.
- Mark the front waist dart with the determined front intake (here 1 cm). Distribute the back intake (here 6 cm) to the side seam and the back waist dart. Raise the waist 1 cm at the side seam and taper the side seam 1.5 cm at each side.
- On the waist line, measure 1/3 of the back width plus 1 cm for the position of the back dart intake. Mark the intake with 3 cm and draw the dart middle line 15 cm upwards.
- The missing width at the hip is 1 cm at the centre front and 5.5 cm at the centre back, a total of 6.5 cm. Add 1.5 cm at each side seam and the remaining amount at the back panel seam (3.5 cm). The back pattern overlaps at the back waist dart and a seam line is necessary to separate the overlapping pieces.
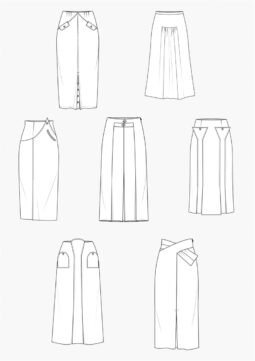
In this e-dossier, you will find instruction on pattern construction for vintage skirts for women.
Construction Sleeve
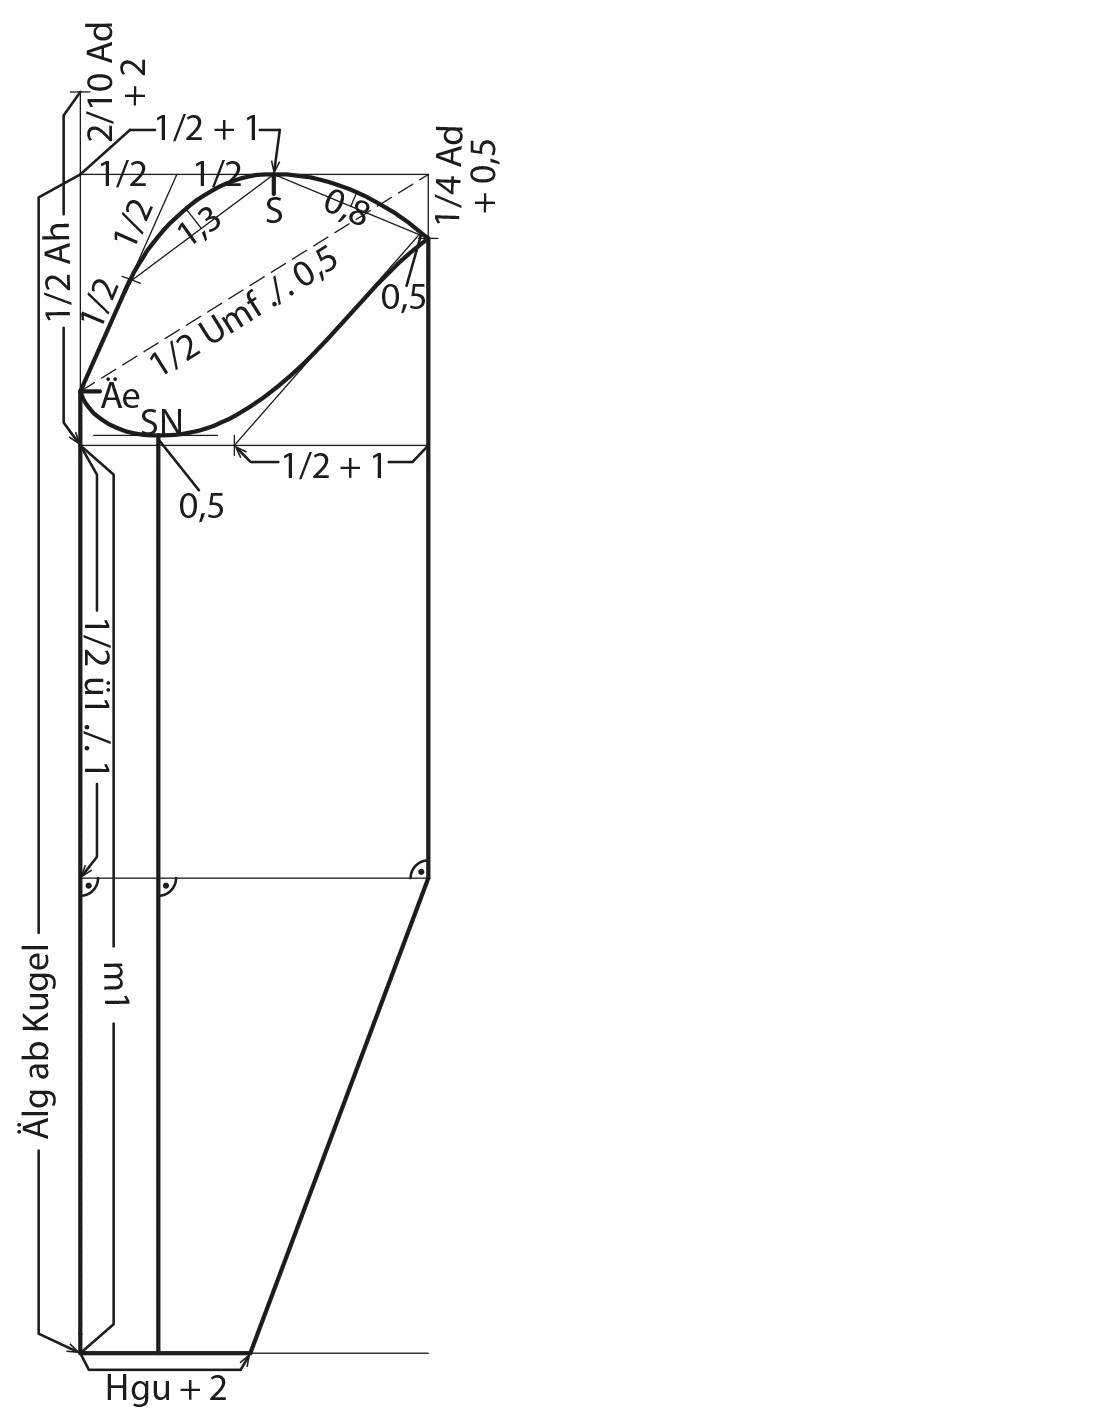
- Measure ó of the armhole height downward on a vertical line. Measure 2/10 of the scye width plus 2 cm downward from the starting point for a lower sleeve cap.
- From this point, measure the sleeve length downward.
- Measure the distance from the armhole height to the hem (m1) and transfer half of this amount minus 1 cm downward (ü1). Square out to the right from this point for the elbow line.
- For the front armhole notch measure . scye width upward.
- Measure the ó of the armhole circumference minus 0.5 cm from the front sleeve notch diagonally to the original line and square down to the elbow line.
- Divide the original line in half and measure 1 cm to the right for the shoulder point. Measure the same amount to the left on the biceps line.
- Mark the halfway point between the starting point and the shoulder point and draw a guideline to the front armhole notch.
- Draw another guideline from half of the first guideline to the shoulder point.
- From the sleeve width, measure . scye width plus 0.5 cm downward and draw a guideline to the shoulder point. Measure 0.5 cm from the vertical line along the guideline and draw the next guideline for the lower sleeve curve slanted to the bicep line.
- Raise the bicep line 0.5 cm and transfer the lower sleeve curve from the front armhole notch to the side seam to the raised bicep line. Mark the side seam and square down to the hem line.
- Draw the sleeve cap line and the lower sleeve line as shown in the illustration.
- Measure ó of the hem width and draw a line to the elbow line.
Finished Pattern Pieces
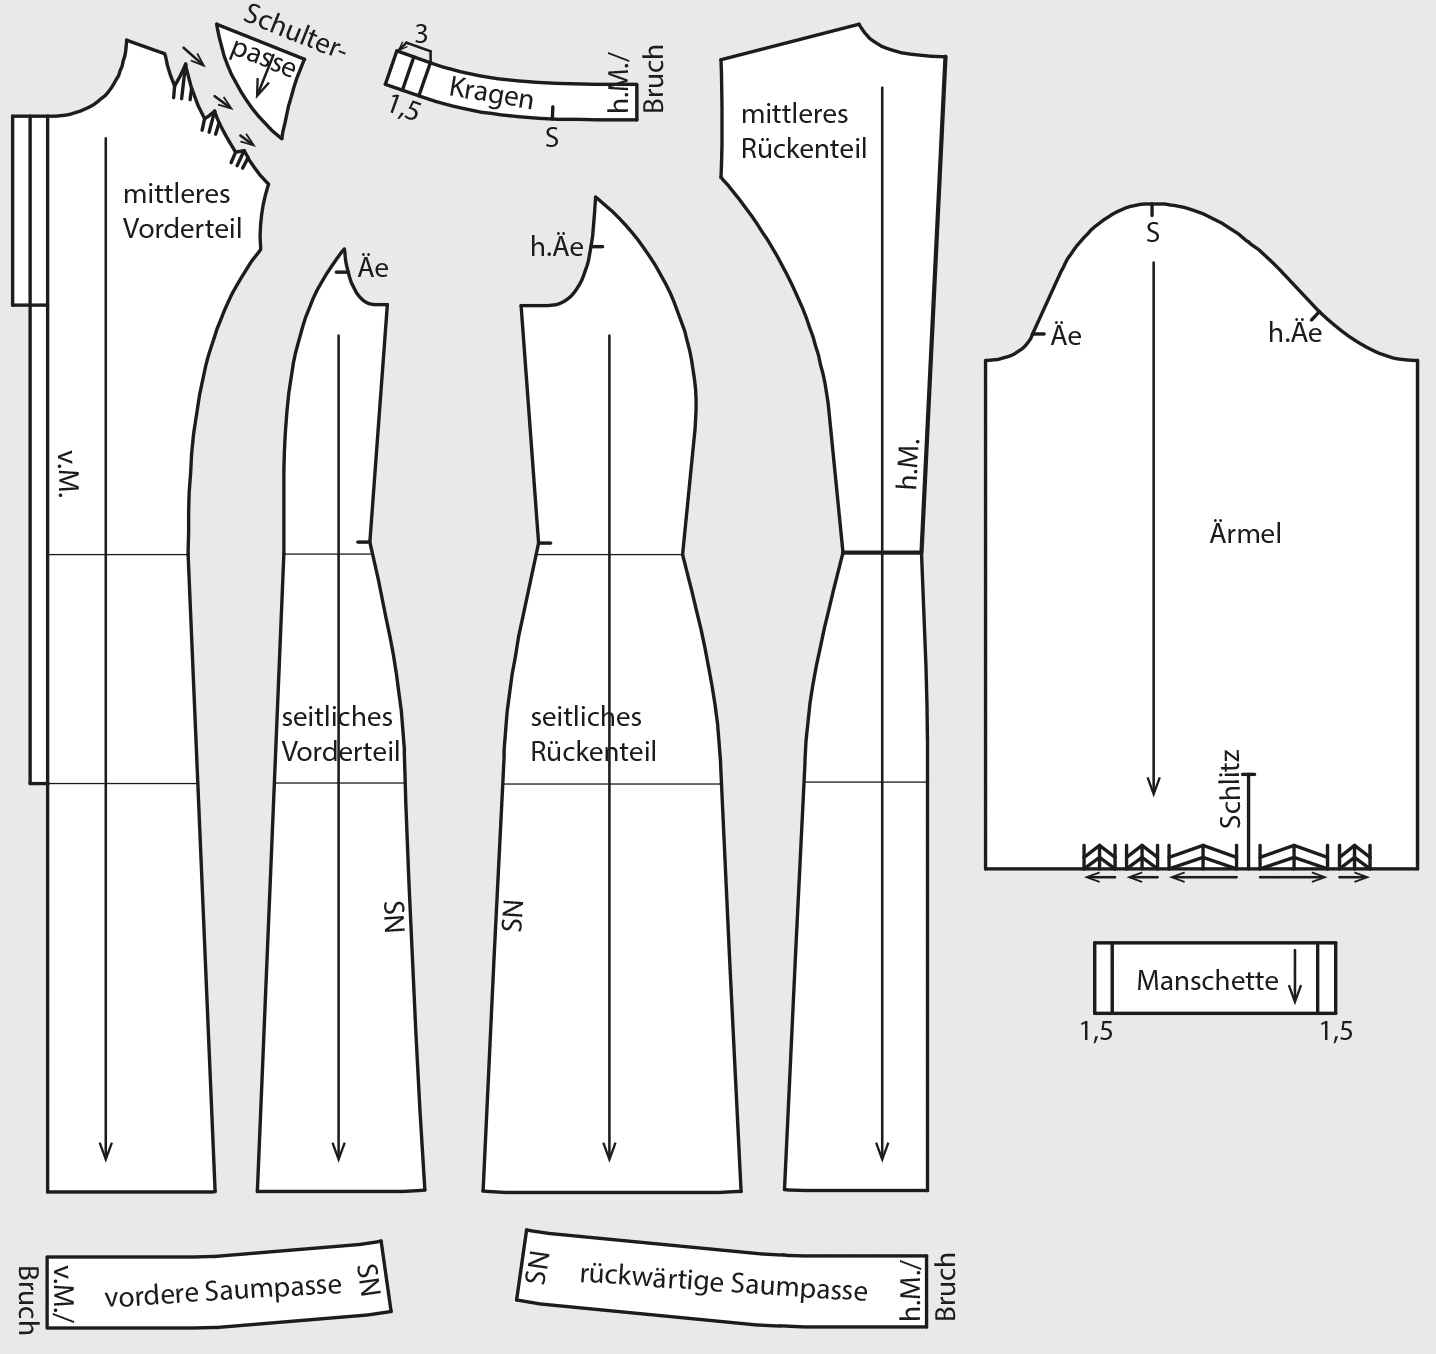
- Copy all pattern pieces. Fold the dart and blend the dart hood lines.
- Add 3 cm overlap and 1.5 cm underlap to the collar front.
- Add 1.5 cm overlap and underlap to the cuff pattern.
- Mark the grainlines.
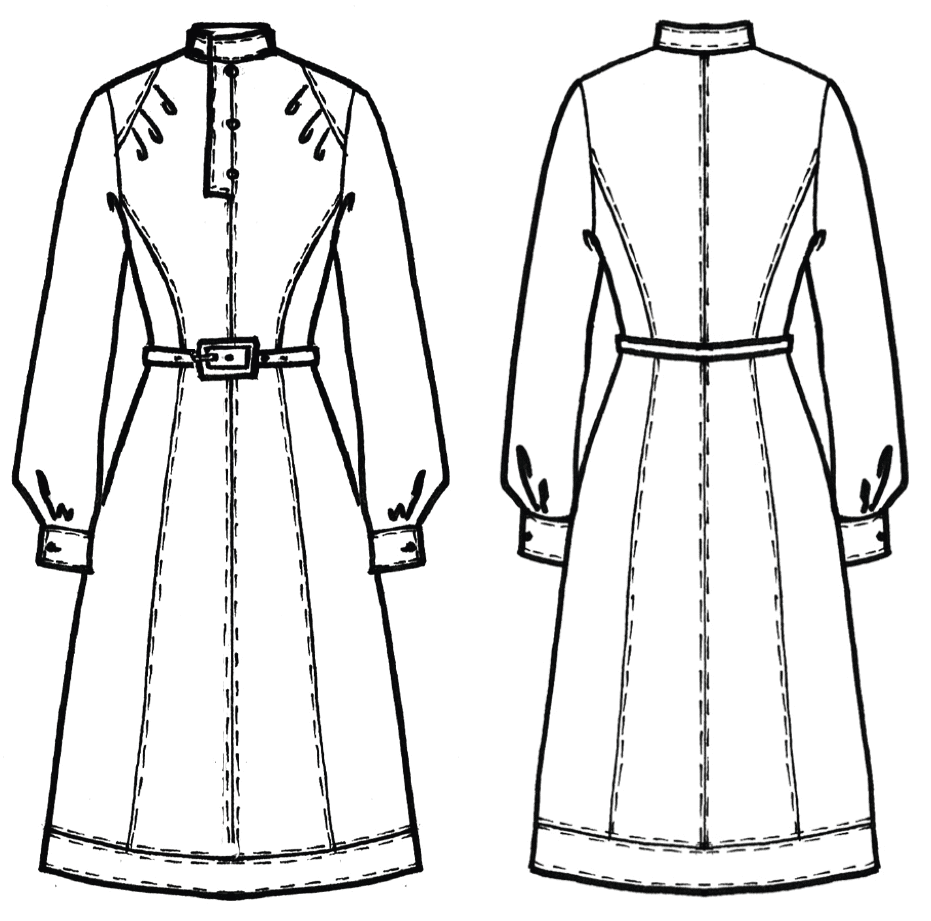
Dress with Concealed Placket
Construction in short size 19
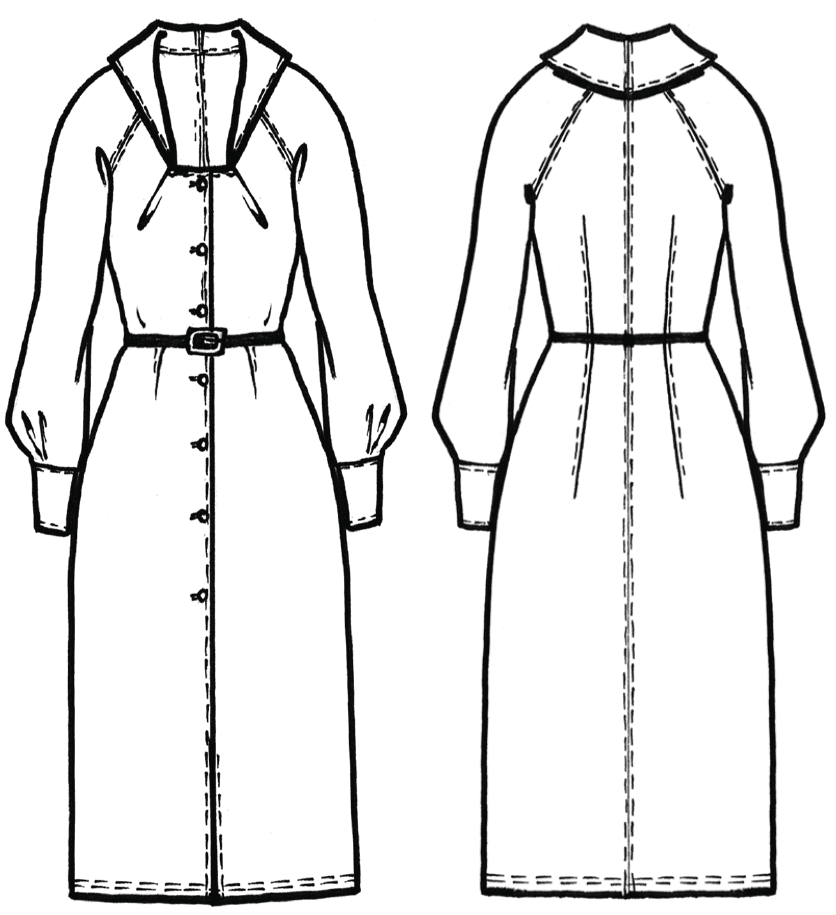
Button Front Dress
For a figure with a full bust and narrow waist and hip girth
This dress is also available in sizes 36 -46 on the pattern Schnittmuster Vintage Kleid 70er Jahre
The pattern sheet contains a dress for the civil wedding and a one-piece suit in sizes 36-46.
- Download
- Print Version
You can find many more cutting instructions and patterns for sewing in our online shop.