Enlarge a Pattern for a Jacket for Kids
Deutsch
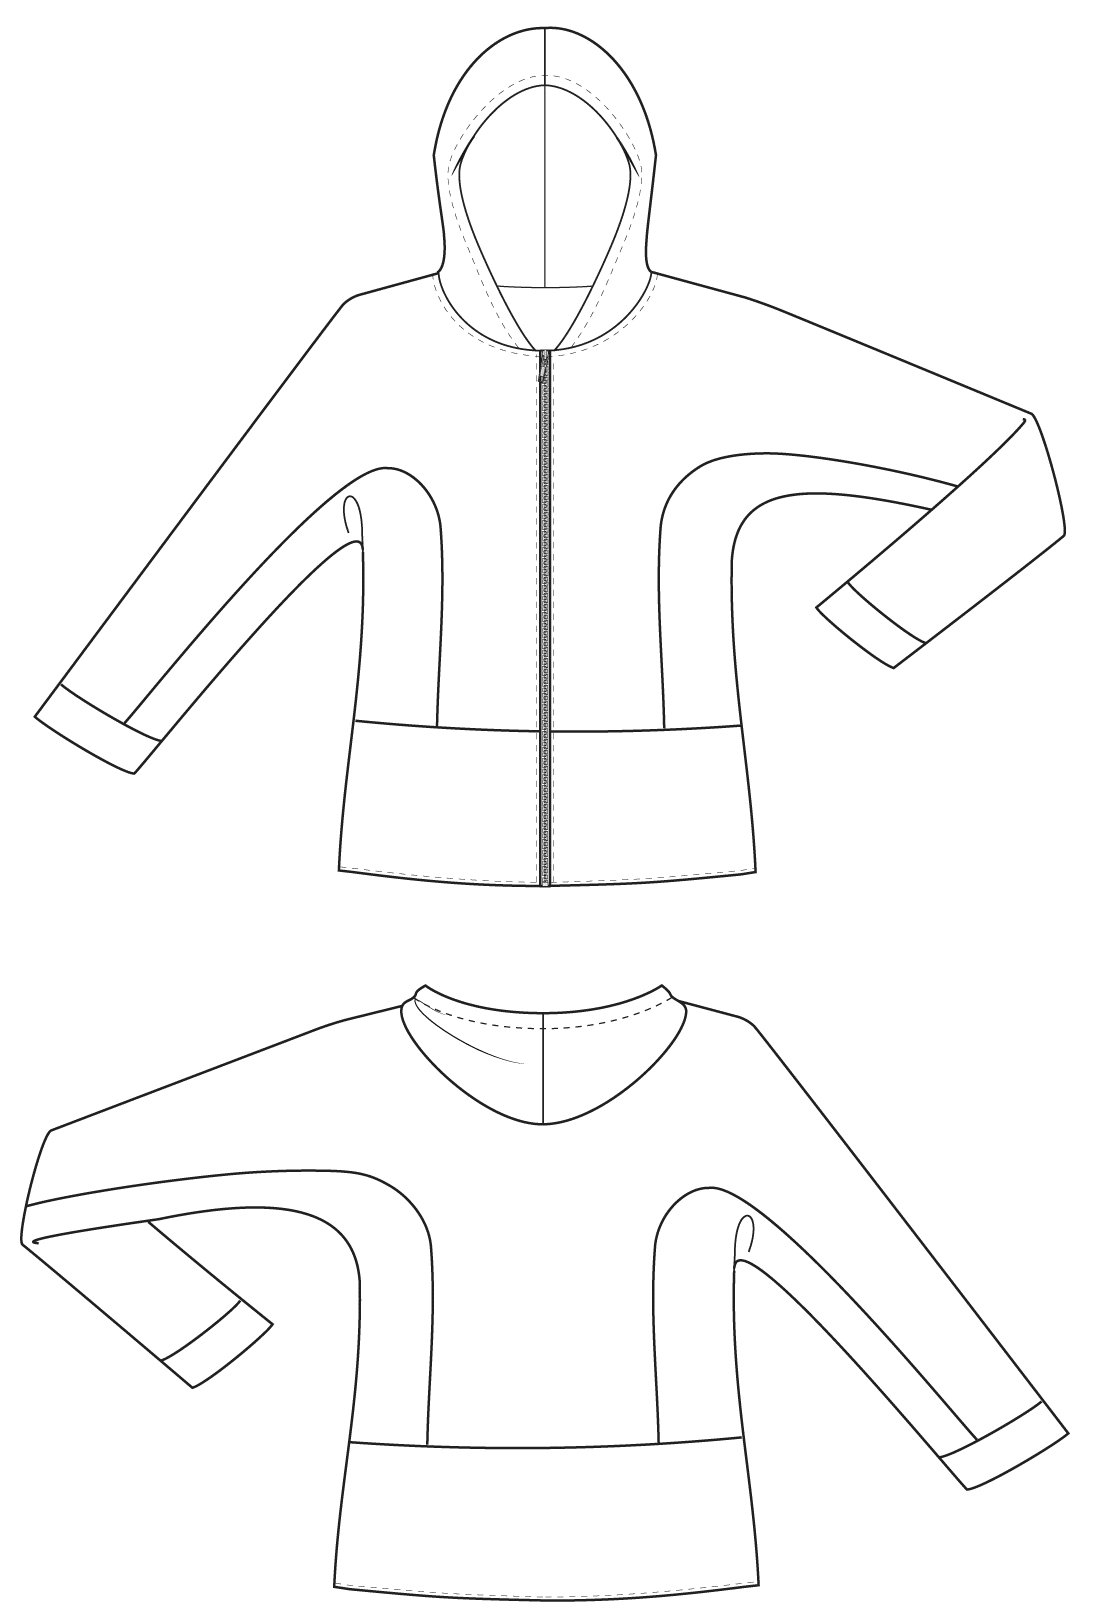
This article shows the enlargement of a jacket with hood and zipper from size 128 to size 152 You will find this and other contents about grading children’s clothing in the reference book Grading Women & Kids.
This reference book focusses on the special subject of increasing and decreasing patterns in size according to the M. Müller & Sohn system – also known as GRADING.
Grading a Children’s Jacket with a Hood
The grading increment at the waist line is shown here but is however not necessary for this straight cut. The style seams are not graded but could be if preferred. The jacket length increment is 17 mm per size. This amount can be changed depending on preference and design. The grading increments are shown in table 9, 11 and 12.
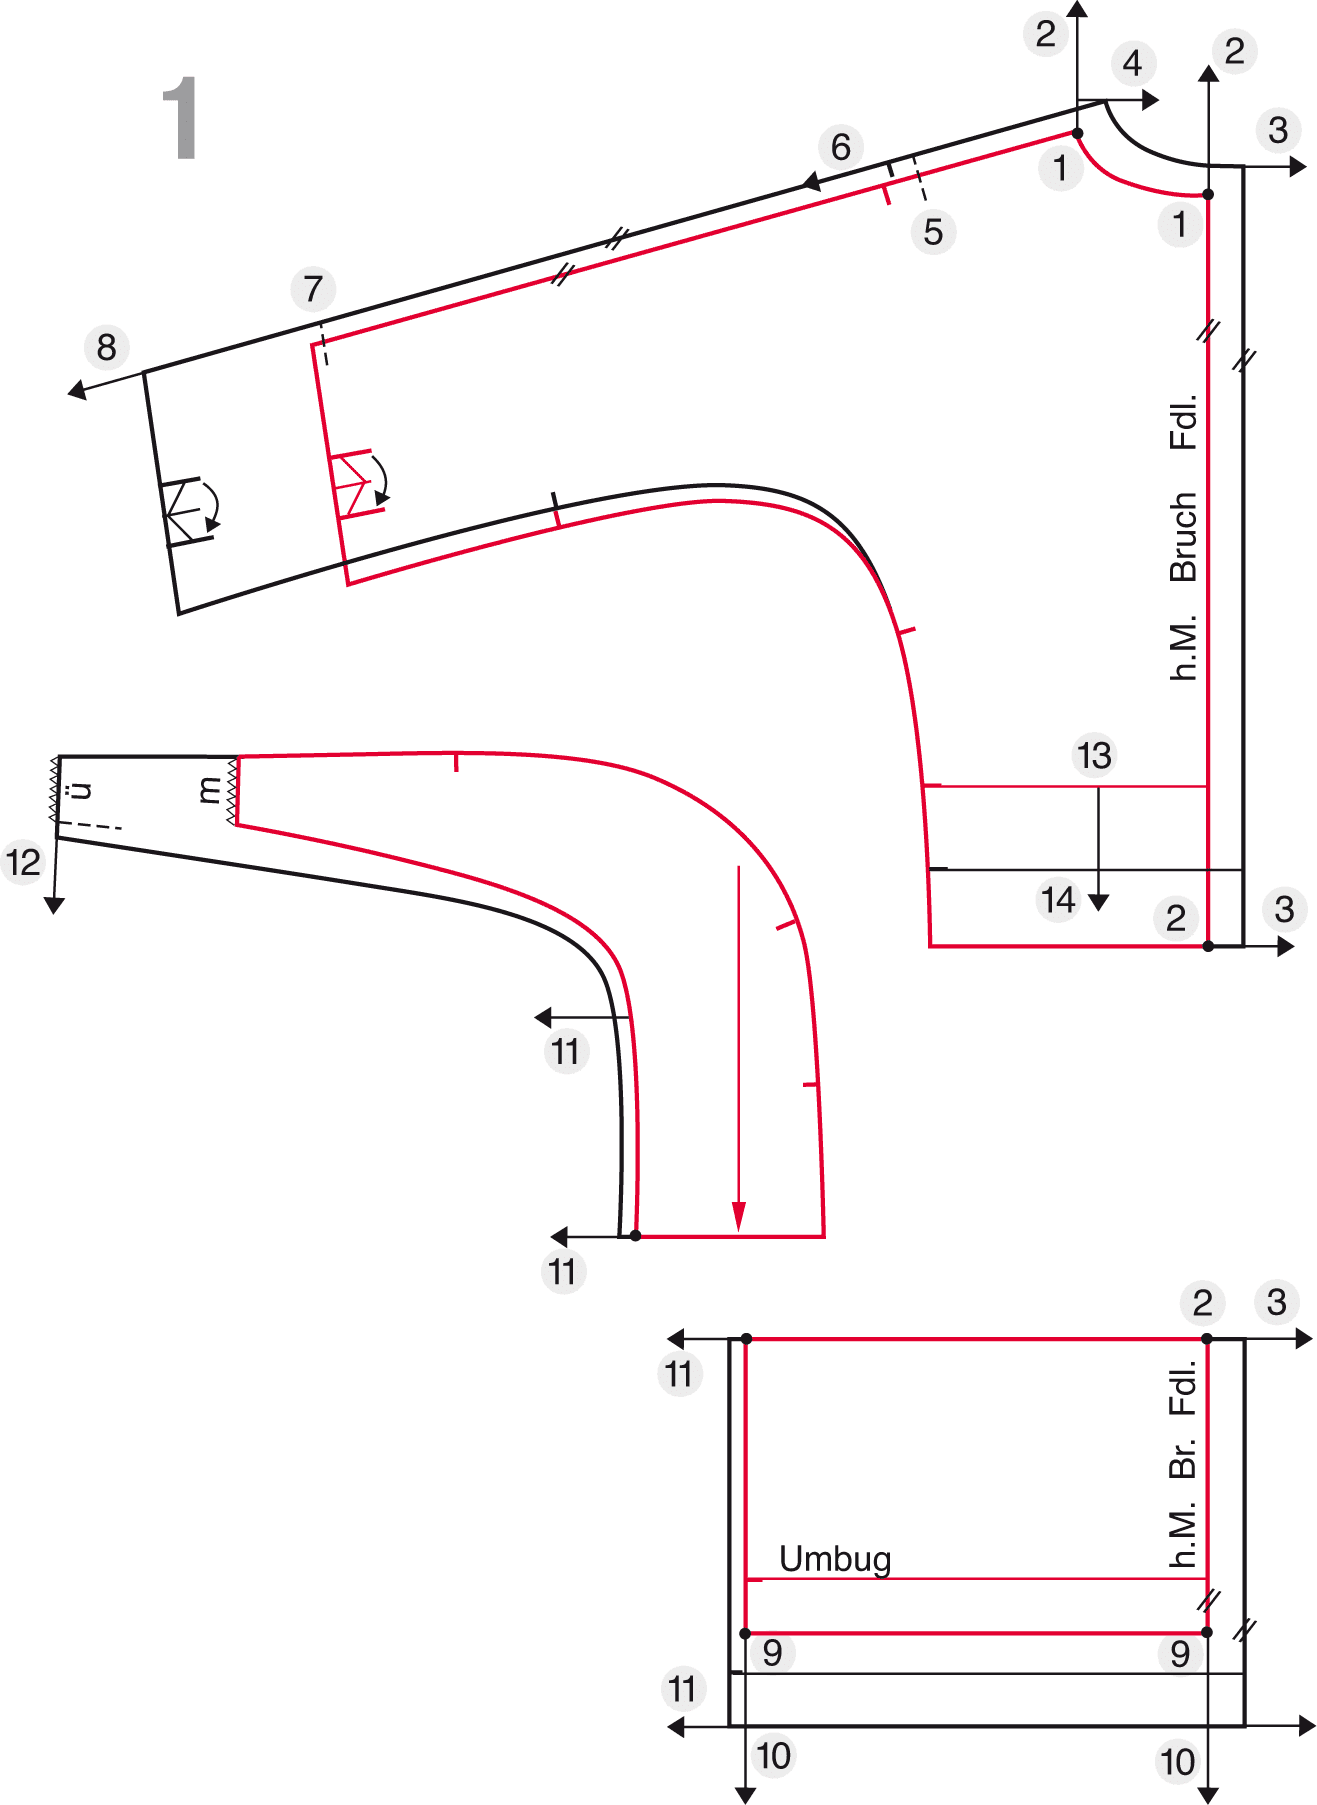
Back Pattern (1)
1–2 Scye depth increment = 16 mm. Measure this amount perpendicular to the waist line at the centre back and at the neck line.
2–3 Back width increment = 20 mm. Measure this amount to the right at the neckline, at the style seam and at the hem. Draw the centre back parallel to the basic pattern.
2–4 Neck point increment = 14 mm. Calculation: Back width increment 20 mm – neck width increment 6 mm = 14 mm. Measure the neck point increment to the right and draw the new neckline using the basic pattern as a template.
5–6 Shoulder increment = 14 mm. Place the basic pattern on the new neck point 4 parallel to the centre back and transfer the shoulder seam and mark the shoulder width (dashed line/ point 5). Measure the shoulder width from the new shoulder point 6 = dashed line/point 7.
7–8 Sleeve length increment = 94 mm. Draw the new sleeve hem parallel to the basic pattern. Draw the style seam using the basic pattern as a template.
9–10 Jacket length increment 68 mm = 17 mm per size. Lengthen the jacket 68 mm.
10–11 1/2 of the scye width increment = 6 mm. Add the 1/2-scye-width increment parallel to the side seam.
12 1/2 of the sleeve hem width increment = 6 mm.
Add the sleeve hem width increment to be able to draw the new side seam and sleeve seam. First measure the original sleeve hem (m). Draw a parallel line with the same length (tr) and mark the original width with a dashed line.Extend the hem width by 6 mm and draw the new sleeve seam curve to the side seam.
13–14 Back waist length /waistline relocation = 42 mm. Draw the new waist line parallel to the basic pattern.
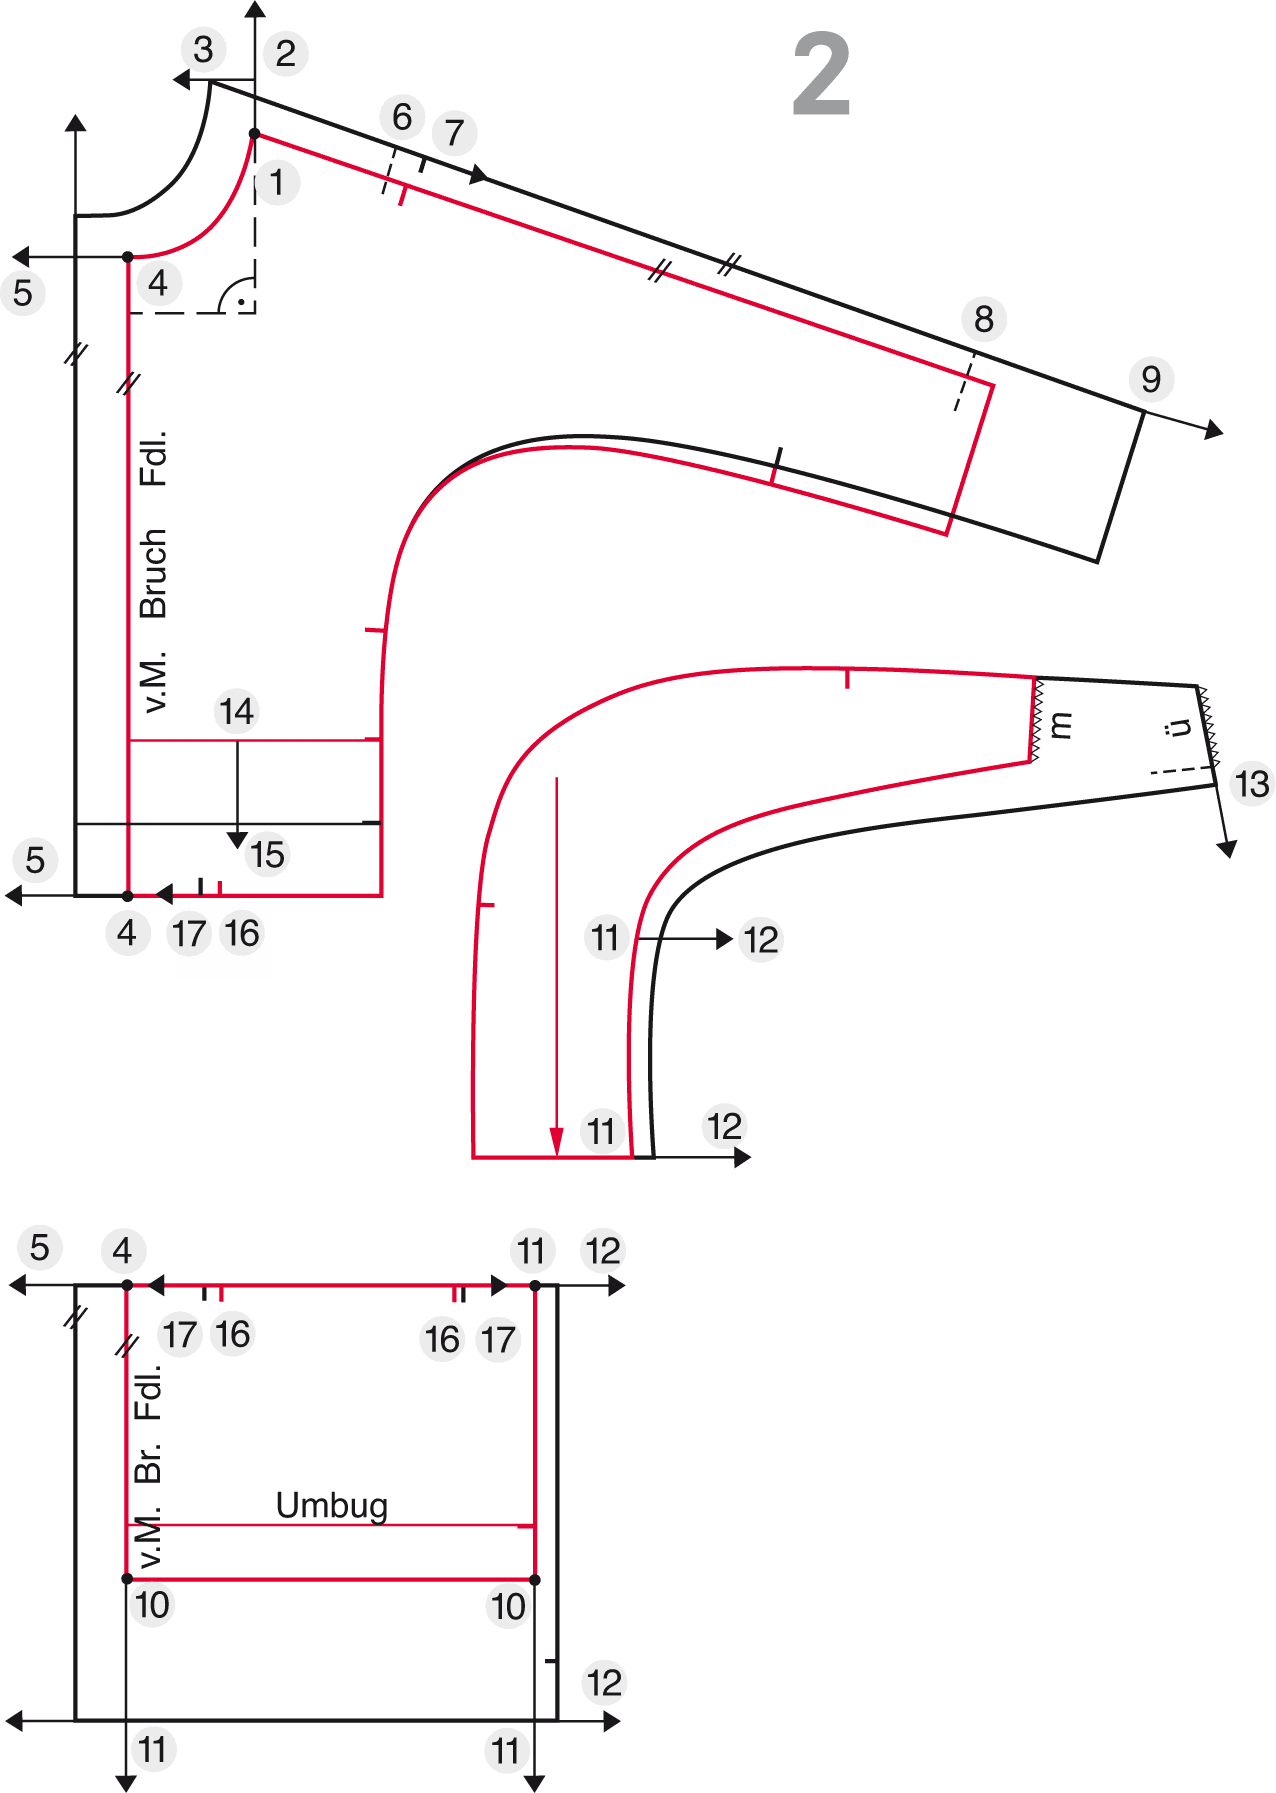
Front Pattern (2)
1–2 Front waist length increment: 24 mm. Measure the front waist length increment perpendicular to the waist line from the neck point upwards.
2–3 Front neck point increment = 22 mm. Calculation: Chest width increment 28 mm – neck width increment 6 mm = 22 mm. Measure this amount to the front. Draw the new neck line later with the neck line template.
4–5 Chest width increment = 28 mm. Add the chest width increment parallel to the centre front and extend upwards and downwards.
6–7 Shoulder increment = 14 mm. Place the basic pattern on the new neck point 3 parallel to the centre front and mark the shoulder width (dashed line/point 6). Measure the shoulder increment and transfer the basic shoulder width from the new point 7 (dashed line/point 8).
8–9 Sleeve length increment = 94 mm. Extend the sleeve length. Draw the new sleeve hem parallel to the basic pattern. Draw the style seam using the basic pattern as a template.
10–11 Jacket length increment 68 mm = 17 mm per size. Lengthen the jacket 68 mm.
11–12 1/2 of the scye width increment = 6 mm. Add the . 1/2-scye-width increment parallel to the side seam.
13 1/2 of the sleeve hem width increment = 6 mm. Add the sleeve hem width increment to be able to draw the new side seam and sleeve seam. First measure the original sleeve hem (m). Draw a parallel line with the same length (tr) and mark the original width with a dashed line. Extend the hem width by 6 mm and draw the new sleeve seam curve to the side seam. Measure and compare the seam length with the back pattern. Equalize if necessary.
14–15 Back waist length/waistline relocation = 42 mm. Draw the new waist line parallel to the basic pattern.
16–17 Pocket entry. Measure 3/4 of the pocket entry increment = 9 mm to the left and 1/4 of the pocket entry increment to the right.
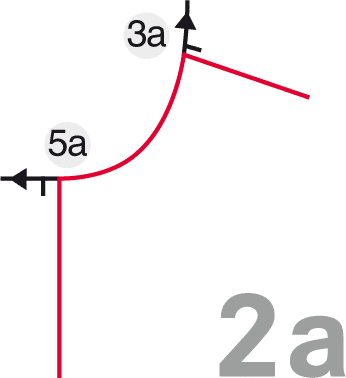
Drawing Template for the Neckline (2a)
It is useful to make a template for drawing the new neckline. Trace a copy of the basic neck line.
3a 1/2 neck width increment = 3 mm. Measure 3 mm upwards at the neck point.
5a Neck width increment: 6 mm. Measure the neck width increment to the front.
3a Place the neckline template on point 3 of the front pattern (fig. 2). Turn the template so that point 5a meets the extended centre front. Draw the new neck line.
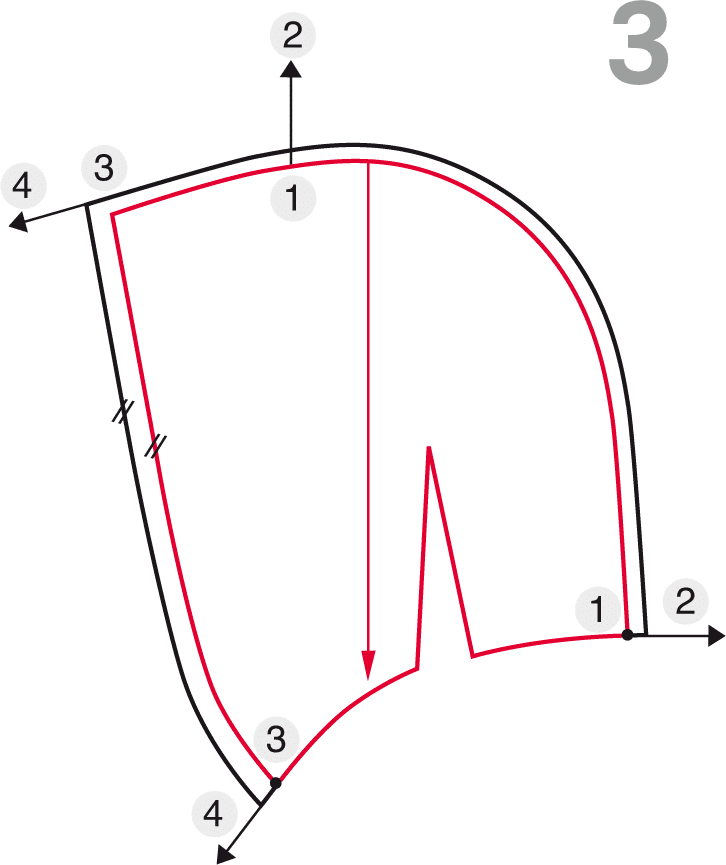
Hood ( 3)
1–2 Neck width increment = 6 mm. Add this amount parallel to the centre back seam up to the hood front.
3–4 11/2 of the neck width increment = 9 mm. Measure this amount parallel to the hood front and in extension to the hood seam.
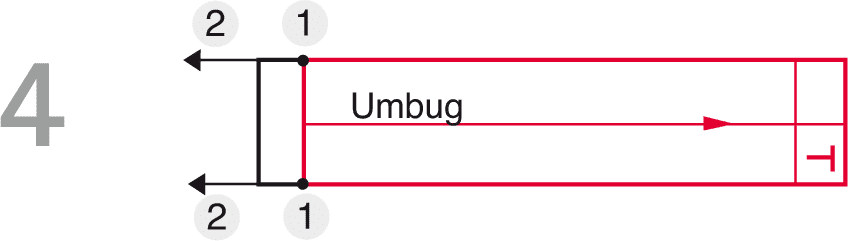
Sleeve Cuff ( 4)
1–2 Sleeve hem width increment = 12 mm. Extend the sleeve cuff 12 mm.