How to Make a Fanny Pack
Deutsch
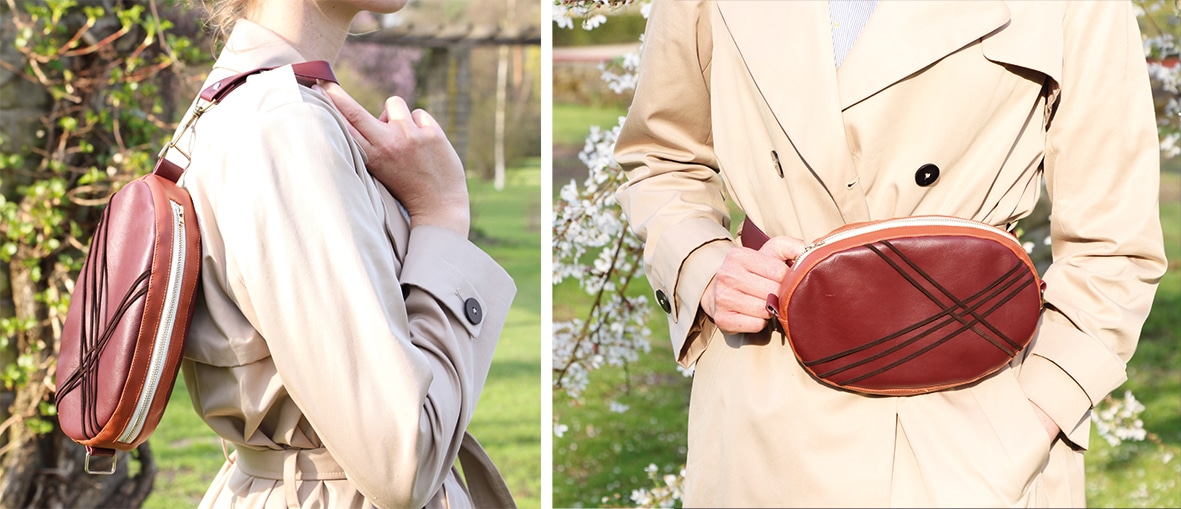
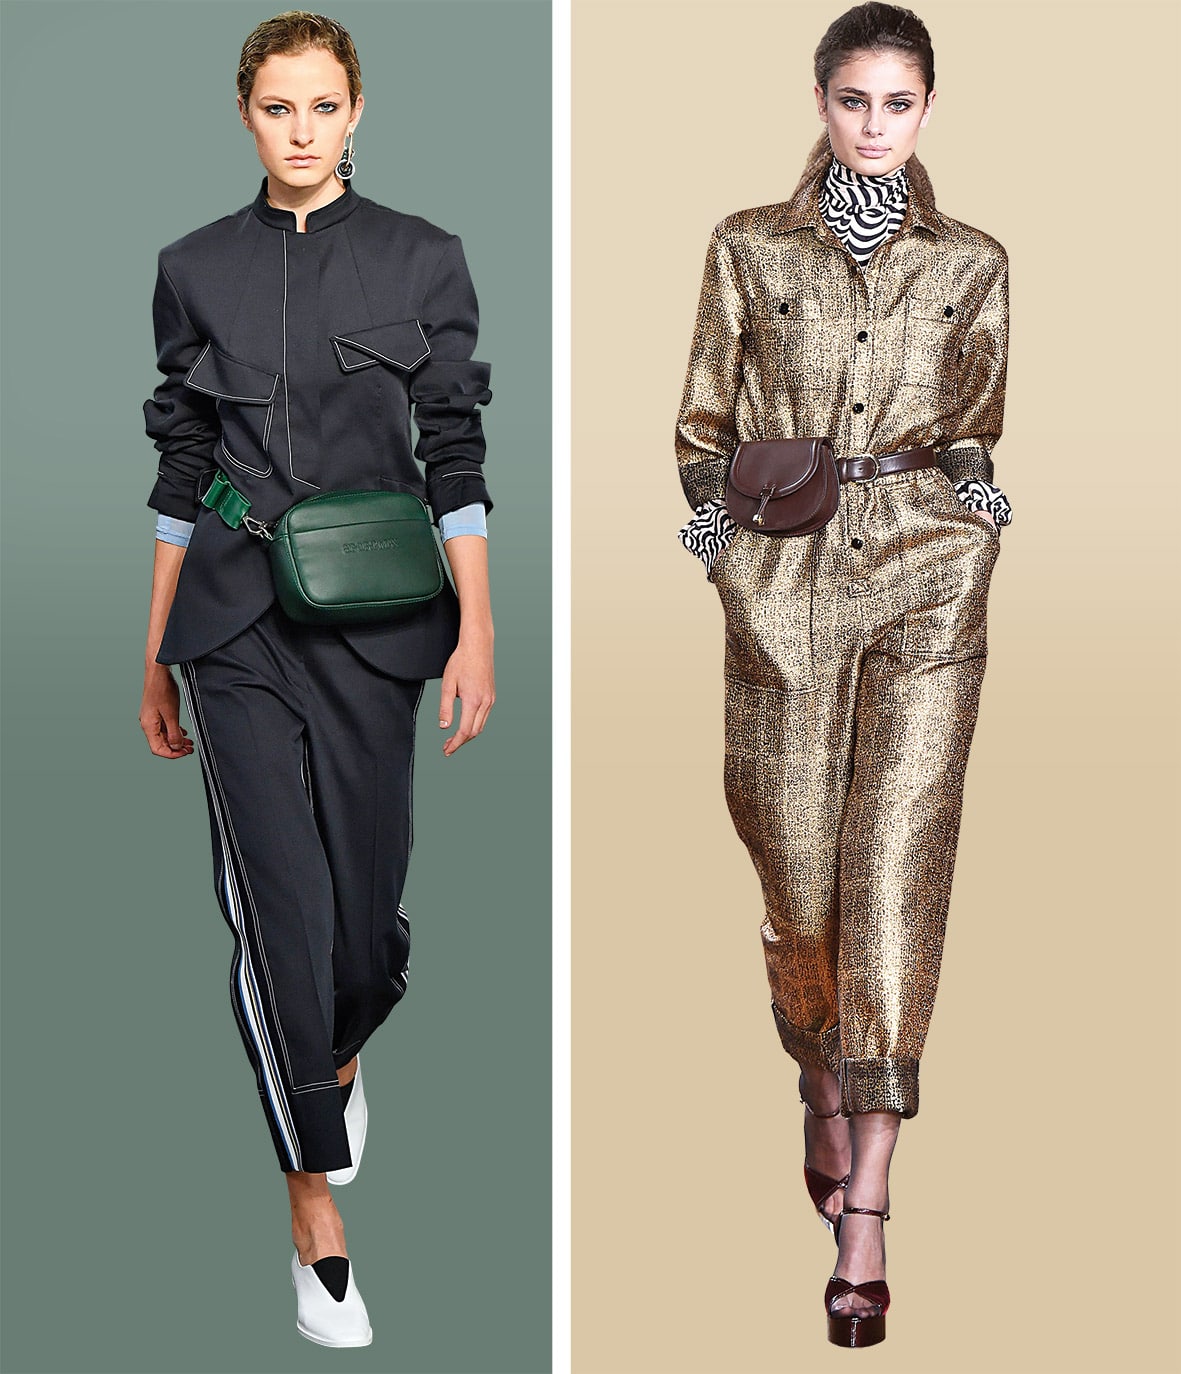
The Fanny Pack, hip bag, belt bag or Belt pouch is celebrating its big comeback. This It-Piece is not only handy, but also a real eye-catcher. It can be combined with almost anything and makes every outfit a statement. In this article we show you how to construct a pattern for a Fanny Pack and how to sew the oval fanny pack.
Content
- What do you need to sew a fanny pack?
- 7 sewing tips for imitation leather
- Pattern Fanny Pack
- Sewing Instruction Fanny Pack
What do you need to sew a fanny pack?
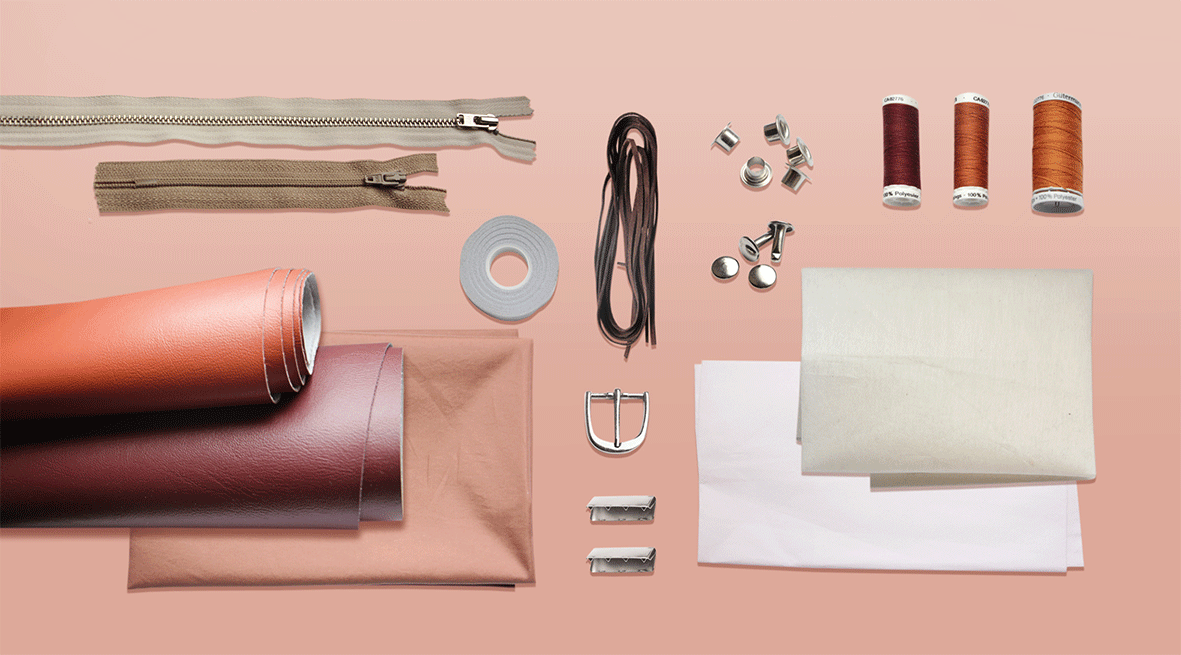
Fabric & Material Consumption
- A Wondertape (double-sided adhesive tape for fixing) can be used for sewing loops, belt loops, zippers & Co.
- Outer fabric > We sewed the belt bag in imitation leather (100 % PVC) 50 cm
- lining (100 % PES) 20 cm
- Inlay (depending on imitation/fabric) 20 cm
- Zipper made of metal or plastic (24 cm) 1 pc.
- Zipper (for inside) made of plastic (14 cm) 1 pc.
- Rings for attach the belt (rectangular / D-shape) 2 pcs.
- Belt buckle/ buckle 1 pc.
- Metal eyelets for the belt 4 pcs.
- Hollow rivets for attach the belt 2 pcs.
- End caps for belt 2 pieces.
In order to combine two current trends, we sew our bag from imitation leather, a material that is increasingly being used in sewing machines. Sentences like “Does the machine do this?” or “Doesn’t it leave out stitches? With a few tips, the right presser foot and a suitable sewing needle, sewing (artificial) leather is easy.
7 sewing tips for imitation leather
- Leather needles cause holes that are too large, it is better to use normal needles or jeans needles.
- The optimum stitch length is 3 – 3.5 mm.
- A Tefon foot sticks less and transports (artificial) leather a lot easier. Alternatively, baking paper can be placed under the leather when sewing.
- The thicker the material, the higher the upper thread tension must be.
- Iron artificial leather only to the left, at a low temperature and with an intermediate underlay. Alternatively, heavy weights can be used to flatten the leather.
- Since the edges of the fabric do not fray, artificial leather can be processed with open edges.
- Certain artificial leather is allowed in the washing machine. However, only at 30° C wool cycle, with a mild detergent and without spinning. Many stains can be removed with a cloth and water or leather spray.
Advantages of imitation leather
• a composite of a fabric (natural, chemical or mixed fabric) and a plastic top layer (PVC, PES)
• impervious to dirt, water and sun
• extremely tearproof
• very inexpensive compared to genuine leather
• very lightweight
Fabrics, which are also suitable for this bag well
Leather, canvas, oxford. cork, imitation fur, brocade, denim, velvet, wax cloth
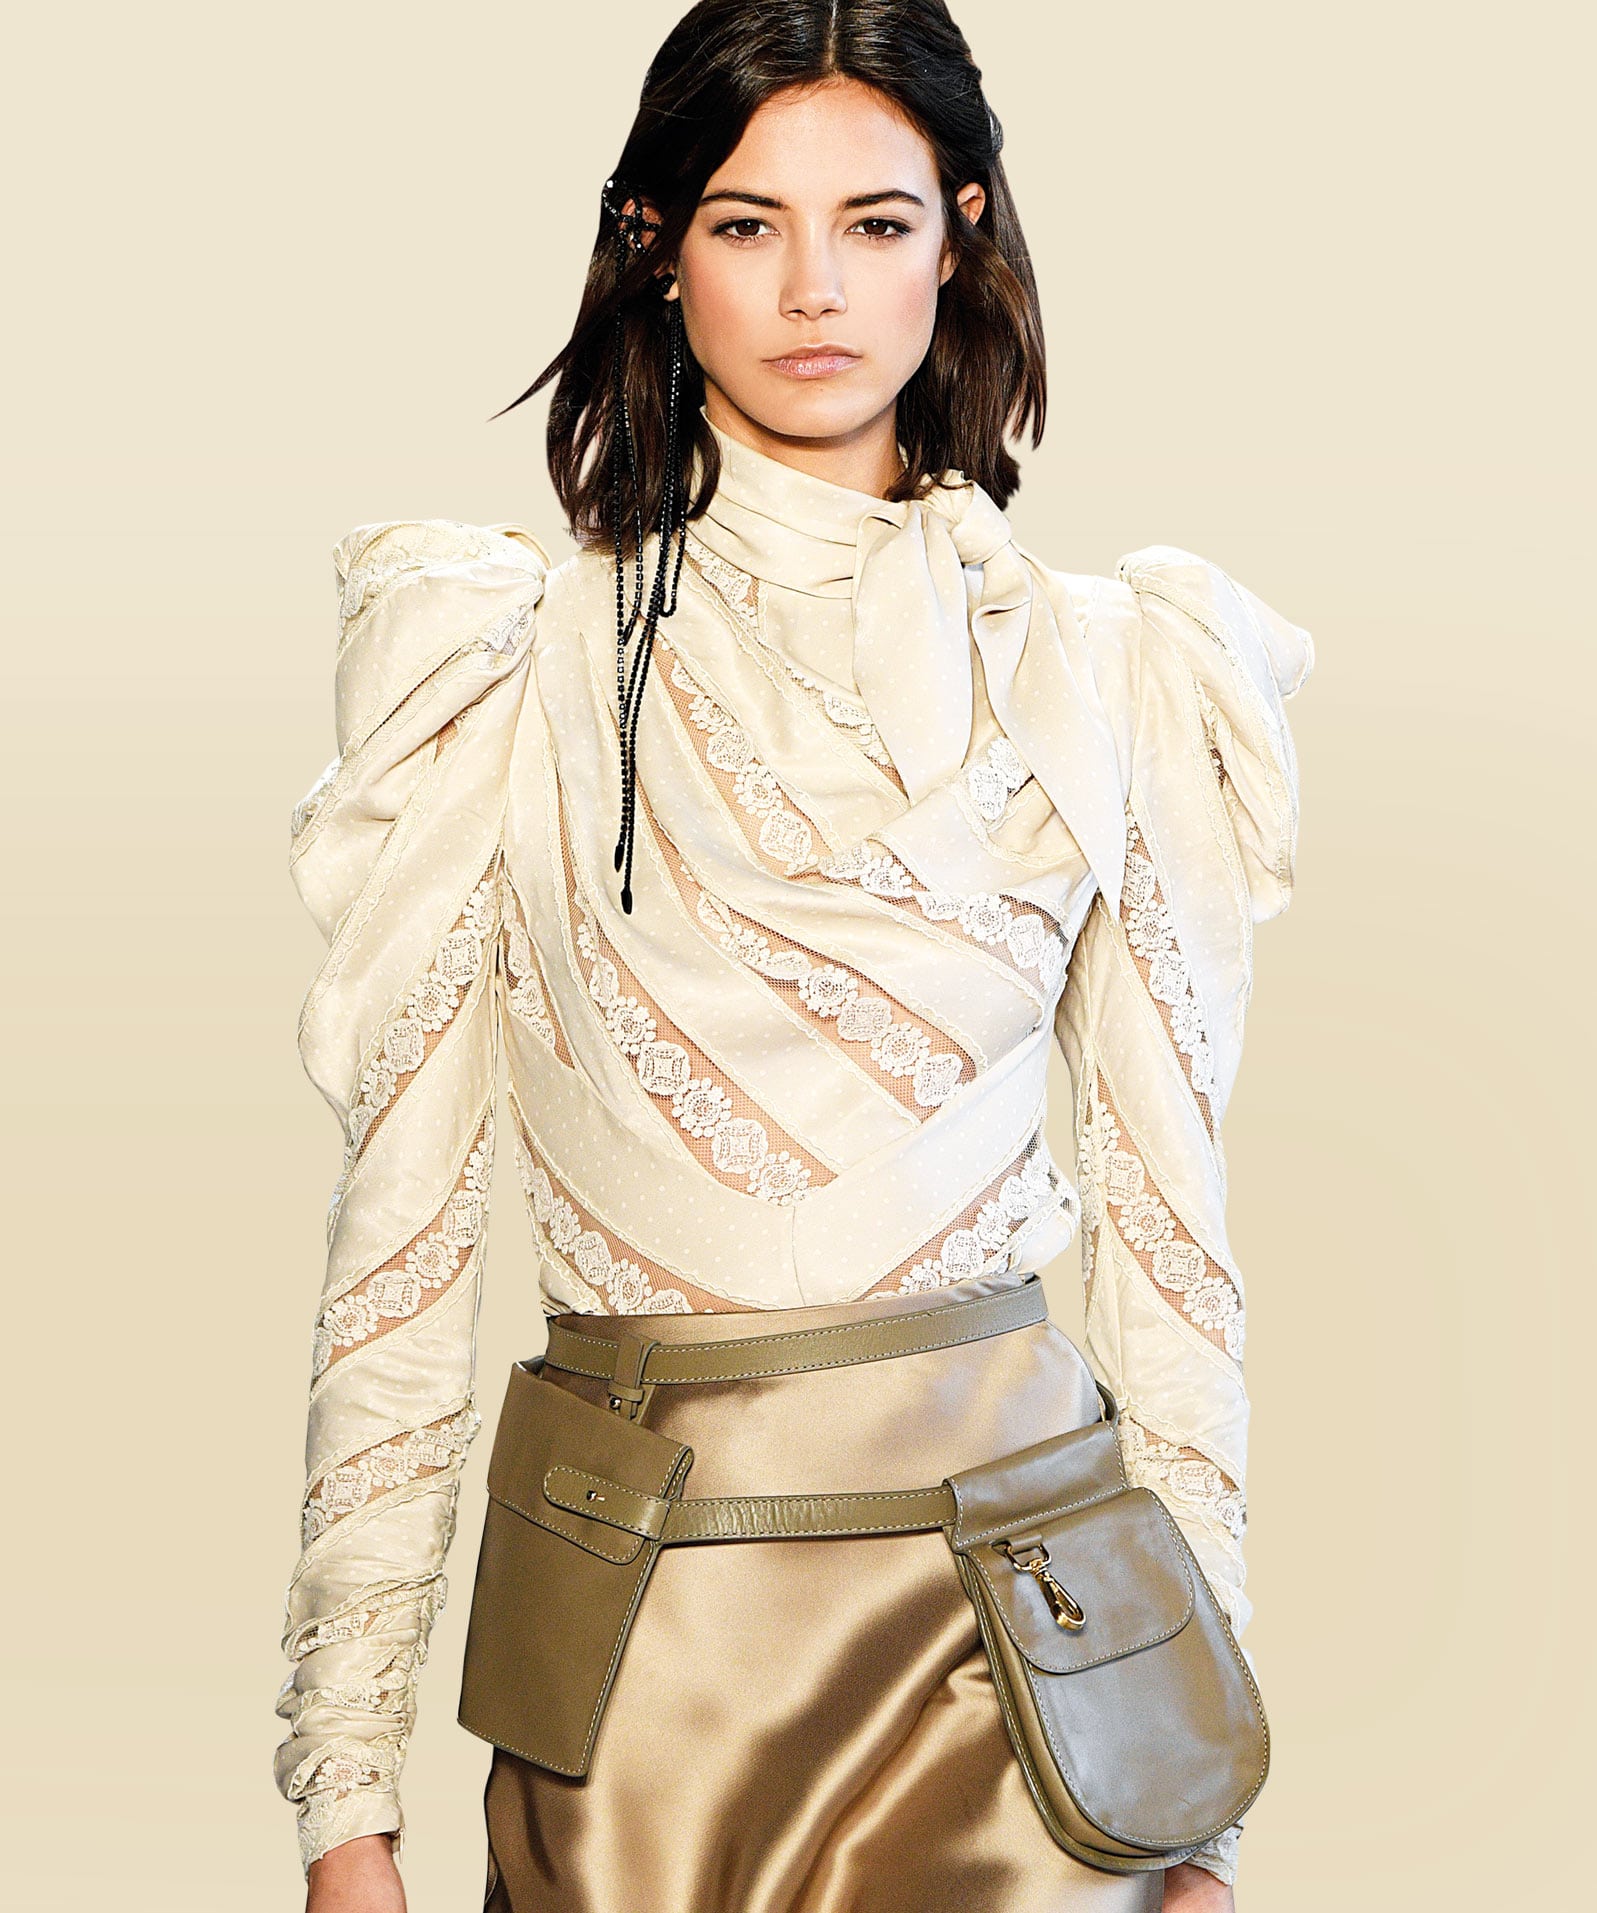
Advantages of a bum bag
1. High wearing comfort
2. Maximum freedom of movement (hands remain free)
3. It can’t be lost or stolen so quickly.
4. Two-in-one: belt and bag
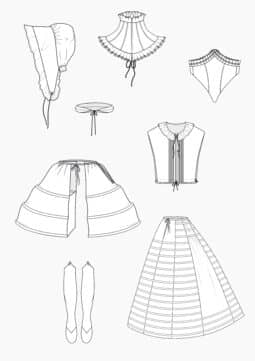
Pattern Fanny Pack
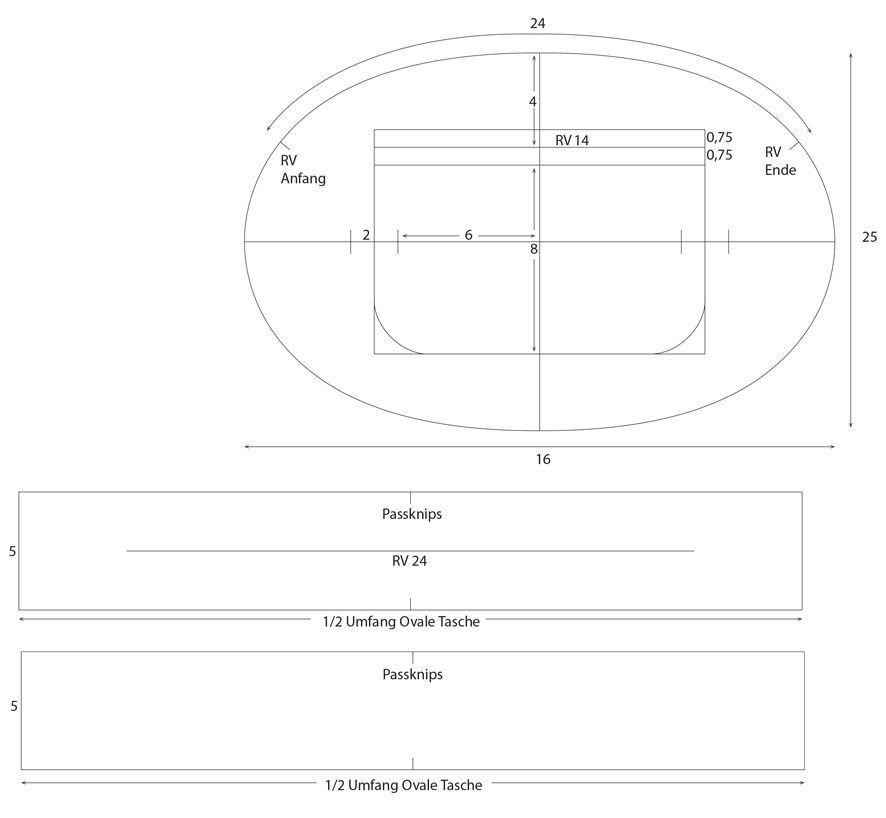
Oval bag
We recommend that you first draw the half shape of the 16 cm high and 25 cm wide oval bag and then mirror it so that all curves are the same. The 2 cm wide loops are each 6 cm from the centre of the bag. The zipper of the bag is 24 cm long. The lining has a 14 cm wide pocket, also with zipper. All other measurements can be taken from the drawing.
Central strip
There is an upper and a lower 5 cm wide central strip, both are connected at the sides. Measure the circumference of the oval pocket and divide by two. Mark the position of the 24 cm long zipper in the middle of the upper central strip, as well as the visible width of the zipper (here: 0.75 cm). Both stripes receive a passport cut in the middle.
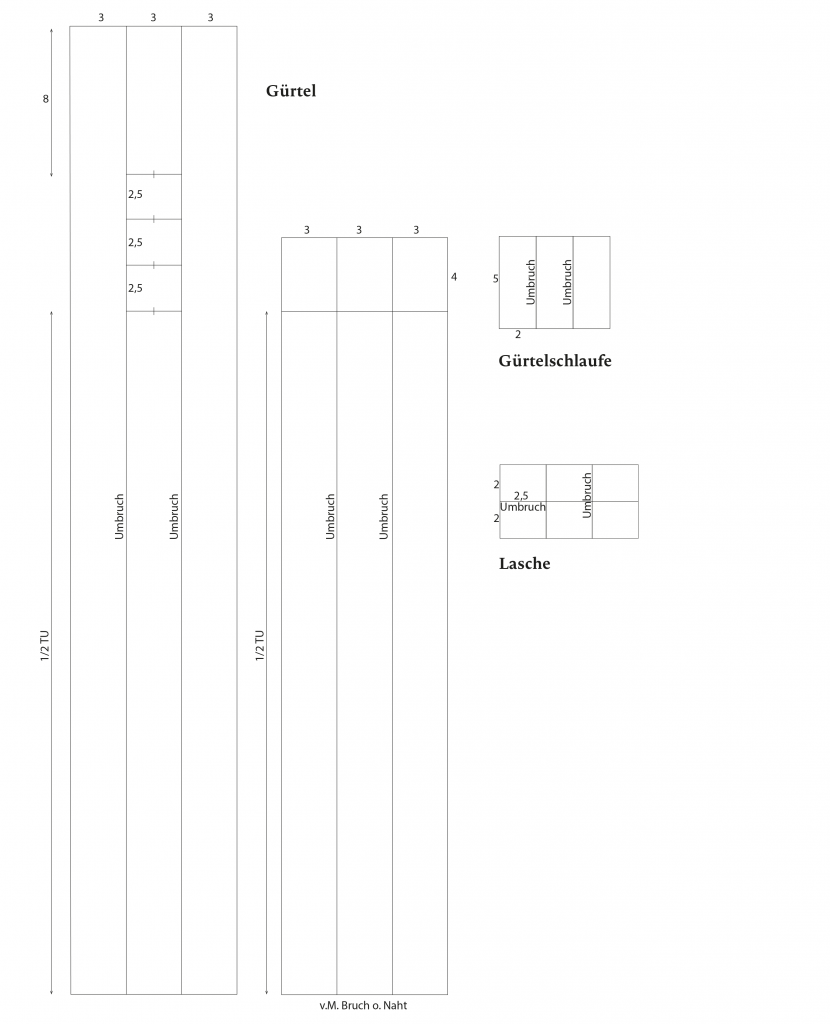
Belt
Draw a strip with the length of the waist circumference and a width of 3 cm. An extra loosening can be added, but the closer with thorn already offers some leeway. Add a distance of the individual holes (here: 4 x 2.5 cm) plus 8 cm end part to one end and 4 cm overlap for the closer to the other end. The belt is 3 x 3 cm wide.
Belt loop
Draw the belt loop with a finished width of 2 cm and a finished length of 5 cm and mirror 2 x to the side.
Flap
The flap is given a finished length of 2 cm and width of 2.5 cm and is also mirrored 2 x to the side. For the make-up, then mirror 1x on top.
Finished Pattern Pieces
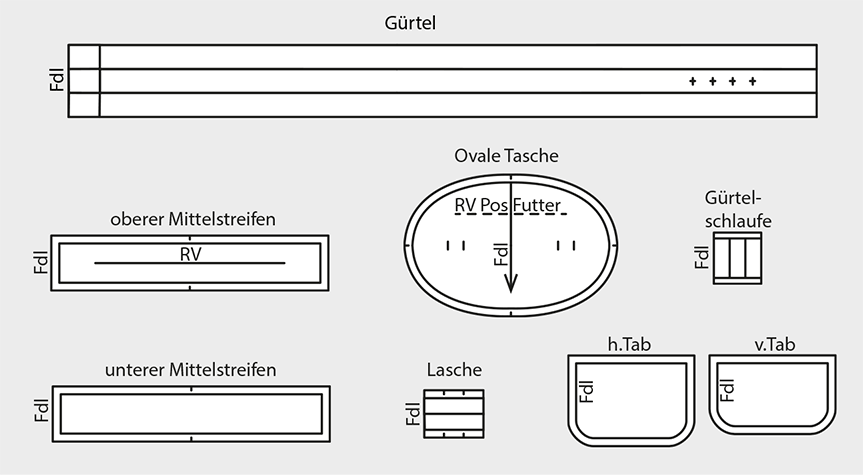
Specify all yarn widths, breaks and notches. The pattern pieces are shown with seam allowance.
Cutting and preparation
With a thickness of 625 g/qm the leather imitation is already quite stable, for an even better stand the oval pattern pieces and the intermediate strips are fixed with a firmer insert. We strongly recommend to carry out an ironing test (incl. ironing cloth) beforehand. This artificial leather can be ironed for 6 seconds without melting or shrinking. Let the artificial leather cool down well afterwards. The cuts of the lining on the upper intermediate band and the oval pocket should be covered with a thin insert.
Sewing Instruction Fanny Pack
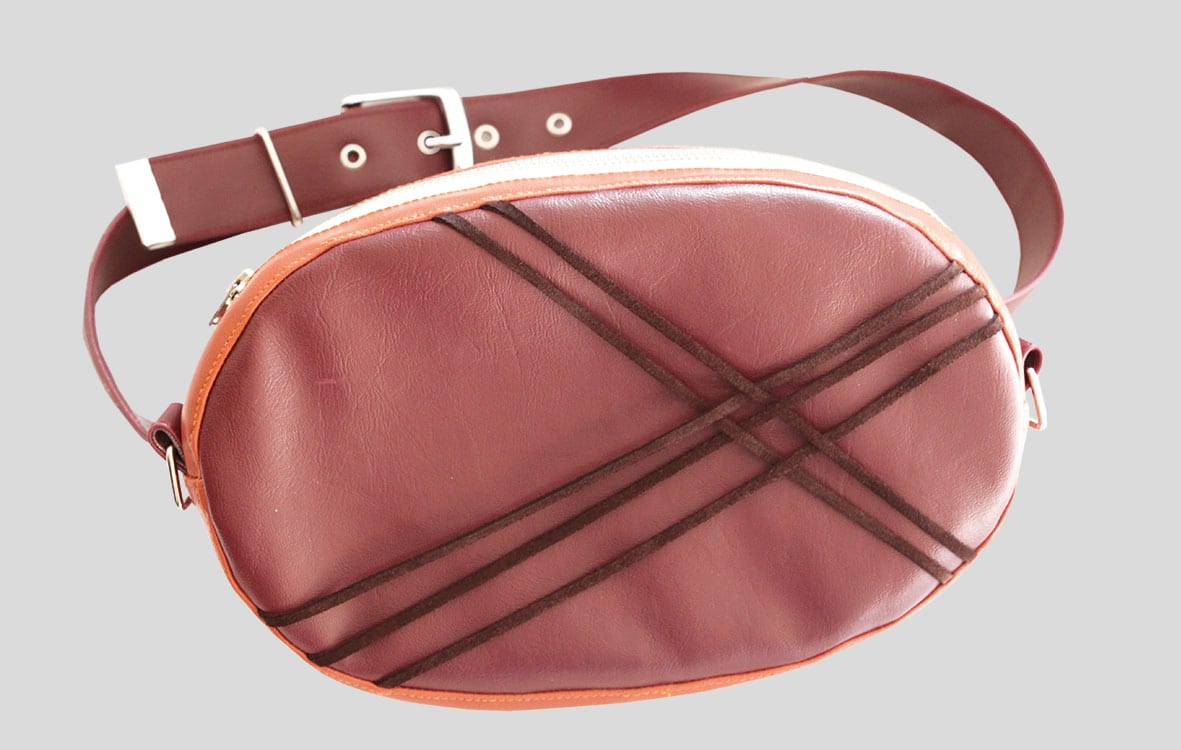
- Cut out all pattern pieces, according to the choice of fabric fix it with insert, mark the zipper position on the right side of the fabric and cut the notches 3 mm deep. Mark the zip length on the right side of the upper centre strip and stitch one end right to right 1.5 cm wide.
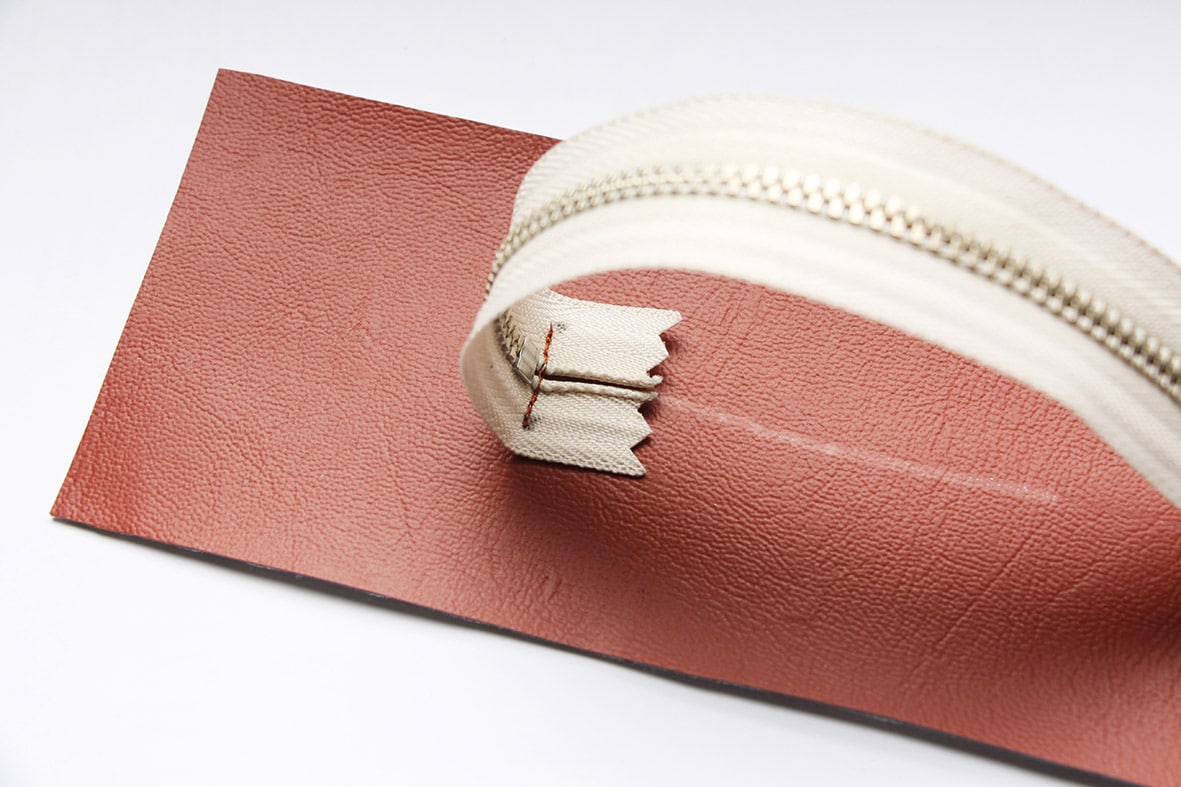
- Open the other zipper end and sew up with hand stitches so that both ends remain at the same height when sewing. It is recommended to sew on the zipper so that it lies tight. Use a narrow zipper foot for this purpose.
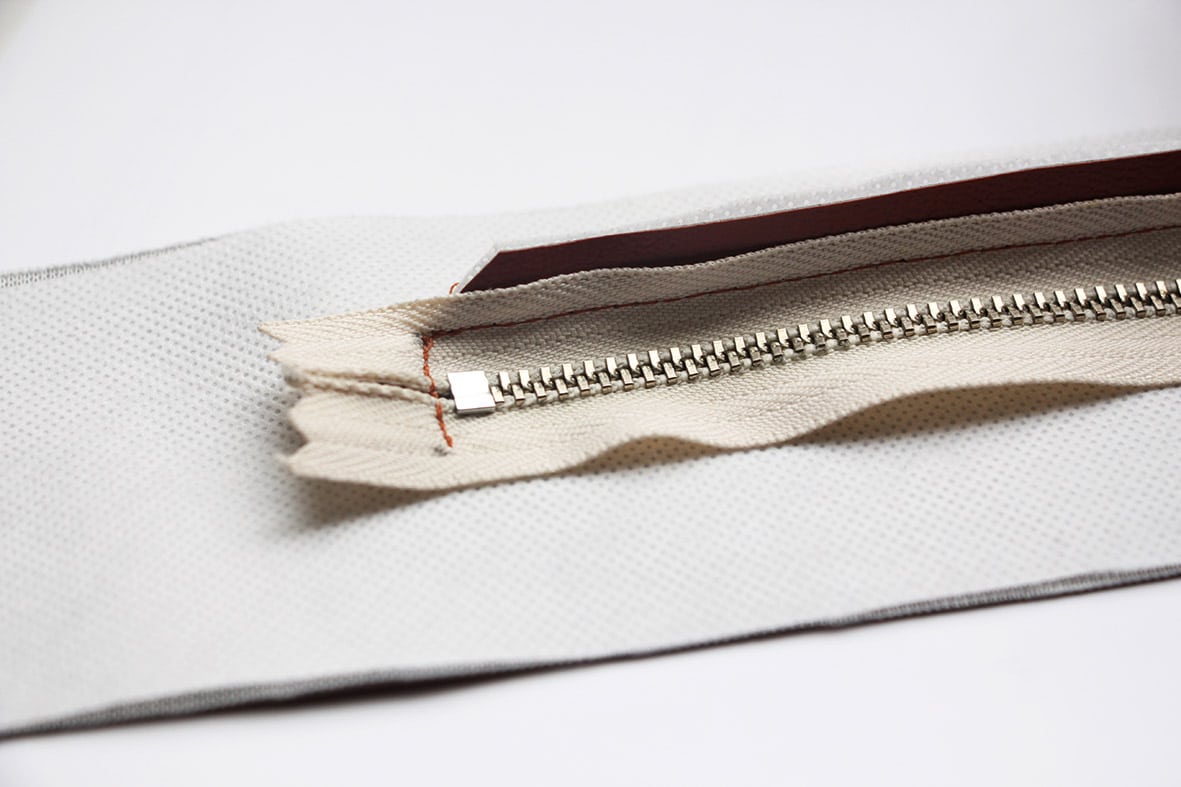
- Cut in the fabric like a piping pocket and put the zipper through the opening on the left side of the fabric. Topstitch both sides of the zipper.
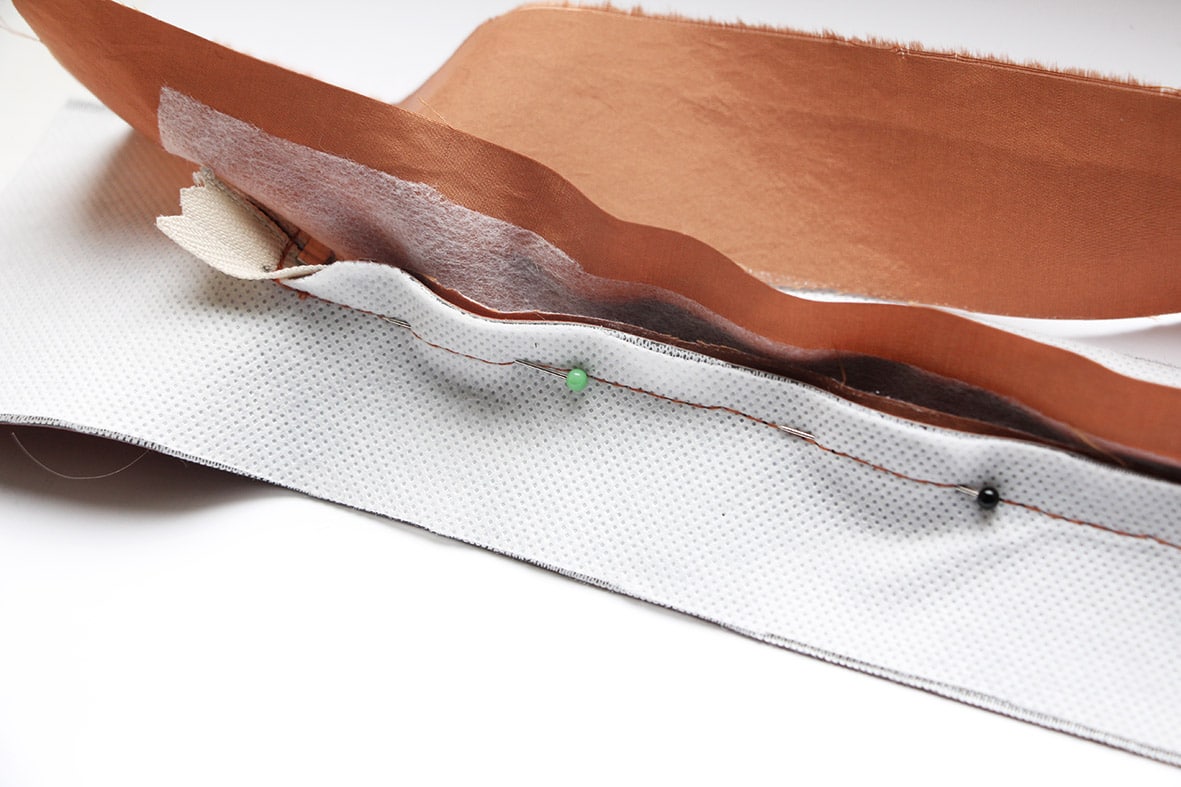
- Cut the upper lining central strip fixed with insert and sew both long sides so that the seam is quilted on the previous one.
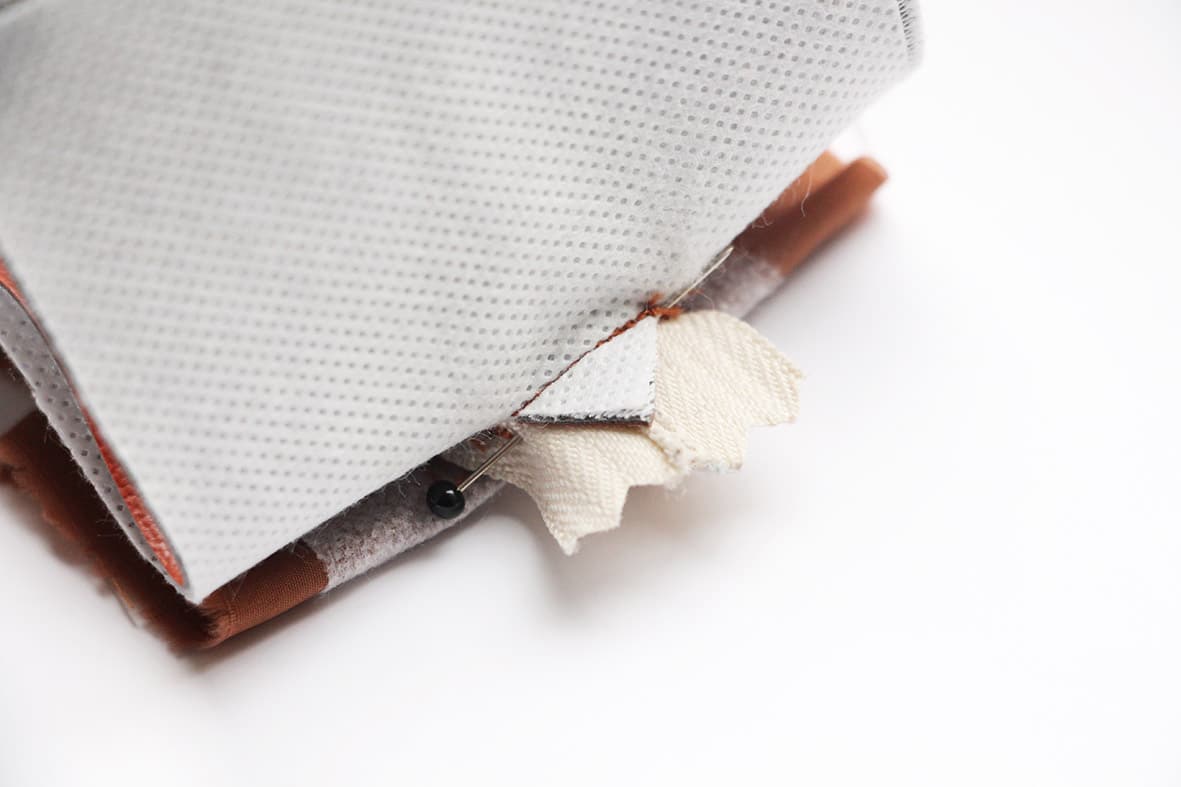
- Then sew off the corners.
- Thus the zipper is also cleanly processed from the inside. Fix the lining and fabric at the seam allowance with needles or clips.

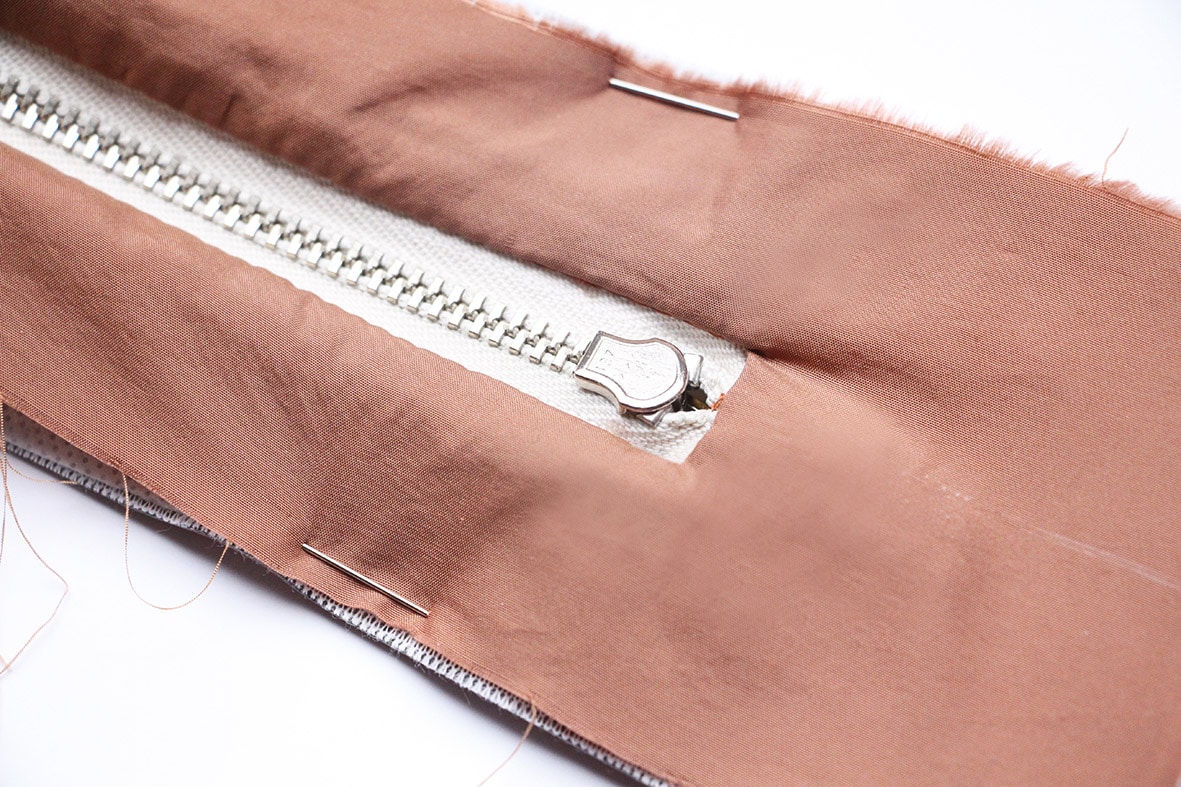
- Topstitch the zipper around all layers from the right with a narrow edge. Use a Teflon foot and a longer stitch length (here 3.5 mm).
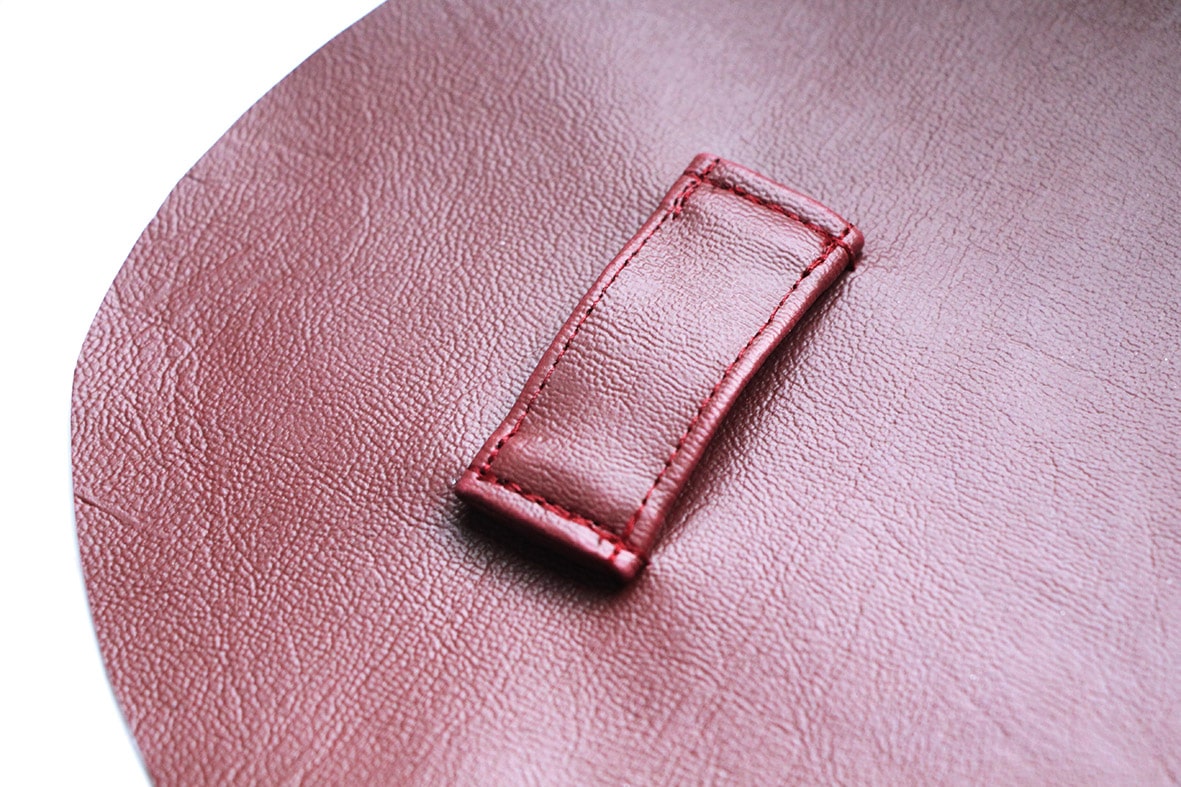
- Wrap the ends of the belt loops with the help of the wonder tape at the top and bottom and topstitch them tightly. Then fold in the long sides one after the other, topstitch and place on the oval cut piece. Sew narrowly at the top and bottom. To protect the artificial leather, sew only on the loop, not beyond it.

- Prepare the flaps, pull them through the square ring, place both ends on top of each other and stitch them in the middle to the end of the upper middle strip.
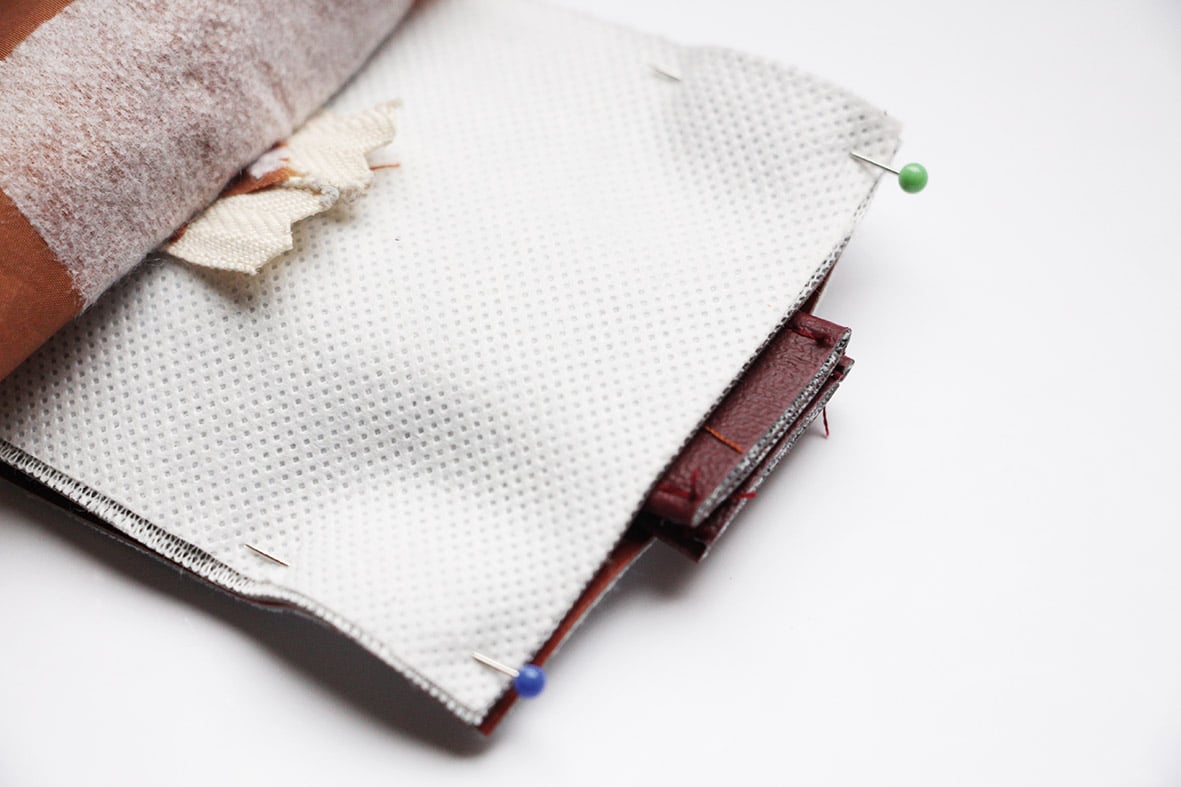
- Then, place the lower central strip right sides together and sew tight.
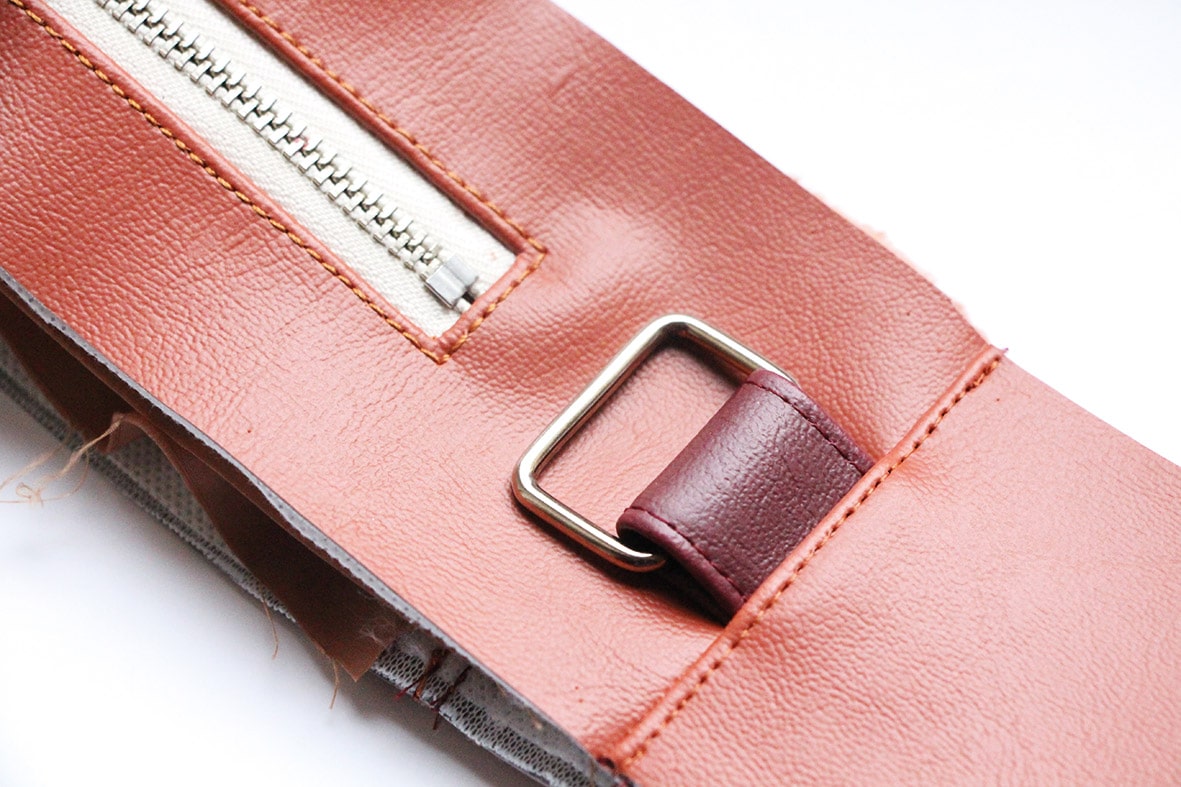
- Place the seam allowance down and topstitch all layers so that the flap with the ring is placed upwards. Process the second side identically.

- Connect the lower to the upper central lining strip and sew together to form a ring.
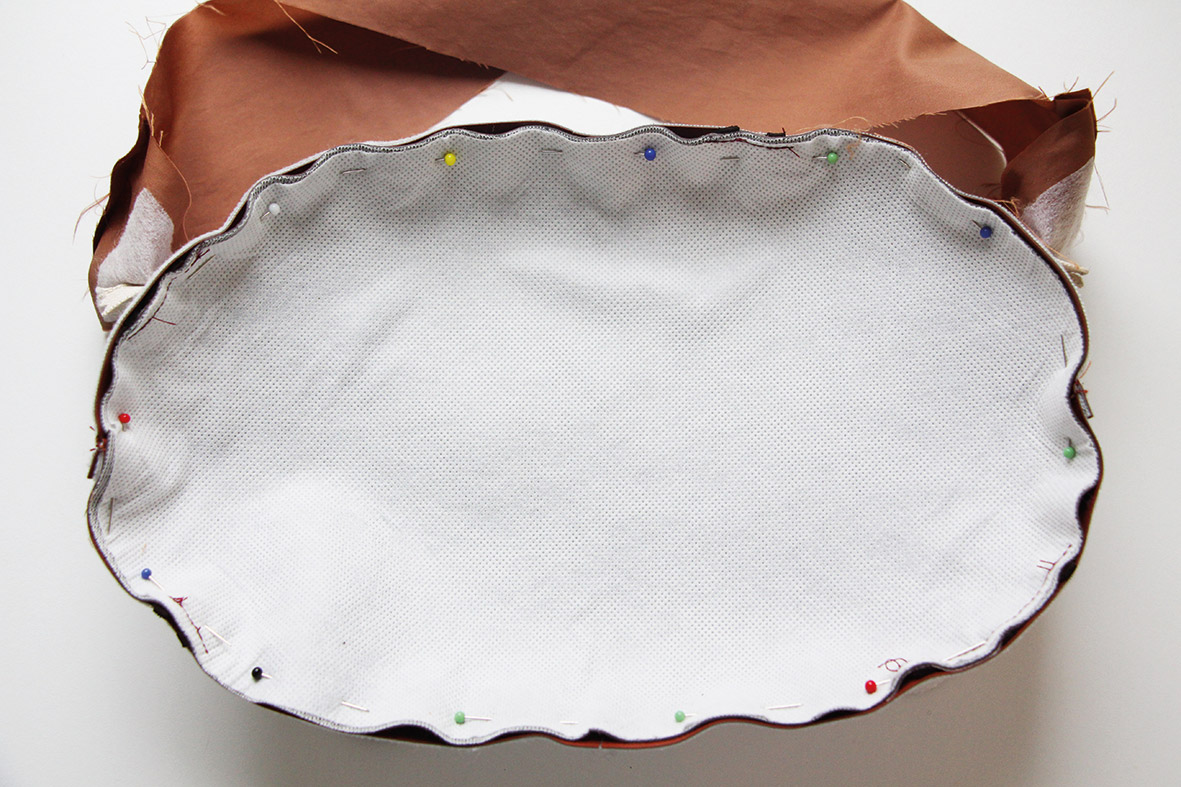
- Clamp the oval cut piece right sides together on the middle strip and connect both layers, the oval cut piece is on top. Note the notches.

You can find many more pattern making instructions and finished patterns for sewing in our online shop.