Double-breasted Coat for Plus Sizes
Deutsch
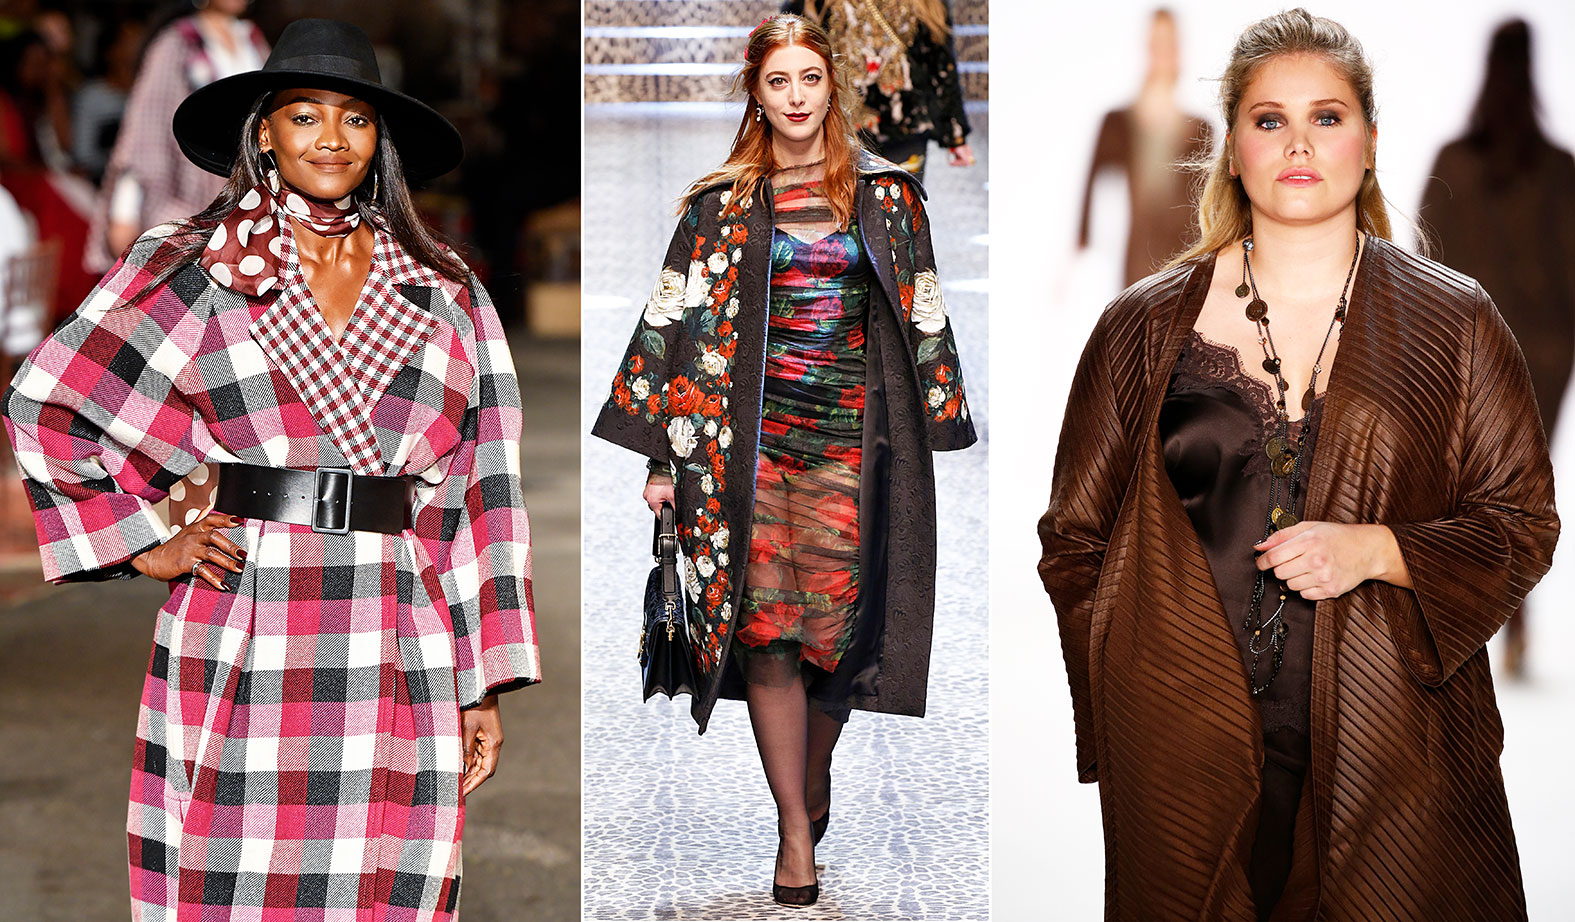
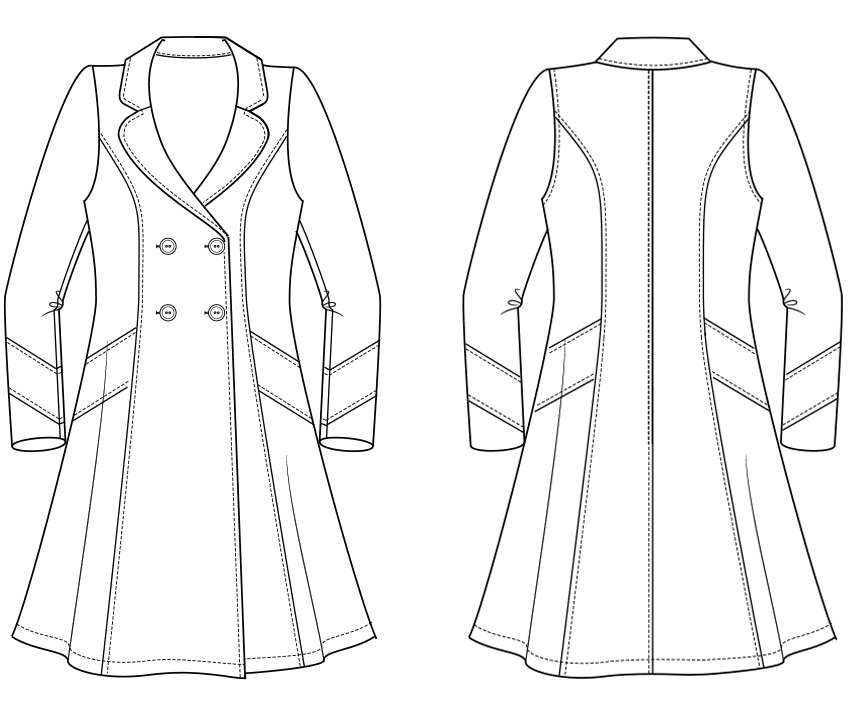
The relations of chest, waist and hip are decisive for how the basic pattern block is set up. As the size increases, the difference between the chest and hips and the waist decreases. The waist circumference therefore grows more than the chest and hip circumference. Before designing a pattern in plus size, the question always arises: Is it a figure with a strong chest or buttocks, or is the ratio balanced? In this article we will show you how to construct a pattern for a coat in plus size. You will find the complete article in the Damen-Rundschau 11/2011. For an english translation you can contact our customer service.
Pattern Construction Double Row Jacket
Template: Basic Jacket Block in Size 44
Front and Back Pattern
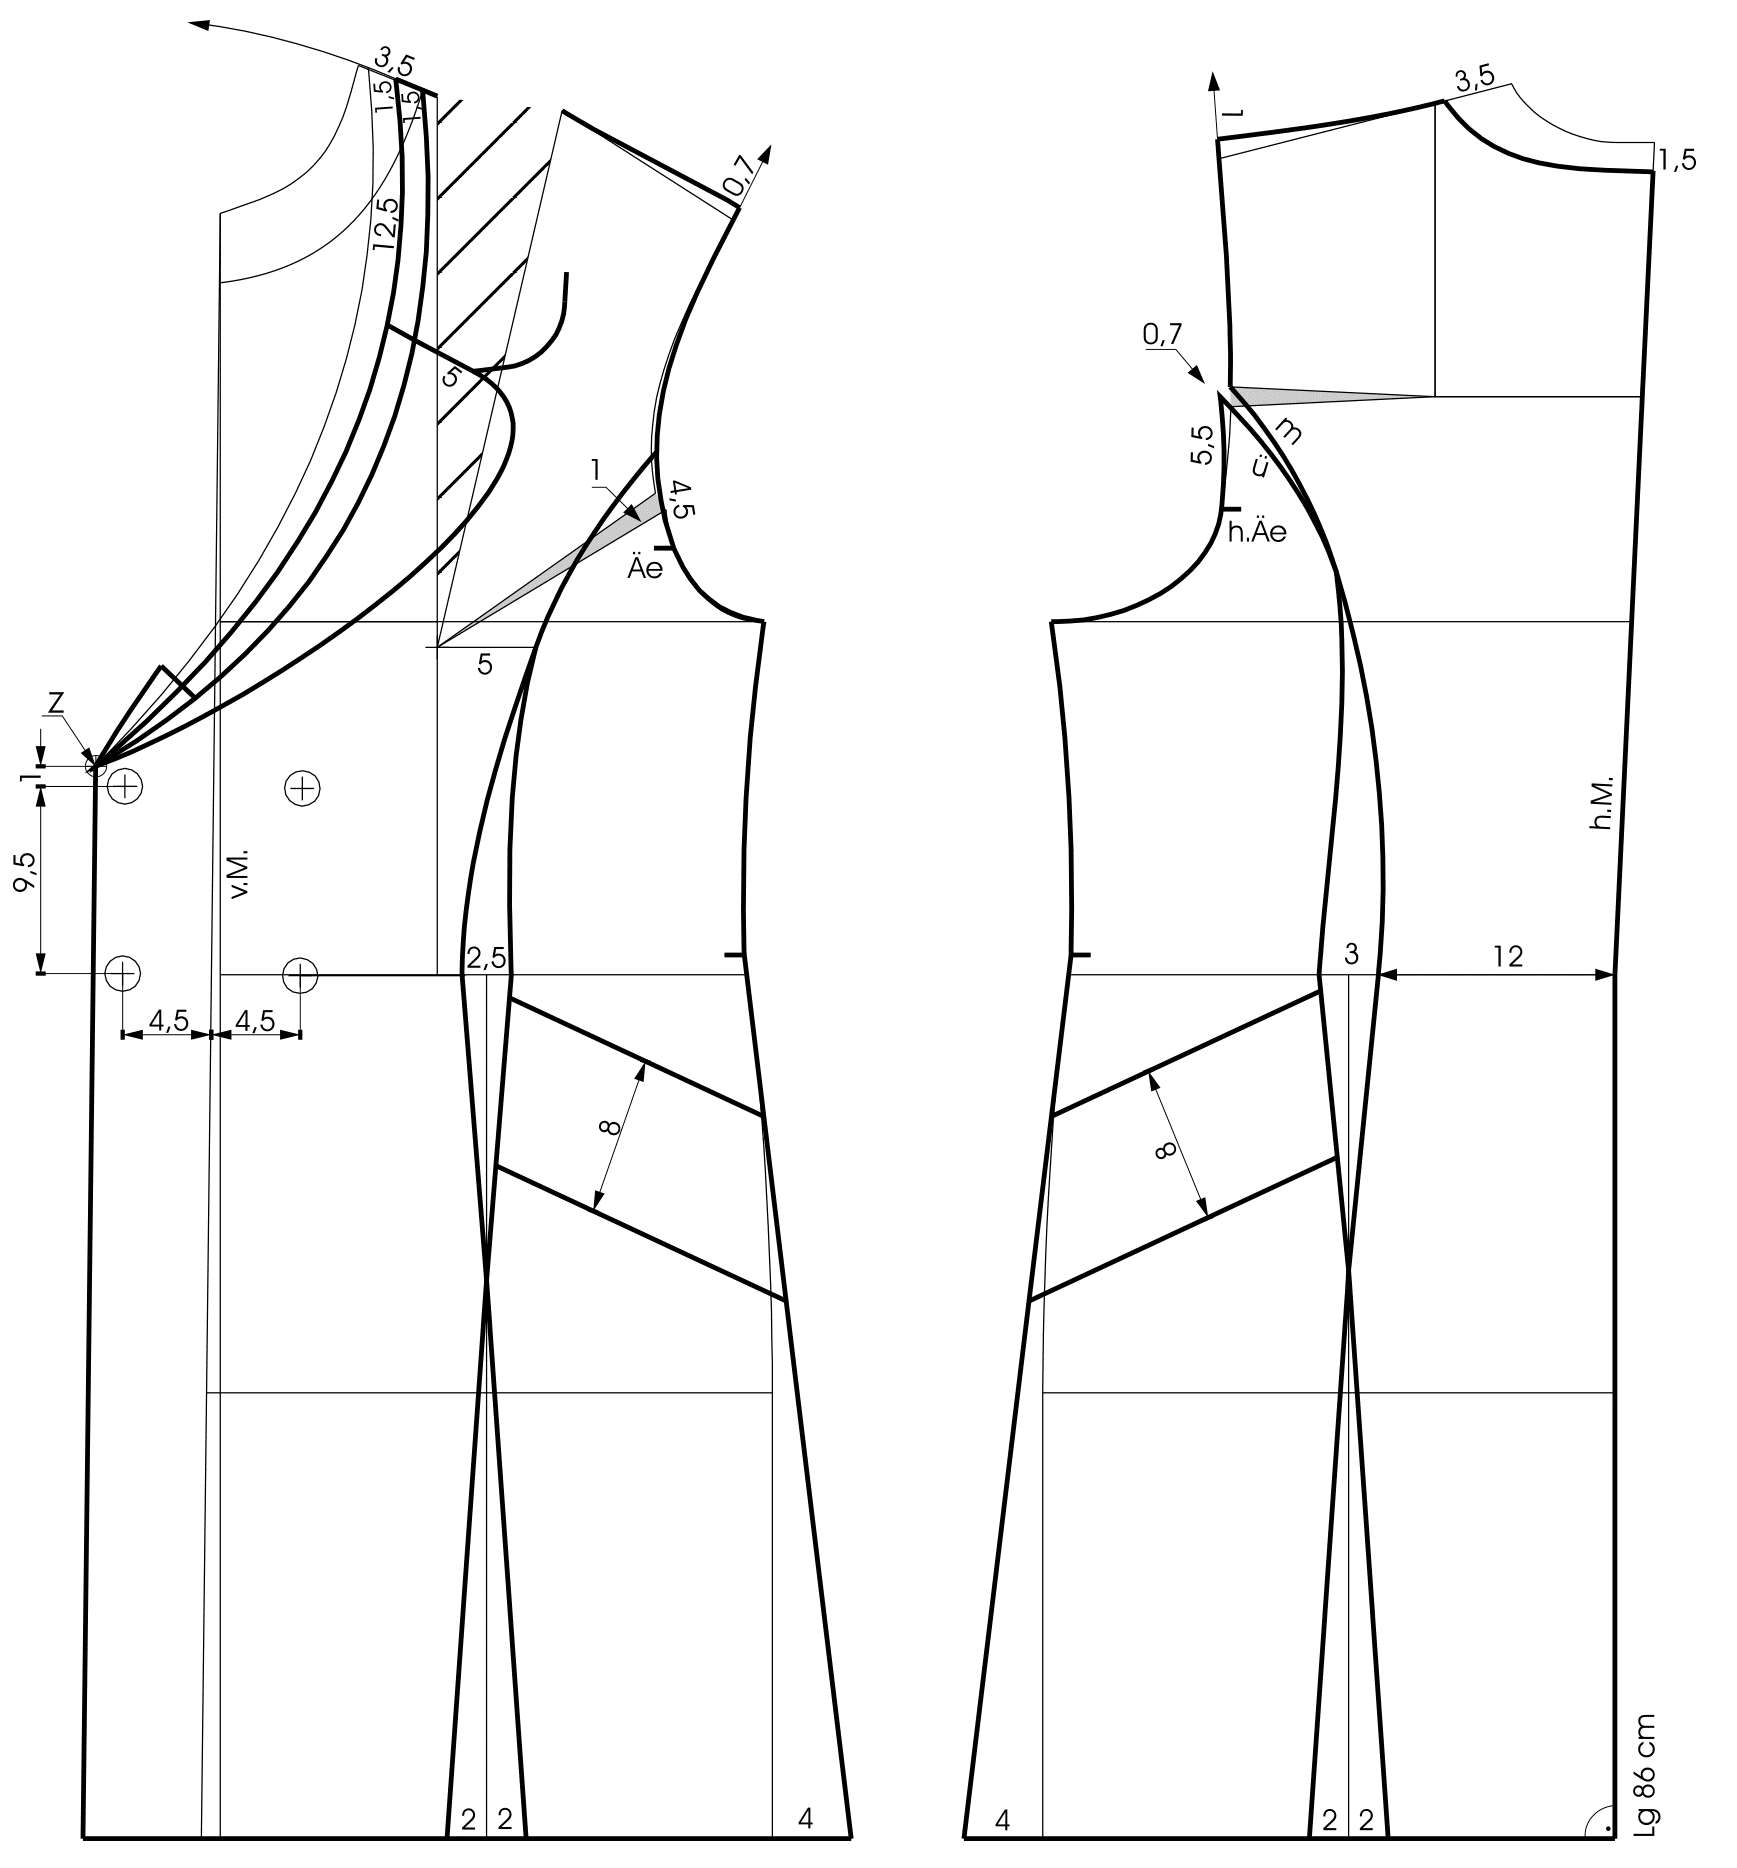
- Use a basic jacket pattern and a matching one-piece sleeve with overarm seam in size 44 as a template (see measurement chart). Mark the length at the centre back with 86 cm. Lower the neckline 3.5 cm at the shoulder and 1.5 cm at the centre back. Draw the new neckline. Extend the armhole on the front pattern 1 cm and raise the front shoulder 0.7 cm. Extend the armhole on the back pattern 1 cm and raise the back shoulder 1 cm. Draw the stylelines as shown in the illustration. Mark 0.7 cm intake at the back styleline for a better fit at the armhole. Equalize the seam lengths on the back pattern. Extend the sideseam 4 cm each side at the hem. Extend the hem 2 cm at each styleline. Blend the hemline on the finished pattern pieces. Shift the centre front 0.7 cm to the front at the hipline. Add 6 cm overlap parallel to the new centre front. Mark the buttonhole positions. Mark the beginning of the lapel break 1 cm above the upper button and mark pivot point Z. Draw a circular arc with pivot point Z over the lowered neck point and measure 2 x 1.5 cm for the collar stand (point K). Plot the neckline shape and the lapel as illustrated. Draw the side panels on the front and back pattern 8 cm wide.
Lapel Collar for Round Neckline
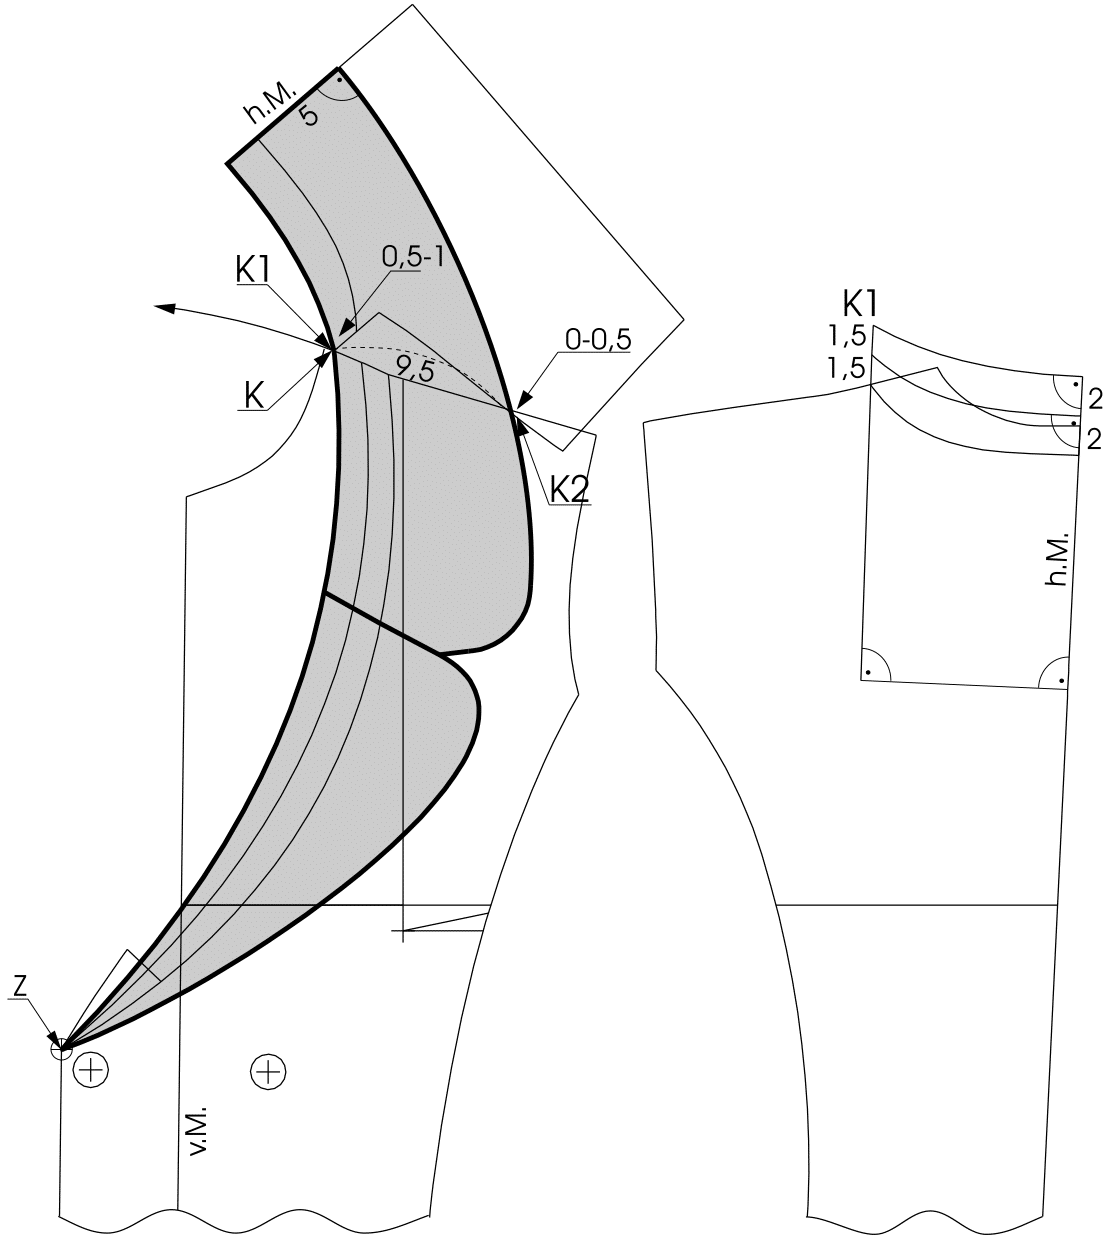
- Separate the pattern pieces at the stylelines and close the bust dart. Blend the seamline. Mark the collar and the collar stand 9.5 cm wide
at the shoulder (1.5 cm collar stand, 8 cm collar width). Extend the centre back upward and draw a parallel line through the lowered neck point.
Measure 2 x 2 cm at the centre back and 2 x 1.5 cm upwards at the neckline = point K1. Draw the neckline seam. Trace a copy of the upper back
pattern with the attached collar stand.Place the copied back pattern on the front pattern with point K1 touching point K and the shoulder
seams overlapping 0.5 – 1 cm at the collar width = K2. Mark the collar 5 cm wide at the centre back and finish the collar shape.
Finished Pattern Pieces
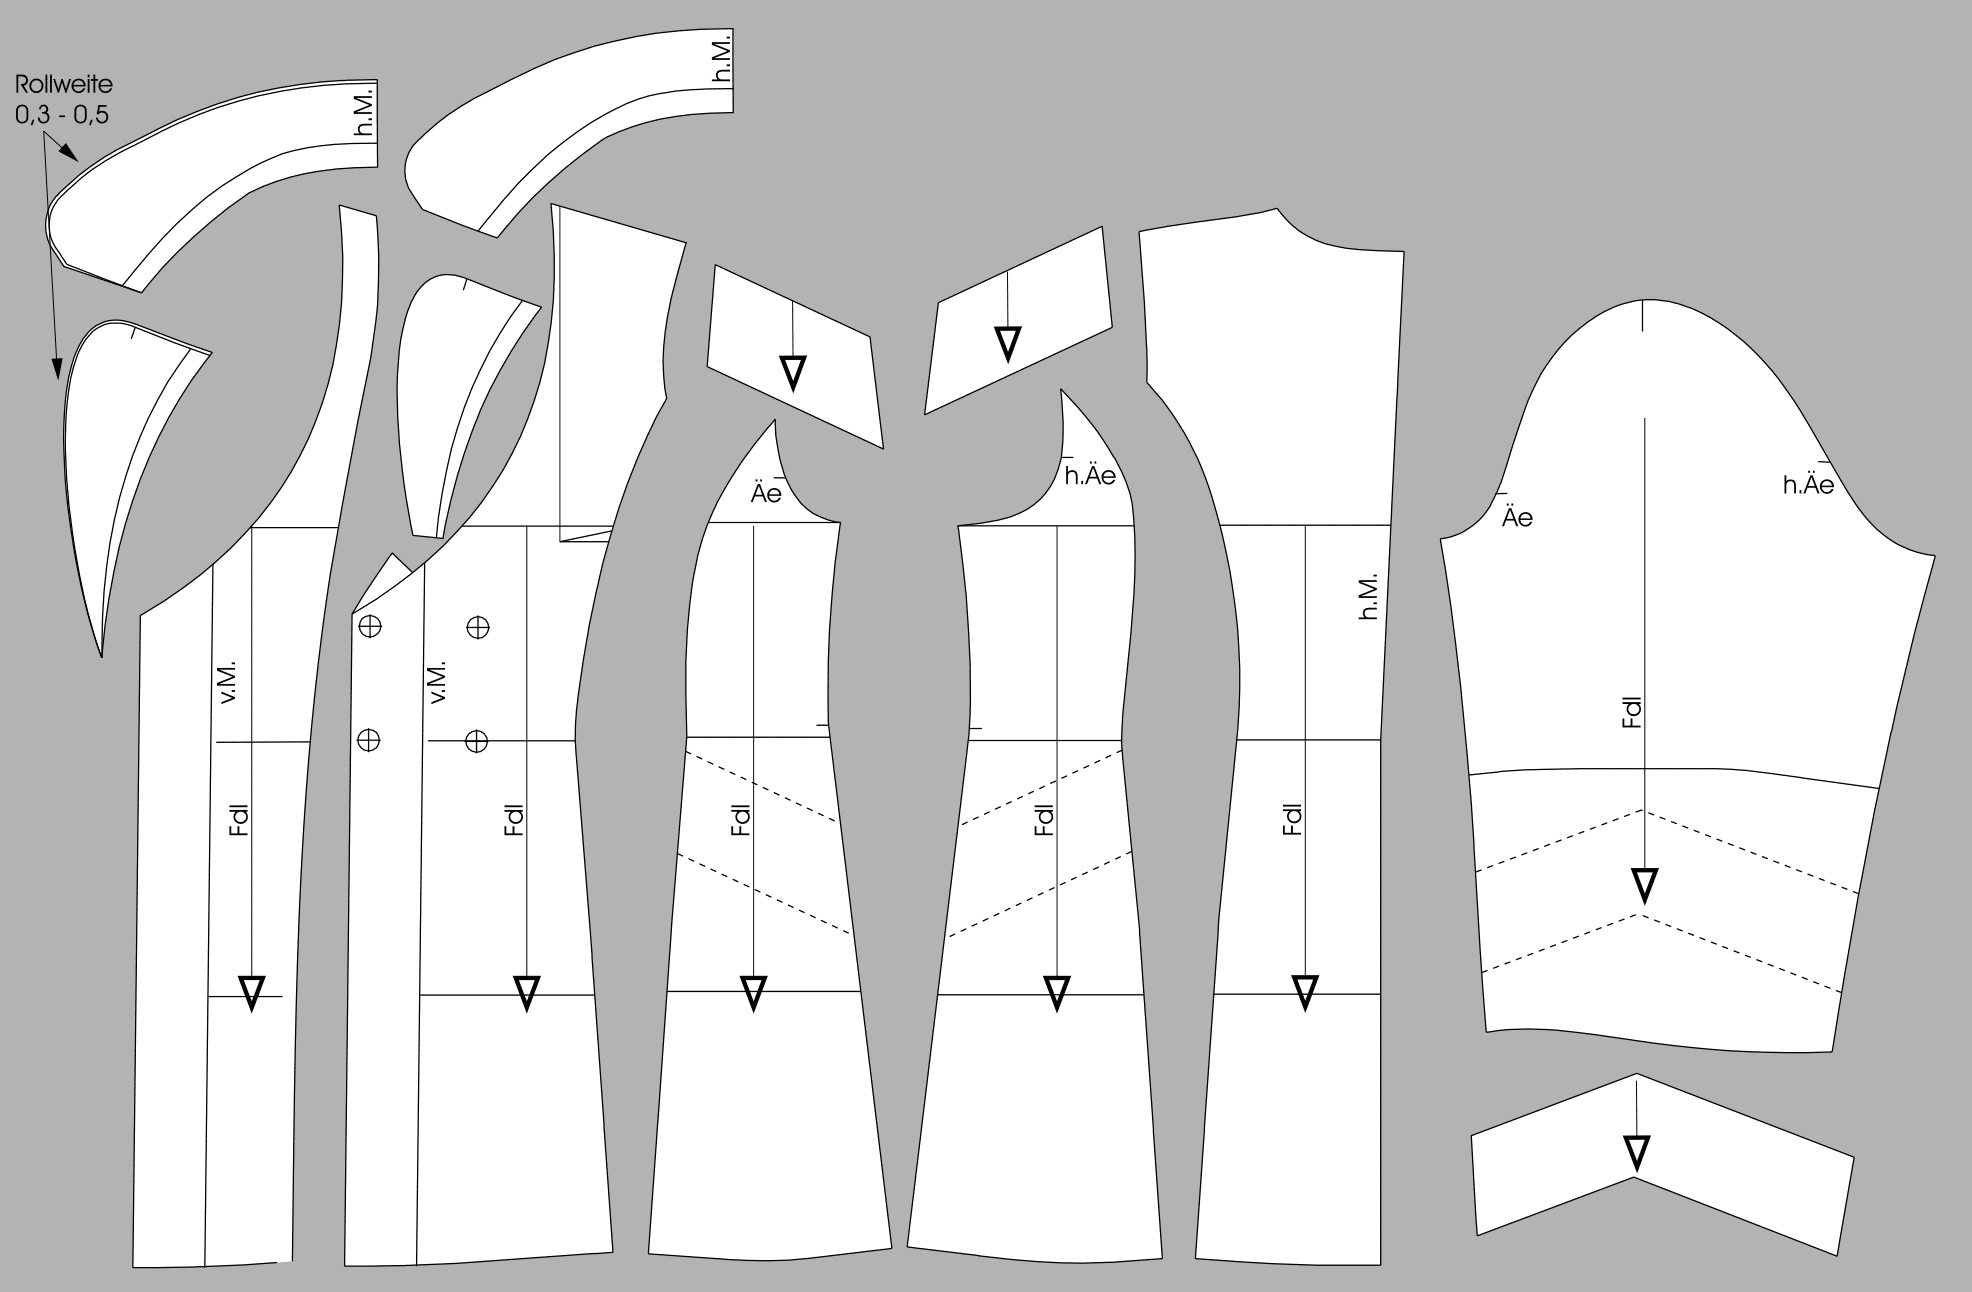
- Copy and separate all pattern pieces. Complete overlapping sections. Copy the sleeve panels and the side panels. Copy the collar and the front facing. Open the cutting lines. Add 0.3 – 0.5 cm roll width to the upper collar and the lapel depending on the material. Cut the front pattern with an attached lapel corner, so that not all seam allowances meet at the lapel break. Blend all seamlines. Mark the grainlines.
You can find many more pattern instructions and finished patterns for sewing plus size fashion in our online shop.


Hi, i would like to know if the raised front shoulder and back shoulder of 0.7cm and 1.0cm respectively, is performed to accommodate shoulder pads. Or is it done to improve wearing ease?
Hi Yun Yunus, yes exactly, the raised front and back shoulder is done to improve wearing ease. Kind regards
thank you jasmine clausen.