How to sew a Panty
Deutsch
 (Photo Credit: © CATWALKPIX.COM)
You find the complete pattern instruction in our magazine Rundschau for men 3.2017. It is available through our online shop. Please note that the magazine is only available in German.
In Sizes XS – XXL. Printed pattern sheet or PDF download (depending on purchasing option).
- Download
- Print Version
Basic Block and Design Pattern by Frank Schroeder
Reduce the hip girth measurement around 25% for the stretch of the material. Adapt the stretch factor to the respective material. Draft the panty pattern on a vertical and horizontal baseline. The different sections of the pattern are color separated.
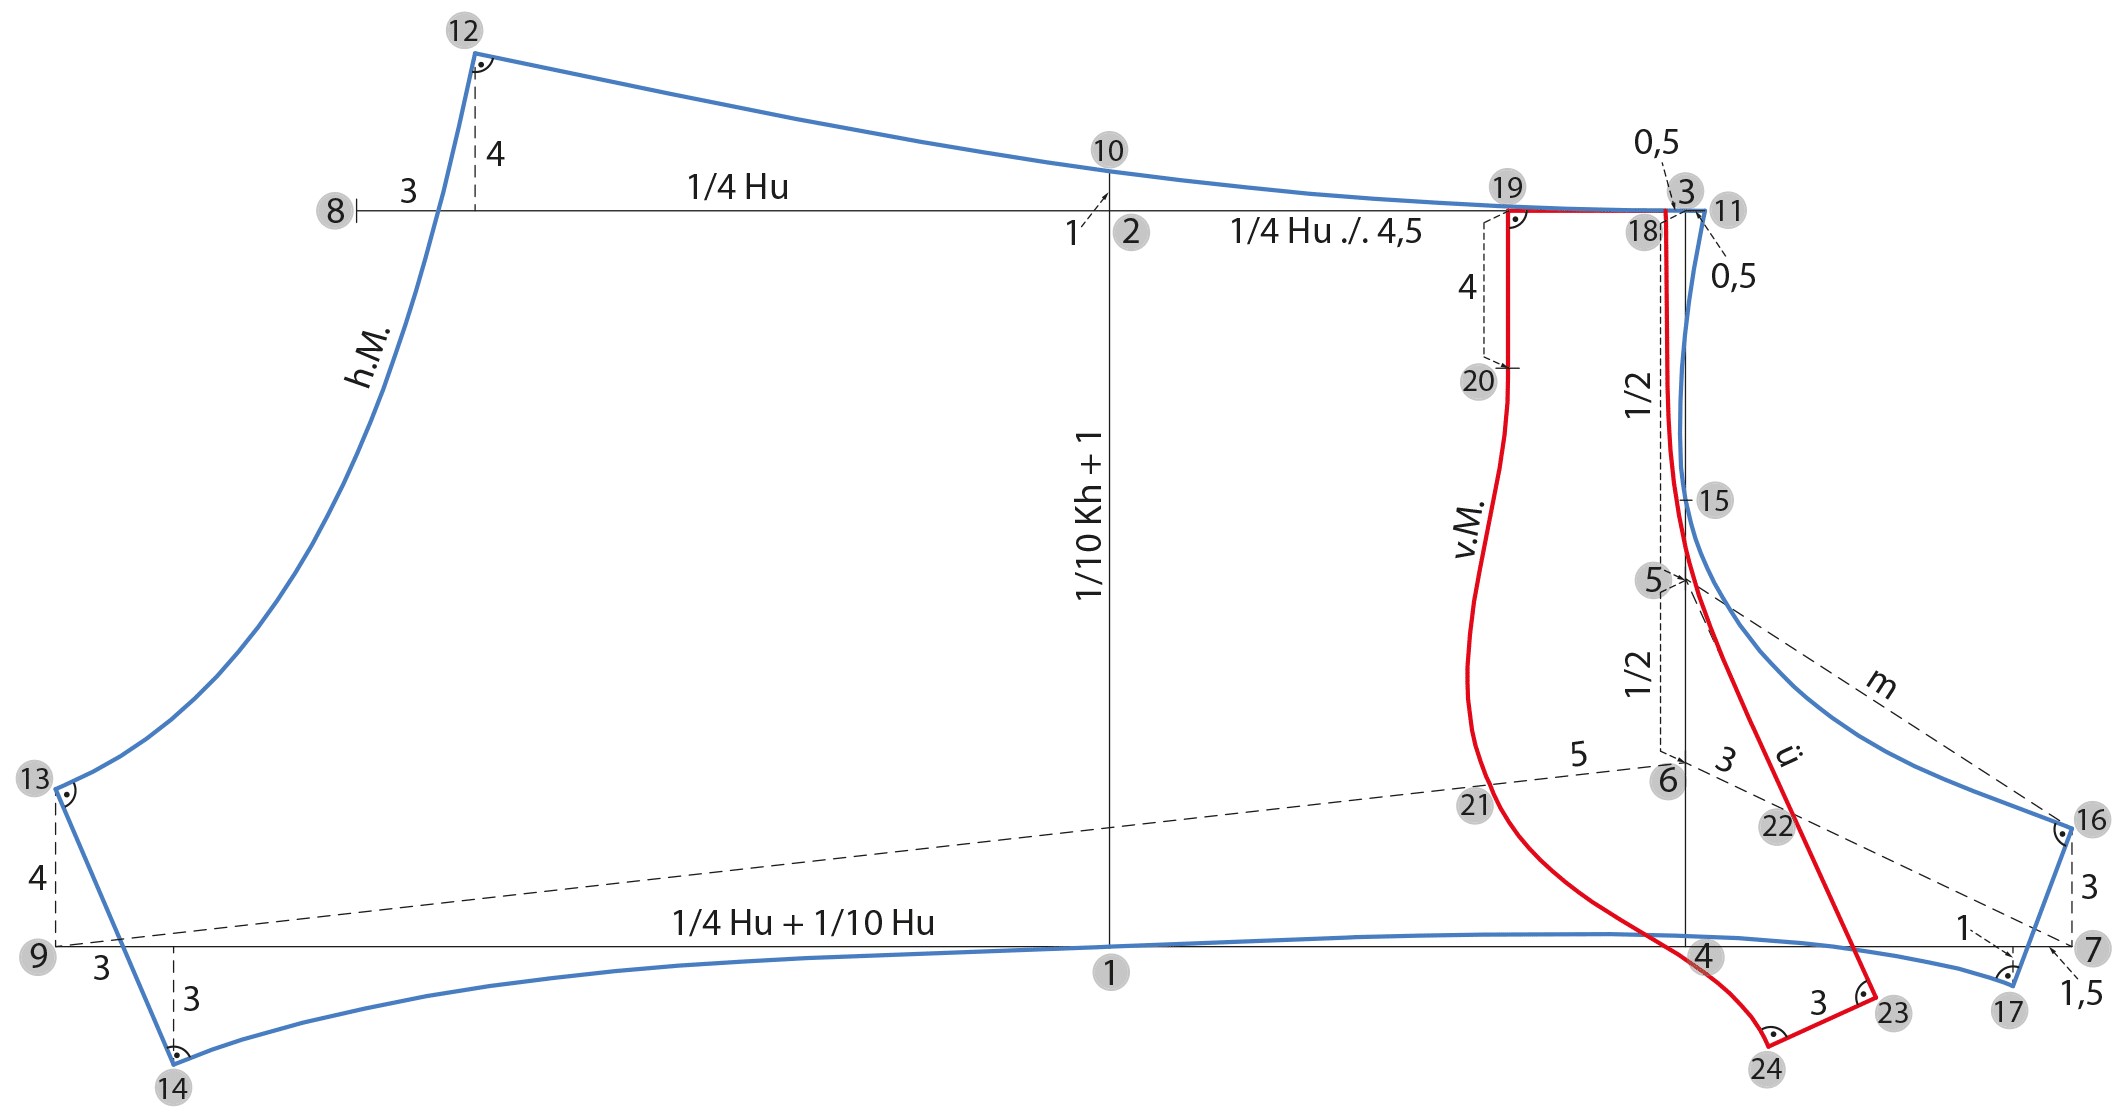
Guidelines (shown in black)
1 – 2 Measure 1/10 of the body height plus 1 cm = 18.7 cm along the vertical baseline.
2 – 3 Square out to the right and measure ¼ hip girth minus 4.5 cm = 14.6 cm. Measure the same distance from 1 – 4
3 – 4 Mark the halfway point = point 5
5 – 4 Mark the halfway point = point 6
4 – 7 Measure 1/20 of the hip girth plus 6 cm = 9.8 cm
2 – 8 Square out to the left and measure 1/4 of the hip girth = 19.1 cm.
1 – 9 Square out to the left and measure 1/4 of the hip girth plus 1/10 of the hip girth = 26.8 cm.
Side Panel (shown in blue)
2 – 10 Extend the baseline 1 cm upwards.
3 – 11 Measure 0.5 cm to the right.
8 – 12 Measure 3 cm to the right and then square up 4 cm.
11 –12 Draw the waistline slightly rounded over point 10.
9 – 13 Square up and measure 4 cm.
9 – 14 Measure 3 cm to the right and square down 3 cm.
13 – 14 Connect both points with a straight line for the inseam.
12 – 13 Draw the centre back perpendicular to the waistline as shown in the illustration.
5 – 15 Measure 2 cm upwards.
7 – 16 Square up and measure 3 cm.
7 – 17 Measure 1.5 cm to the left and 1 cm downwards.
16 – 17 Connect both points with a straight line for the inseam.
11–15–16 Connect the points as shown for the front panel seam. The hollow curve between points 11 and 15 is beneficial for striped fabric or rib knit.
14–1–17 Draw the hemline slightly rounded as shown in the illustration.
Front Panel (shown in red)
The front is constructed mirrored – the curved part forms the centre front and is sewn together later.
6 – 7 Draw a guideline to the left.
6 – 9 Draw another guideline to the right.
3 – 18 Measure 0.5 cm along the waistline.
18 – 19 Mark the front 4 cm wide.
19 – 20 Square down and measure 4 cm.
6 – 21 Measure 5 cm along the guideline to the left.
6 – 22 Measure 3 cm along the right guideline.
5 – 16 Measure the distance and transfer this amount from point 5 downwards over point 22, results in point 23.
18–22–23 Draw the front seamline as shown in the illustration.
23 – 24 Draw the front panel 3 cm wide at the bottom.
20 – 21 – 24 Finish the centre front as shown.
Jersey Panty – Cutting & Sewing
Cutting

Cut the following pieces (left and right): two pant pieces and four front pieces (two double).
Add 0.5 cm seam allowance to the waistline and 2 cm to 3 cm hem allowance. Mark all other seam allowances 1 cm wide. The centre front, centre back and the front seamlines are marked in the illustration.
Sewing
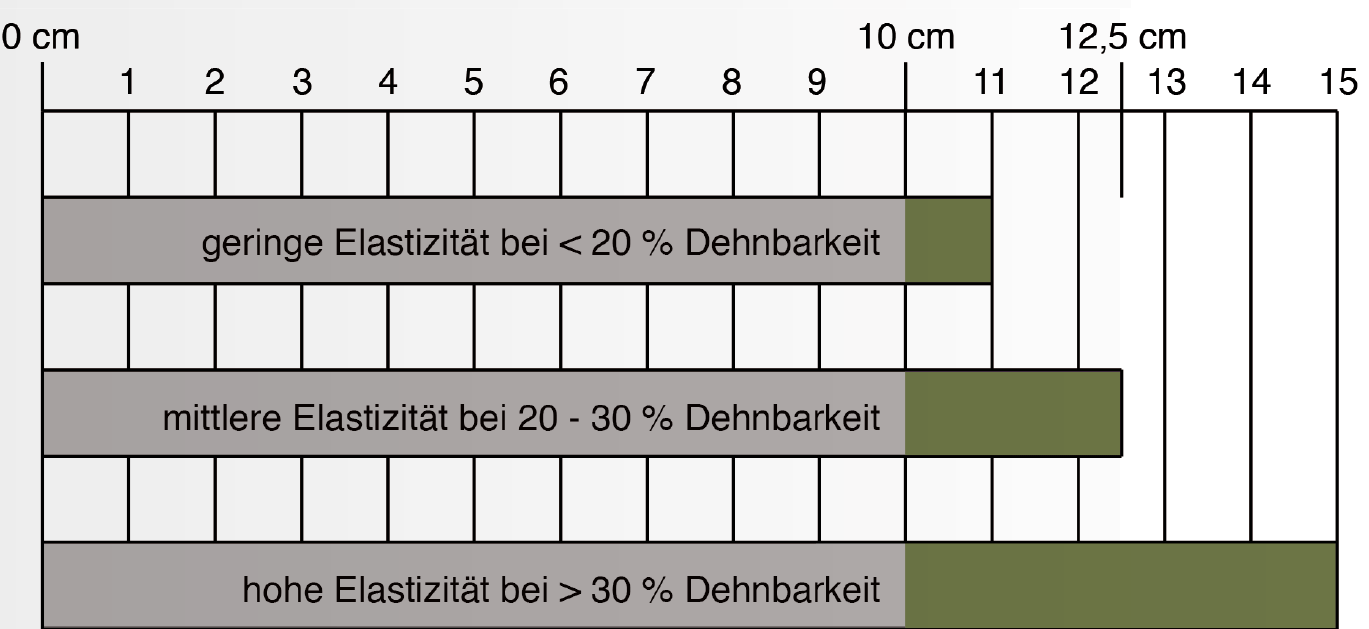
The fabric for this panty has a two-way stretch of 25%, i.e. 10 cm of fabric can be stretched to 12.5 cm. To determine the stretch, fold the fabric in half and mark 10 cm on the resulting fold edge. Pull the fabric to its maximum width, and compare the stretch with the chart.
All seams should be as elastic as the fabric and should not be restricting. Sew all closing seams with an overlock machine. Use a zig-zag stitch or a flatlock (cover stitch) machine for waistband and hem.
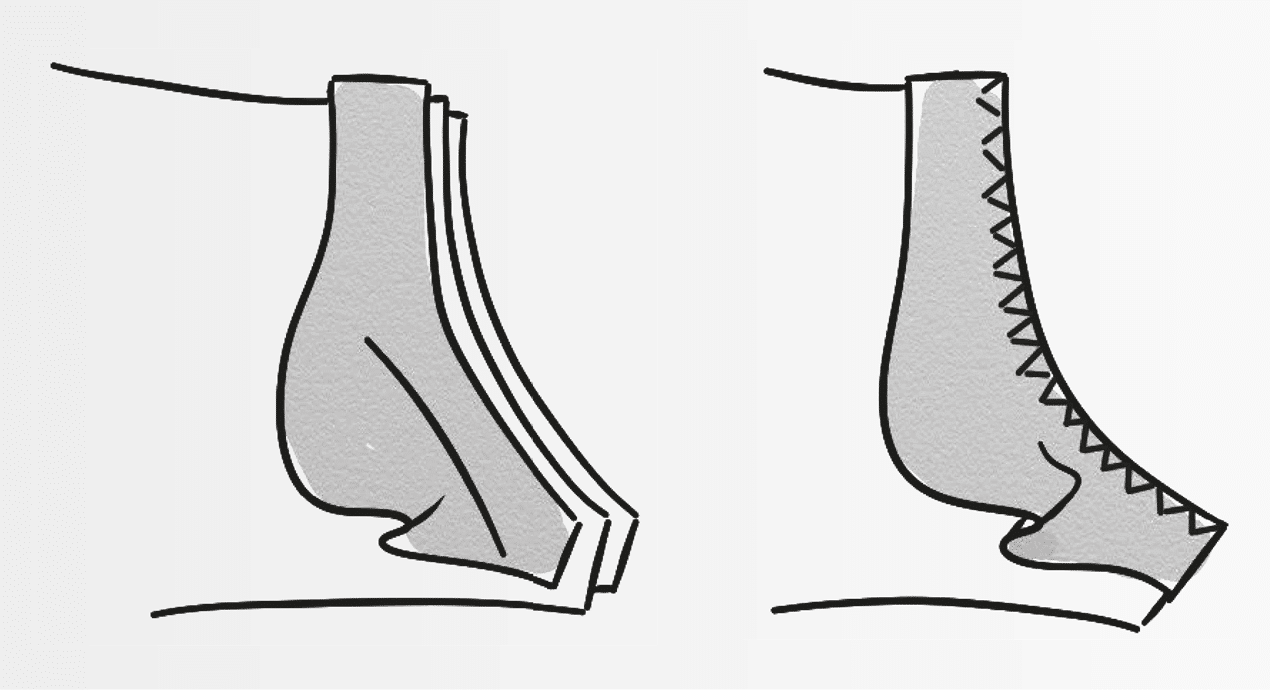
Place one front piece on the front seam right sides together and another front piece underneath. Sew all three pieces together with an overlock seam. Do the same on the other panty leg. Fold the front pieces forward and smooth the seam.
Place both panty legs right sides together and fold away the outer front pieces so that only the inner front pieces are placed right sides together. Sew the centre front with the overlock machine.
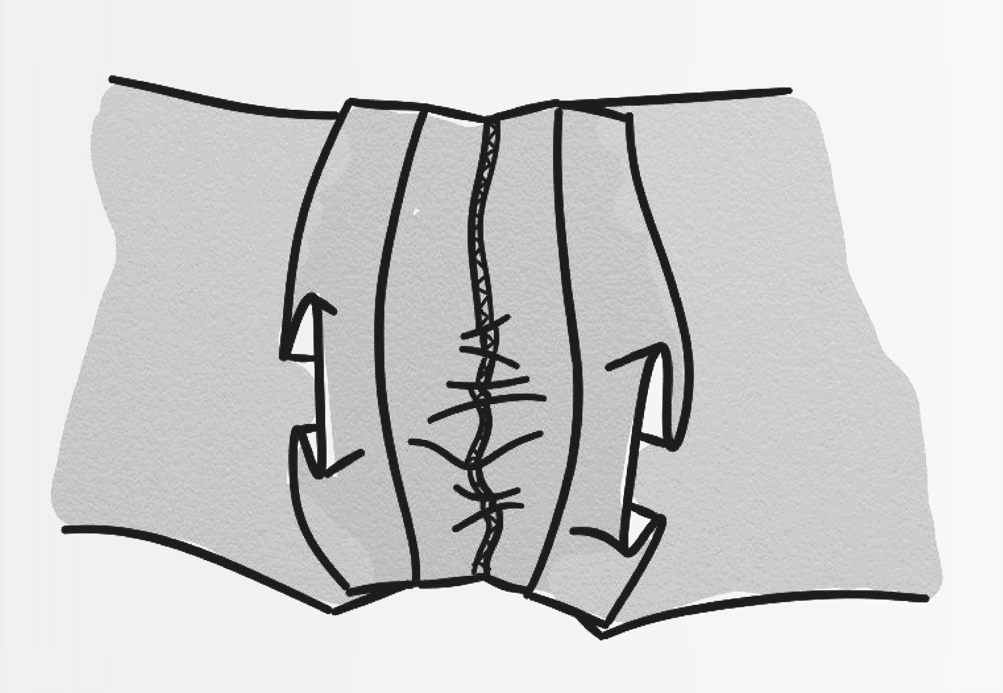
Smooth out the seam. The panty legs are now sewn together at the centre front seam – the overlock seam shows between both front pieces.
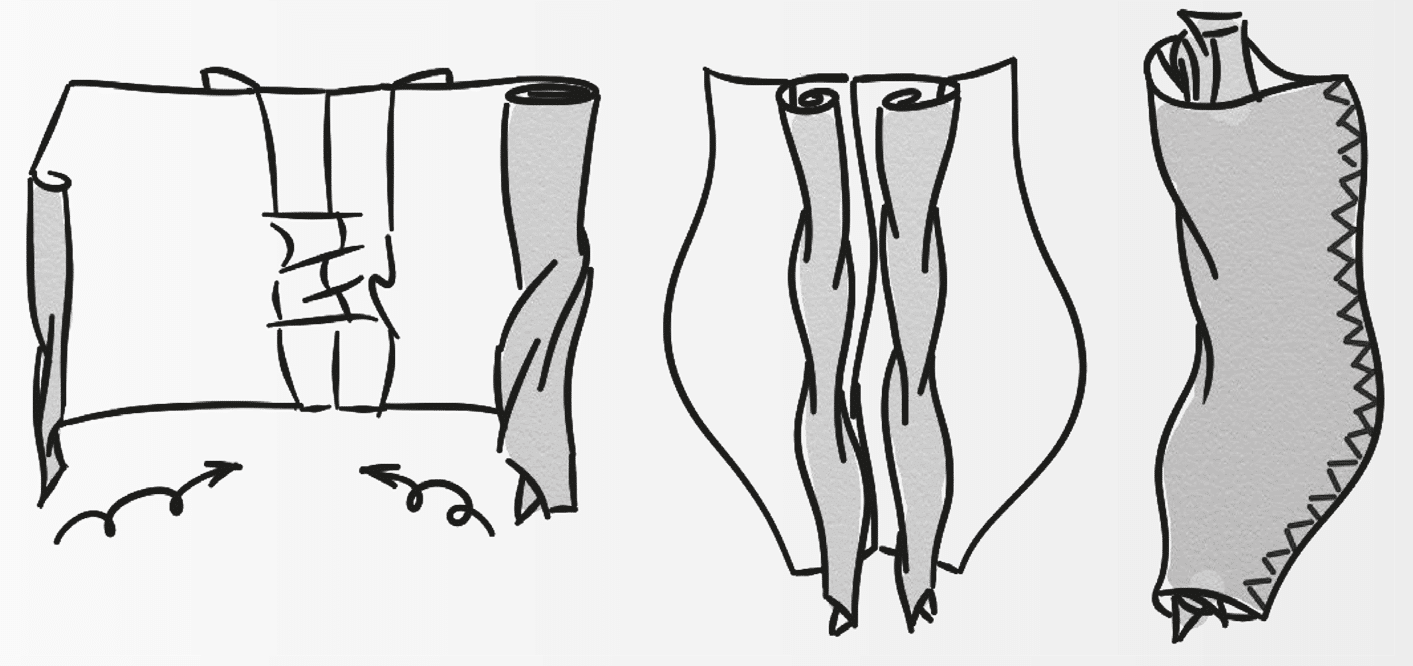
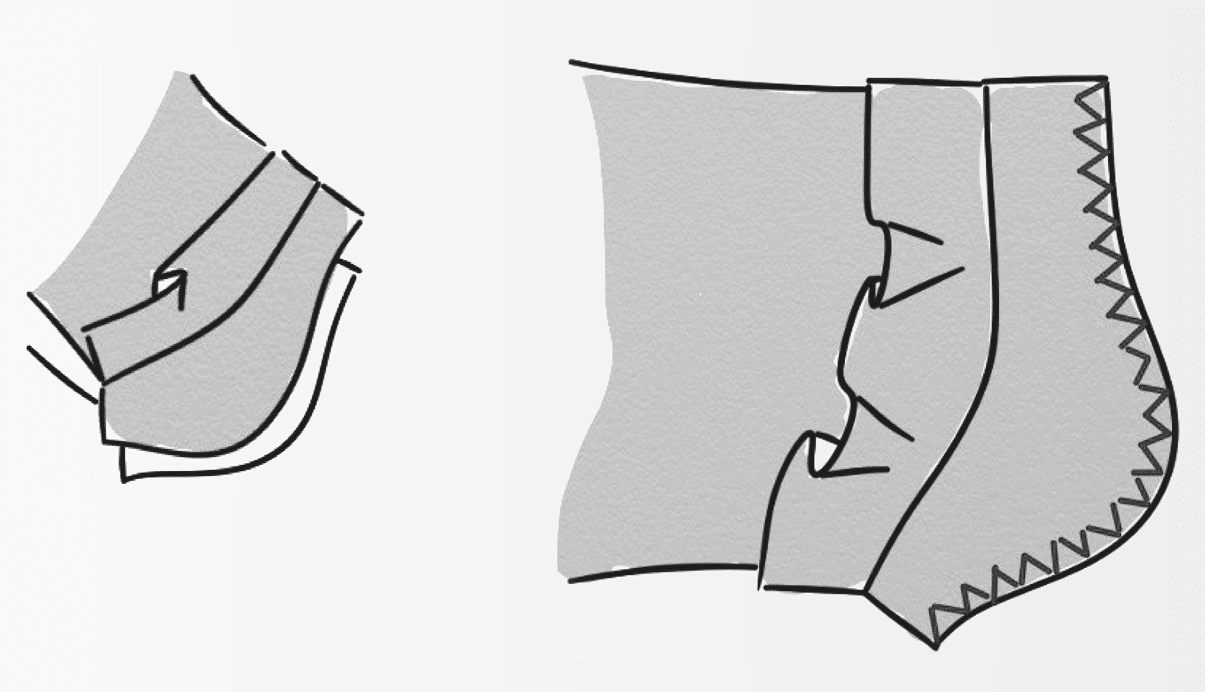
Place the pants so that the loose front pieces are underneath and then roll up the leg panels towards the centre. Fold the open front pieces over the rolled-up leg pieces and then close the remaining front pieces at the centre front with an overlock stitch. Be careful to not sew the inner pieces of the pants in the seam..
Many more pattern instructions and finished patterns for sewing can be found in our online shop.