Sew fabric belt
Deutsch
Belts were manufactured in almost every haberdashery for many decades. This has changed in the meantime and is rarely possible nowadays. There is a wide selection of chic belt models in different materials. However, if belts or belt clips are made to match, including the belt tip custom tailoring is required. (Excerpt from the book Atelier -Fachwissen aus der Praxis Teil 1)
Sewing instruction: Belt Tip
Who has not been upset about the tip during the usual process at least once? If there is too much seam allowance, the tip doesn’t look as smooth, if you trim too close to the seam, the durability is not given. Reduce the width from the sides to receive a continuous seam and stable corners.
Cutting Pattern Belt
- Cut 2x the width of the belt and add 1 cm seam allowance to each side, belt length plus over-, underlap and 1 cm. Interfacing – Use the waist- shape interfacing by Vlieseline or choose an appropriate interfacing for the belt. Cut the interfacing with a right-angled tip.
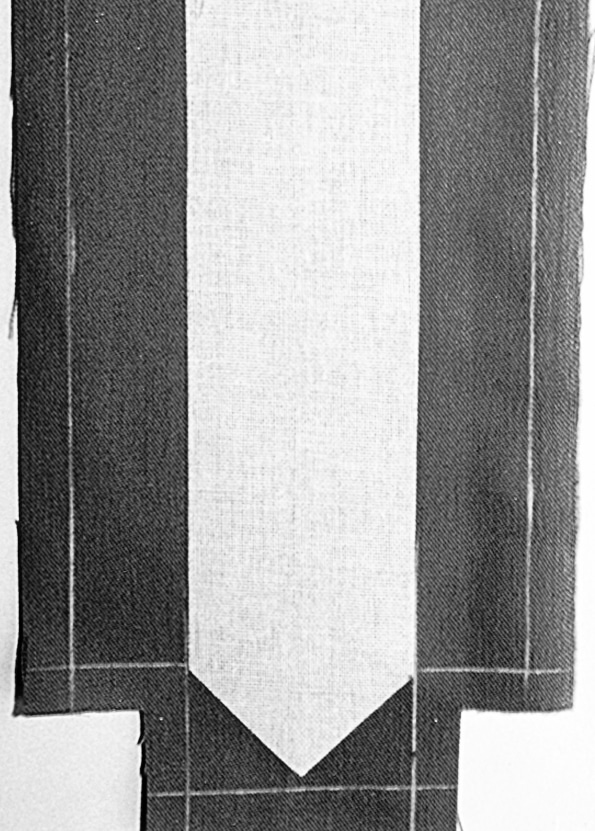
- Iron the interfacing in the centre and secure the tip of the interfacing with an easy removable basting stitch. Mark the seam and the corners. Draw the corners, half belt width in both directions and sew. Iron the seam allowance apart and close the belt seam.
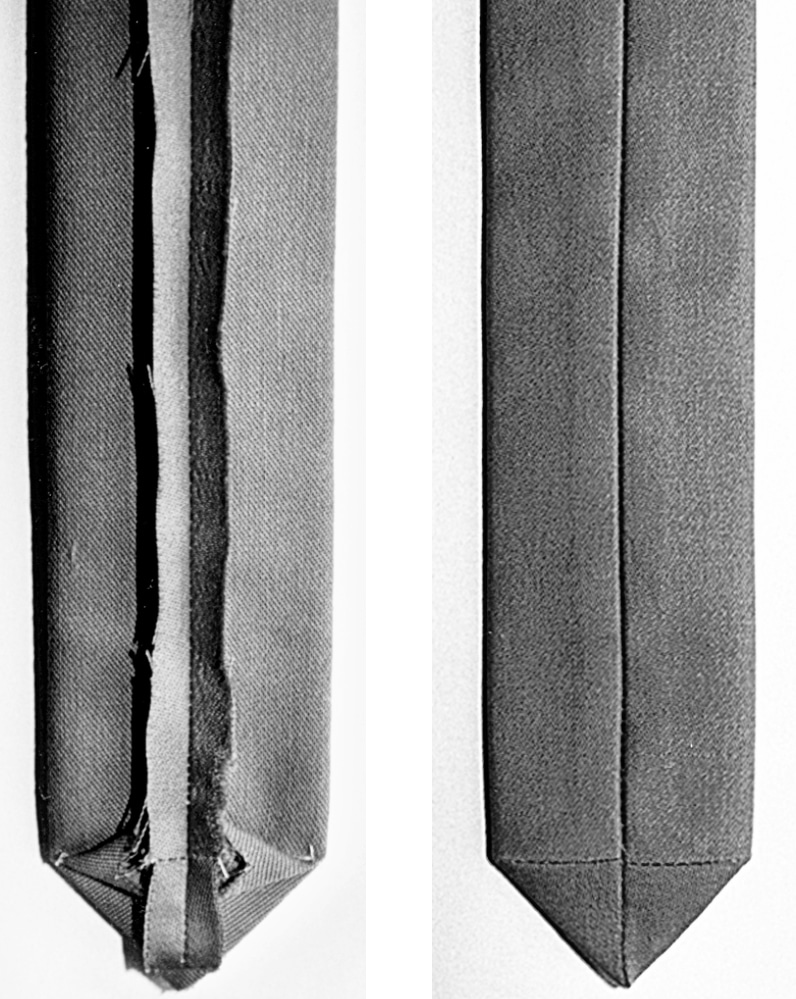
- Iron the belt seam flat at the edge using the ironing board. This avoids ironed break edges. Turn the belt to right side. Pay close attention to the right position of the seams. The result is a smooth and durable belt tip.
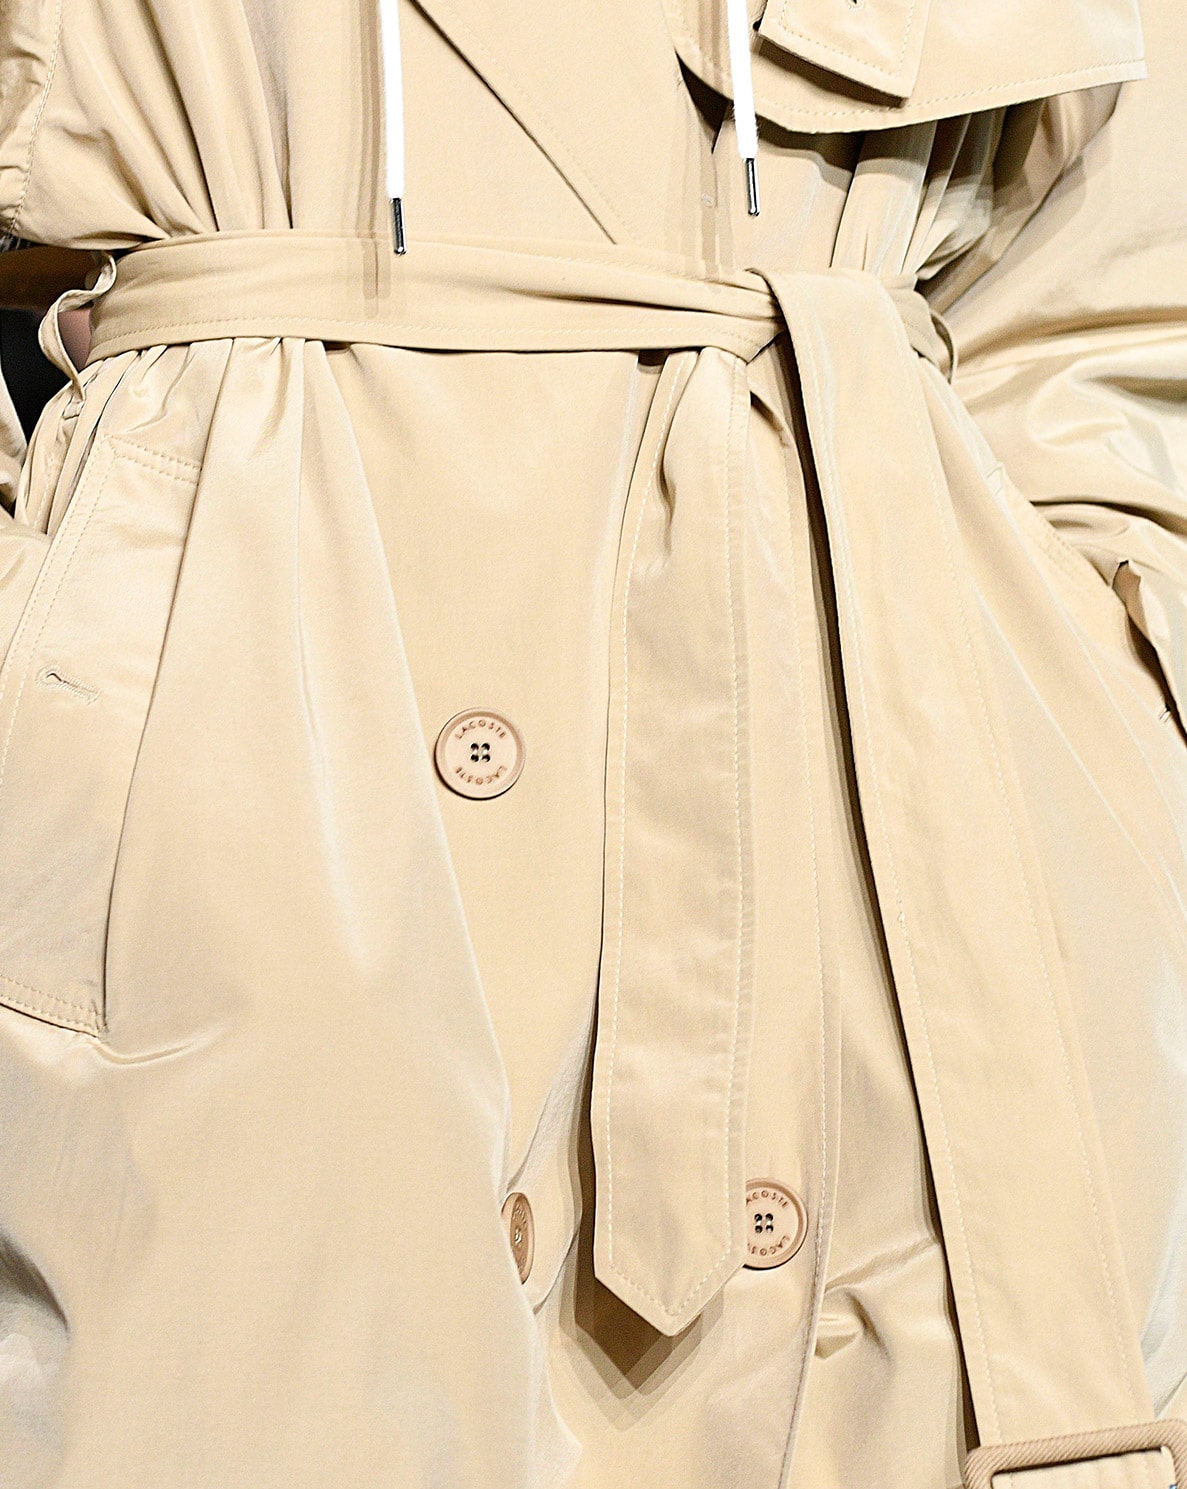
Apron Ties
The apron waistband can be continued with fabric ties. Attach very wide ties a just a few centimetres away from the end of the waistband. For a curvy body shape, shorten the waistband about 5 cm away from the centre back and add the fabric ties so that there is enough space for the knot. The waistband ends will be covered by the bow ties. The ties should not be attached anywhere in between. The length of the ties should be around 2/3 to 3/4 of the skirt length. The tie ends can be finished in a variety of designs.
Simple Ties
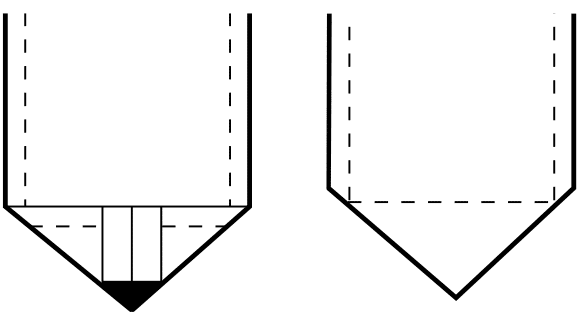
- For this variant the seam is ironed apart, while the corner is laid and not trimmed as usual. The result is a stable, durable hem, which can not tear even after more frequent washing.
- Hand-stitch the resulting diagonal line in silk fabric, when working with cotton fabric it is essential to stitch through the already existing line. Parallel lines look unpleasant and take just as long.
Curved Ties
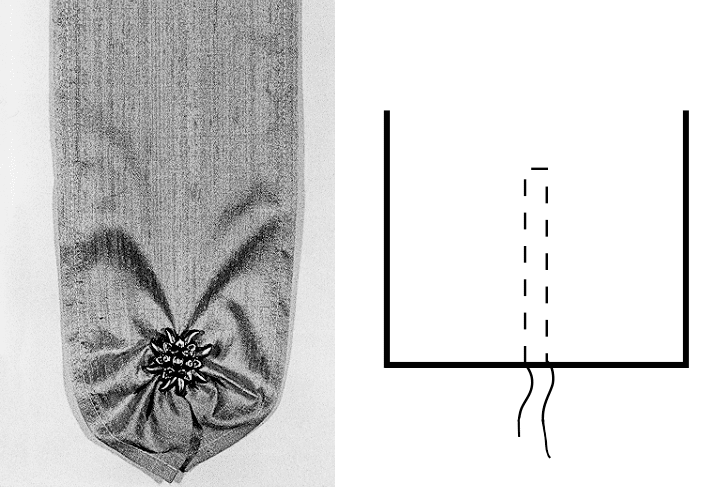
- For this variant, the tie may not be too wide. Depending on the fabric a sample is recommended. To achieve a nice rounded shape stitch along the curve and slightly pull in the ends until a nice round shape is formed. Decorate the end with a modern accessory after the thread is tightened and sewn. If a tough satin ribbon is used, e.g. in communion, bridal or similar models, a pearl or drip bead at the tip is an absolute eye-catcher.
One-Sided Tip

- To get a simple and clean corner, create a selvedge at the bottom. Flip the already serged side to the seam width and edgestitch the folded hem above to achieve an exact tip. If a selvage is not possible, place the tie to the first edge and wrap the lower corner inwards.
Tip with Tassel or Pompoms
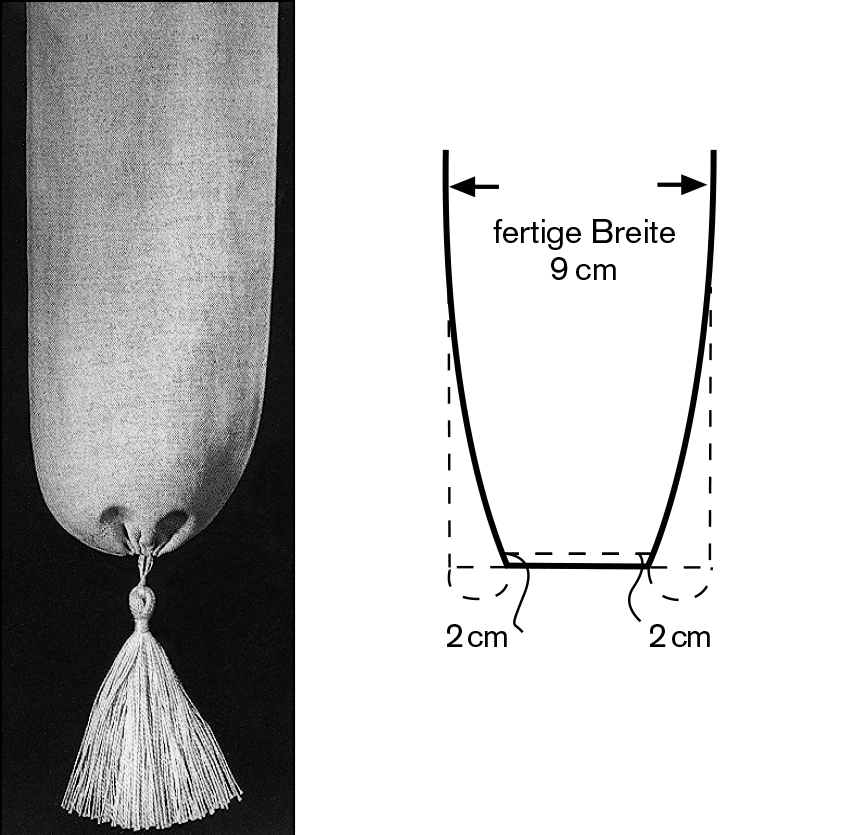
With this finish, the thread-straight tape is doubled and turned over. At the end, draw a flat sheet of 2-2.5 cm inwards, with a finished width of 9 cm. In the lower part of the tape, a light, non-adhesive inlay must be worked in because of the dimensional stability. (If the tape is used as a belt, a firm insert must be inserted into the waist area up to the knot). The middle part is pulled together with row stitches, sewn and finished with an ornament. A pom-pom looks decorative for very young wearers and a tassel for the more mature lady.