Pattern construction for collar with stand
Deutsch

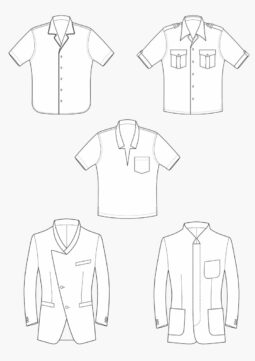
The collar can be a creative accessory on blouses and dresses – so eye-catching collars are in trend! Here are three instructions on how to construct pattern for collars with stand. An article from the Damen-Rundschau 02.2012.
Inhalt:
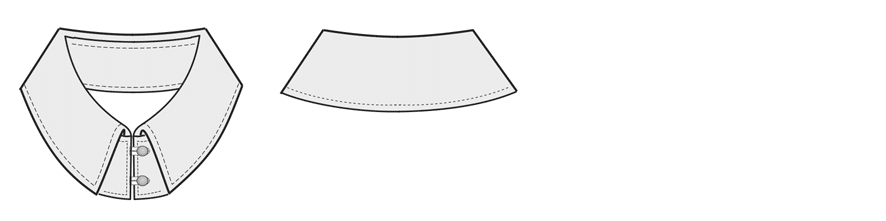
Convertible Collar with Separate Stand
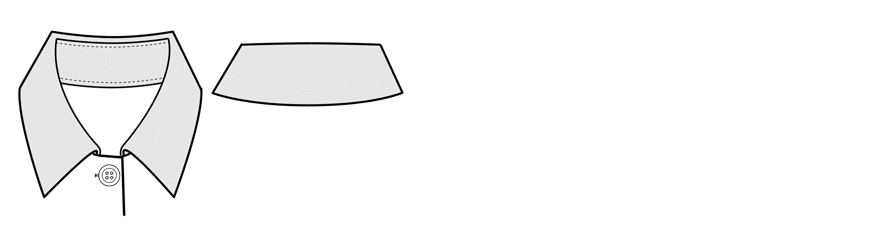
This collar shows a very good fit due to the separation of collar stand and collar. First draw the collar and the collar stand in one like a normal convertible collar. Then separate the collar stand from the collar and reduce the width at the collar seam and the collar stand seam. This way the collar has a more snug fit around the neck and is not as flat as a regular convertible collar.
Collar Construction:
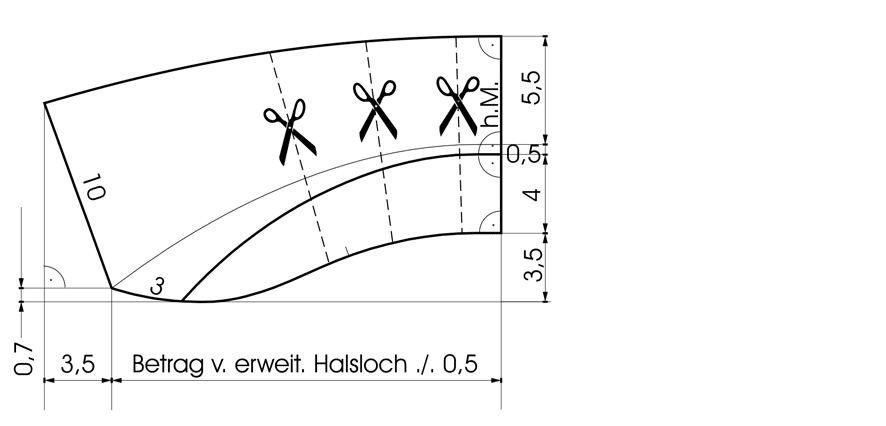
Lower the basic neckline 1 cm at the shoulder, 1.5 cm at the centre front and 0.5 cm at the centre back. Draw the new neckline perpendicular to the centre back. Mark the collar insert point 1 cm away from the centre front. Measure the lowered neckline on the front and back pattern from the centre back to the collar insert point. Draw a horizontal line with the same length as the lowered neckline minus 0.5 cm. From the starting point, measure 3.5 cm for the collar roll, 4 cm for the collar stand, 0.5 cm for the collar break line and 5.5 cm for the collar width upward. Raise the collar front 0.7 cm and measure 3.5 cm from this point to the left for the collar point. Draw the collar front edge 10 cm wide. Plot the collar and the collar stand as shown in the illustration. Start the collar stand 3 cm away from the front edge. Draw the cutting lines as shown.
Collar modification:
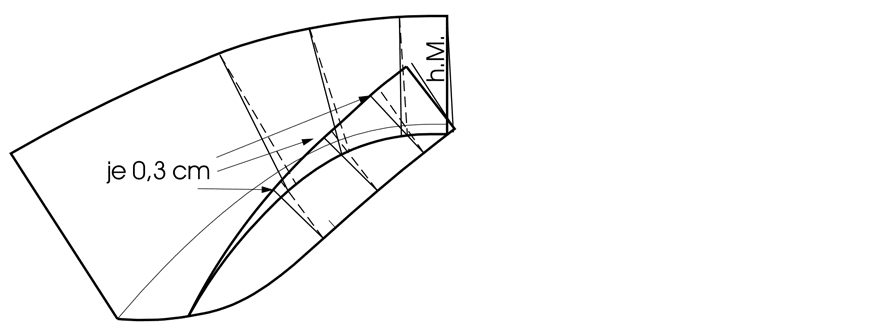
Separate the collar and the collar stand at the seamline. Cut through each pattern piece from the collar stand seam to the outer edge. Overlap the cutting at the collar stand seam 0.3 cm each. Taper the centre back at the collar stand seam 0.2 cm each.
Finished Pattern Pieces:
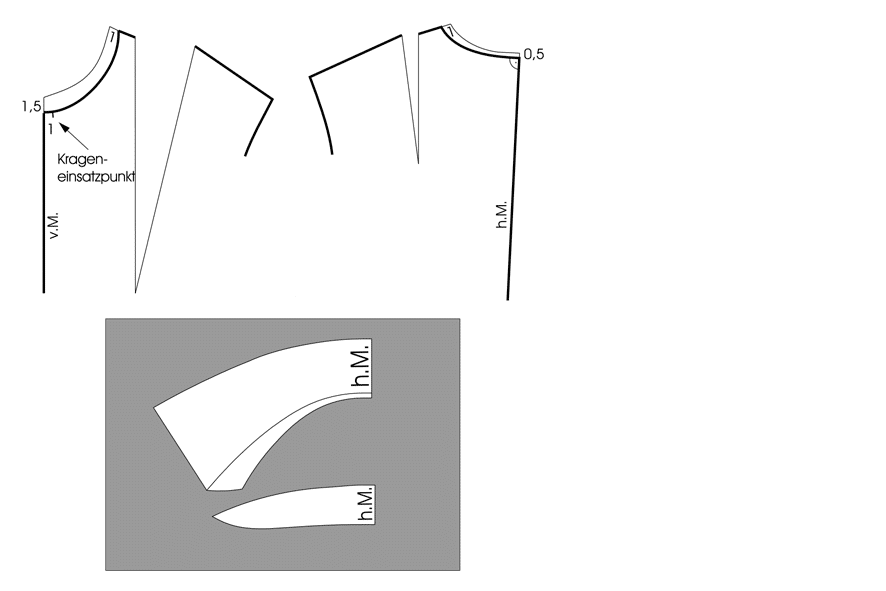
Copy the collar and the collar stand. Blend the seamlines. Check the collar for sufficient length at the outer edge. Depending on the material, add around 0.4 cm roll width to the upper collar. Check all seam transitions and mark the grainline.

Collar with High Stand
The collar stand is designed up to the centre front and can be drafted separately at a horizontal baseline. The collar has a high and conservative look.
Collar Construction:

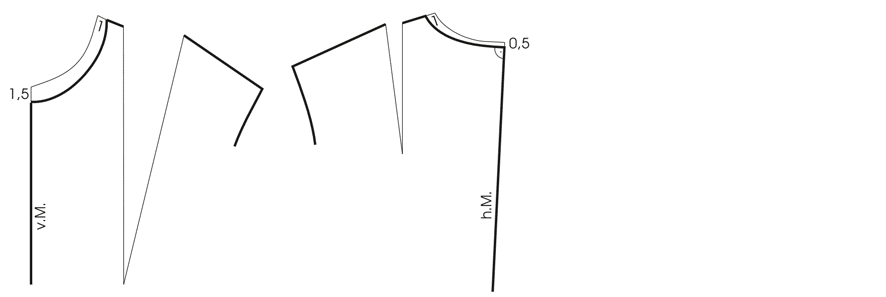
Lower the basic neckline only slightly for this collar with high stand. Lower the neckline 1 cm at the shoulder, 0.5 cm at the centre back and 1.5 cm at the centre front. Draw the new neckline perpendicular to the centre back. Measure the lowered neckline for the collar construction. The collar stand is designed up to the centre front and is closed edge to edge with loops and buttons. Draw a horizontal line with the same length as the lowered neckline. From the starting point, measure 4.5 cm for the collar stand, 4.5 cm for the collar roll and 5.5 cm for the collar width upward. Raise the collar front 2.5 cm and draw the collar stand seam. Draw the centre front of the collar stand perpendicular to the seamline 4.5 cm wide. Complete the collar stand and mark the collar insert point 0.3 cm away from the centre front. Measure 1.5 cm from this point to the left for the collar point. Draw the collar front edge 5 cm wide. Plot the collar as shown in the illustration.
You can find many more pattern constructions in the book Schnittkonstruktionen für Kleider und Blusen
Eton Collar
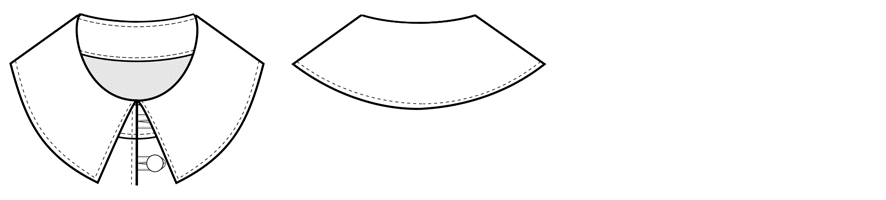
This collar is constructed like a Peter Pan collar, but with separate collar stand. Collar stand and collar are drawn on the combined front and back. The collar stand has a snug fit around the neck and the collar lies rather flat due to the round outer edge.
Collar Construction:
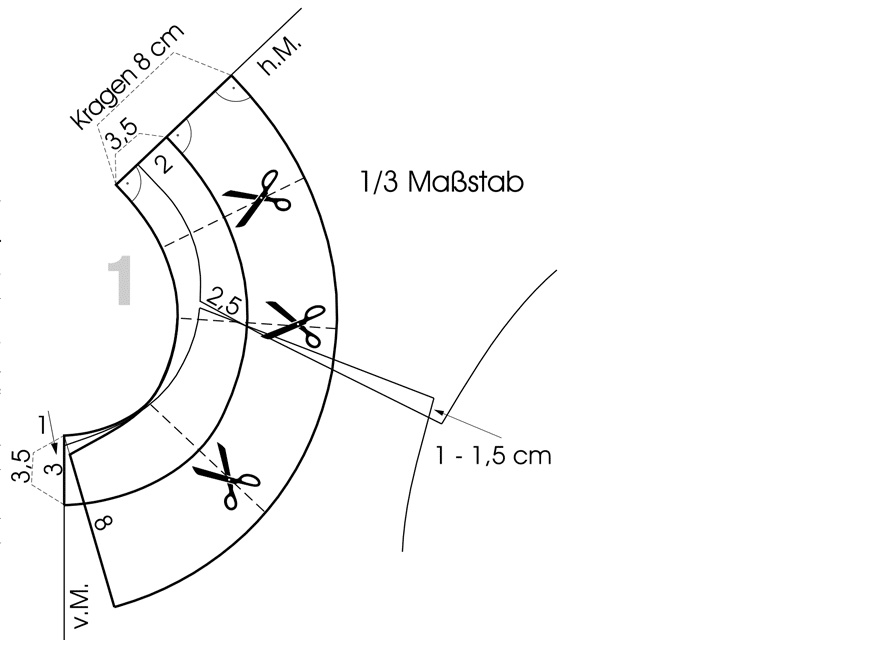
Close the bust dart on the front pattern. Lower the neckline 2.5 cm at the shoulder and 2 cm at the centre back. Lower the neckline 3 cm at the centre front and draw the new neckline perpendicular to the centre front and centre back. Place the back pattern on the front shoulder with the lowered neck points matching and 1 – 1.5 cm overlap at the armhole. The slight overlap at the shoulder gives this collar a very flat shape but, at the same time, prevents a too wide and wavy collar edge. Draw the collar stand 3.5 cm wide parallel to the lowered neckline. Plot the collar 8 cm wide as shown in the illustration. Draw the front collar 1 cm lower than the neckline for a better fall. Mark the cutting lines according to the illustration.
Finished Pattern Pieces:
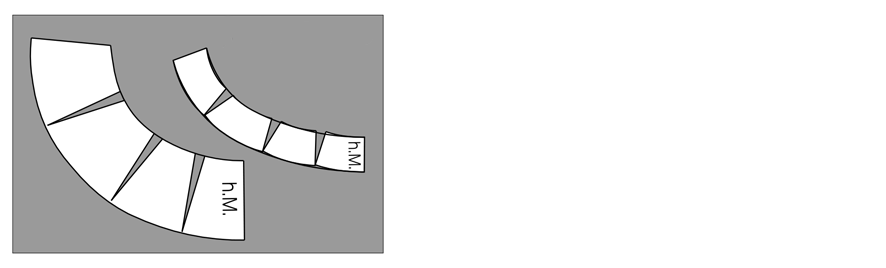
Trace a copy of the collar and the collar stand. Slash and spread the neckline 1 cm at each cutting line. Blend the seamlines. Fit the collar for adequate length of the outer edge. Add 0 – 0.4 cm roll width to the upper collar depending on the material. Check all seam transitions and mark the grainlines.