
Tutorial: Tambour Embroidery
Deutsch
The name »Tambour Embroidery« comes from the word tambourine (drum). This embroidery technique is implemented by stretching a piece of fabric tightly into a frame like a drum. Most renowned French couture embroidery studios such as »Lesage« work with this stitch. In France this technique is also called »Lunéville«. The advantage of tambour embroidery compared with simple embroidery is that only after a few hours of practice there is an essential faster progress than with a simple embroidery needle. In this article we show in a simple step-by-step guide how to do this traditional embroidery technique. The complete instruction can be found in the M. Müller & Sohn magazine 01-02.2020. A continuation of the instruction Tambour embroidery with beads will follow in the 04.2020 issue.

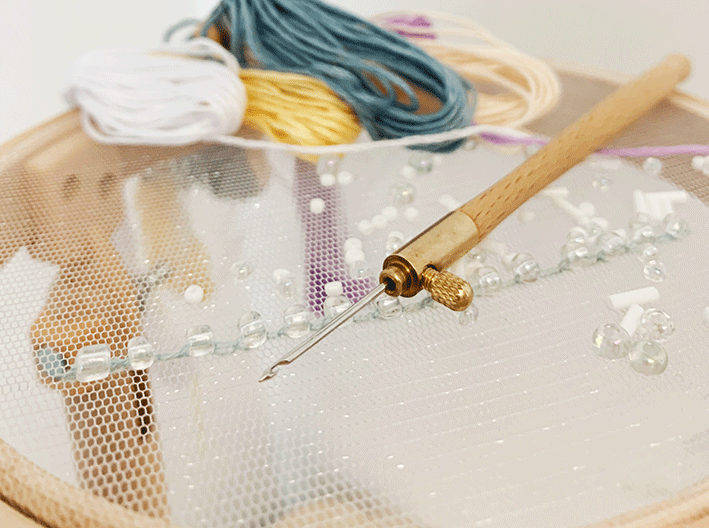
What do you need to embroider tambour?
The tambourine needle is a special fine and pointed crochet needle. When inserting the needle, make sure that the opening of the needle is on the same side as the locking screw. This makes it easier to evaluate in which direction the crochet points during embroidery. Tambour beginners should first practice on a piece of fabric and try out different stitches and textile decoration techniques. Organza is best suited for this, but you can also use tulle. In principle, this type of embroidery can also be transferred to other textiles if you have a good handling of the needle. Suitable threads are for example »Fil a Gant«, silk thread, embroidery twist or metallic thread. As an introduction it is recommended to practice the simple chain stitch in different sizes. Afterwards beautiful corners, embroidery in a circle and surface embroidery can be tried. Finally, beads or sequins can also be incorporated. For the tambourine embroidery a special embroidery hoop can be used to keep both hands free, as it does not need to be held.
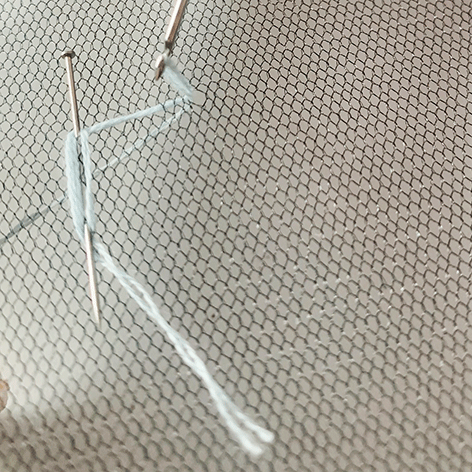
Securing at the beginning of the seam
To start with we show how the beginning of the seam can be fixed. For a better illustration, the stitch is worked a little larger than necessary. The securing stitches should actually be as small as possible to not attract any attention.
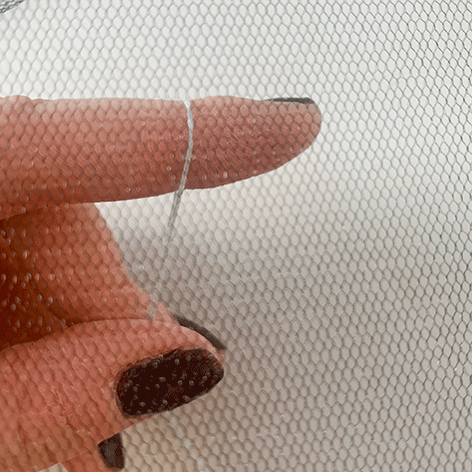
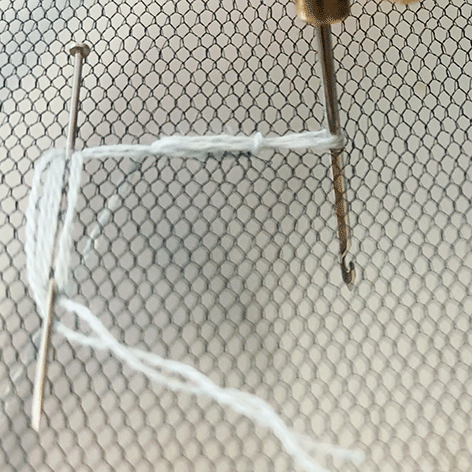
1 Place the embroidery thread around your index finger and fixate it with your thumb on your middle finger to create tension on it, then hold it under the embroidery frame.
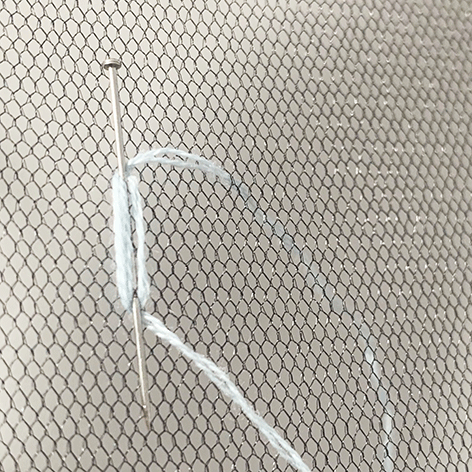
2 Prick with the tambourine needle from above and pull the beginning of the yarn upwards. Place the needle on the side of the yarn and wind the beginning three times around the needle to fixate it.
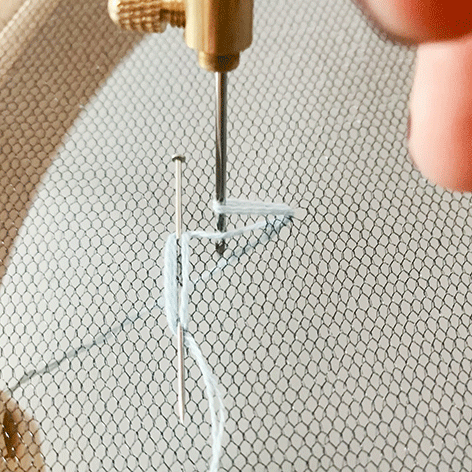
3 For the first stitch, the needle is inserted from above at a distance from the start of the thread. The opening of the needle and the locking screw always point in the direction of the embroidery, in this case to the right. In order to avoid thread pulling during the stitching process, the needle should be held as vertically as possible.
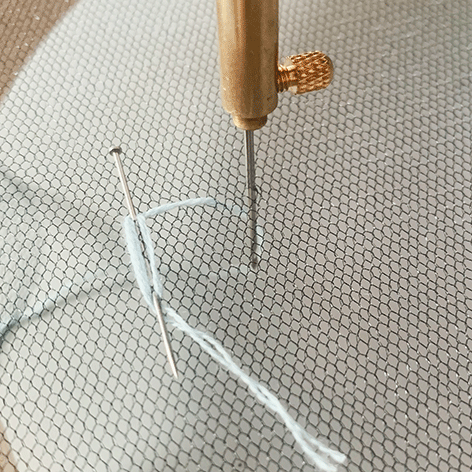
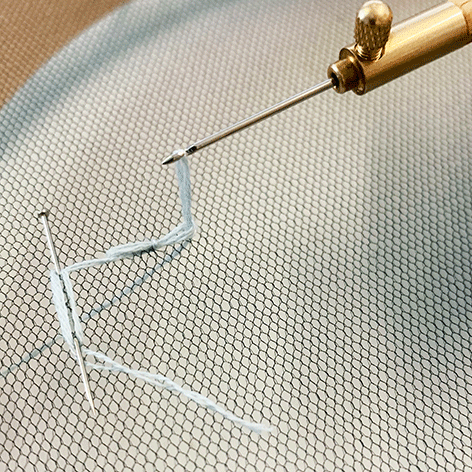
4 Then wrap the yarn from behind once around the whole needle and then turn the needle 180 degrees clockwise that the screw and the opening point to the left . To increase the tension and stabilize the yarn in the needle hook, pull the yarn slightly with your fingers. Now the thread can be brought to the surface. In order to get ready for the next stitch, the thread tension can now be loosened again.
5 The needle is already in the correct position for a reverse stitch, which should end behind the first stitch.
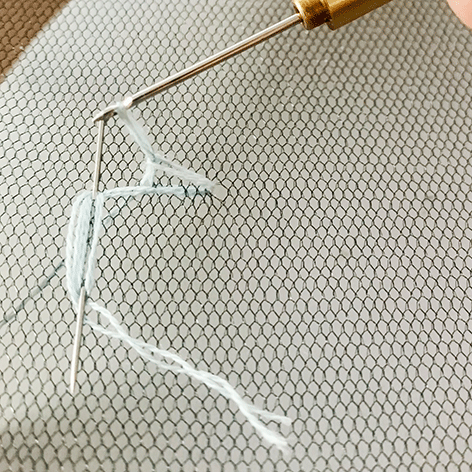
6 After the reverse stitch, wind the thread around the needle again, turn the needle 180 degrees, secure the thread in the hook and pull it to the surface, the loop should go through the previous stitch.
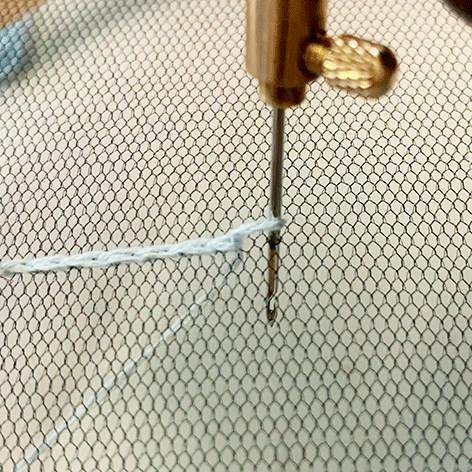
7 When the new loop is pulled to the right, the previous one moves with it. Now the previous loop should be tightened by pulling the thread underneath the embroidery hoop.
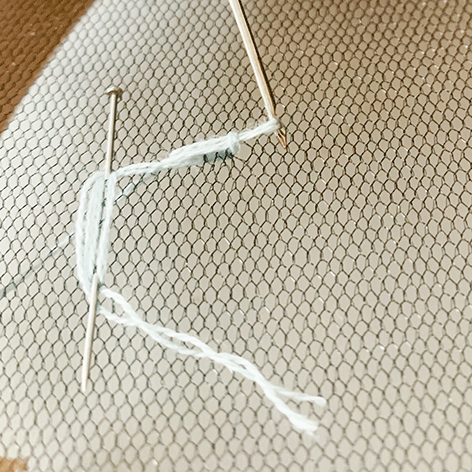
8 The final third safety stitch is located aft er the very first stitch. Aft er the needle has been inserted, the yarn is now wrapped around the crochet again, then the crochet is turned 180 degrees and the loop is pulled up.
9 After these three steps, i.e.: insertion, back stitch, forward stitch, the seam is secured and the actual embroidery can now start.
Chain Stitch
The chain stitch is suitable for simple lines or for fi lling entire areas. The principle here is the same as for the securing stitch, except that all stitches are worked forward.
Continued in M. Müller & Sohn Magazin 01-02.2020.
Hi I like the ideas I want to learn more thank you Serap couture
Dear Serap Couture, you can find the instructions for learning tambour embroidery in the issues 01-02.20 and 04.20. You can download the PDFs in the online shop:
https://www.muellerundsohn.com/en/shop/m-mueller-sohn-magazine-01-02-2020/
https://www.muellerundsohn.com/en/shop/m-mueller-sohn-magazine-04-2020/