Product: Download Pattern Construction Men: Jeans-Basics
Download Pattern Construction Men: Jeans-Basics
instructions for the pattern construction

How to tie a Tie

Narrow tie by Dolce & Gabbana
Inspiration Runway: Narrow tie by Dolce & Gabbana (Photo Credit: © CATWALKPIX.COM)


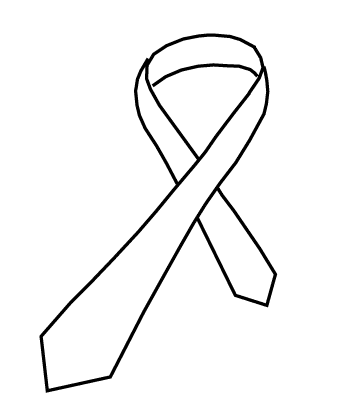
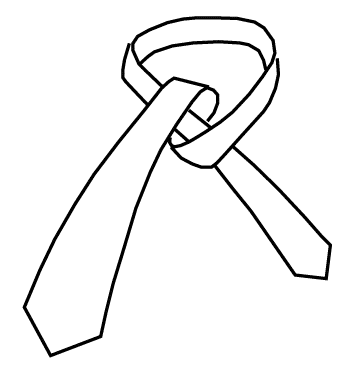
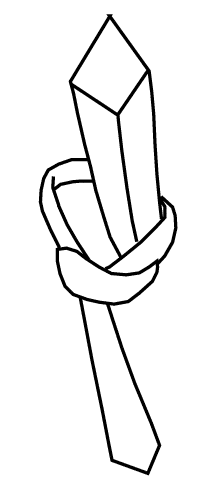
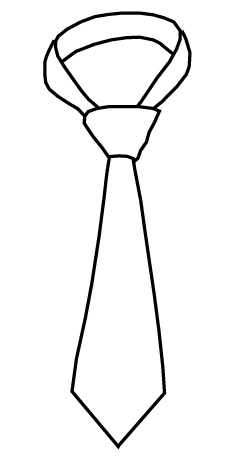
In a tie knot, the wide end of the tie is looped around the narrow end, creating a loop. The narrow end can then be pulled back and forth through this knot and the tie is thus made adjustable in width.

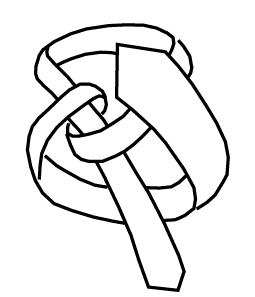
The most important tie knots:

  • Simple knot / Four in hand
  • Simple Windsor knot
  • Double Windor knot
  • Double knot / Victoria knot / Prince Albert knot
  • Pratt Knots / Shelby Knots
  • Oriental knot / Persian knot

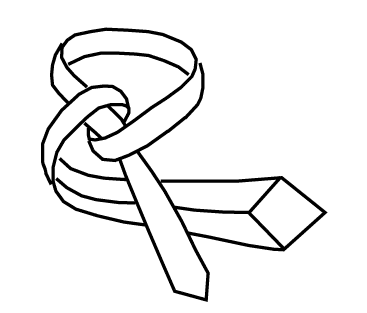
With the perfect tie knot, care should be taken that the wide end covers the narrow end of the tie and that the belt buckle is touched by the tie end or even slightly protrudes.

Tying a tie requires a little tact. In this article you will find simple instructions on how to tie a tie correctly. We  show different methods to fold a suitable handkerchief. You will find many more interesting facts about ties as well as instructions for how to make a pattern for a tie in our article Sewing a Tie.

Inhalt:


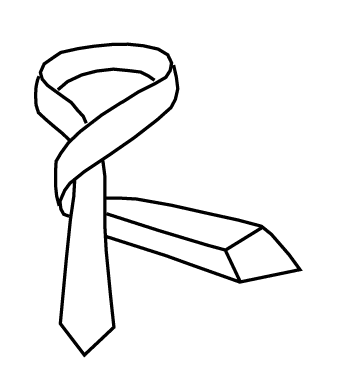
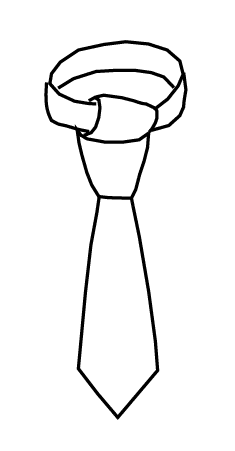
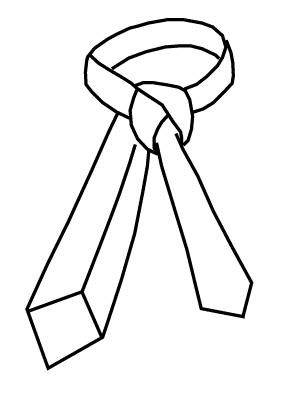
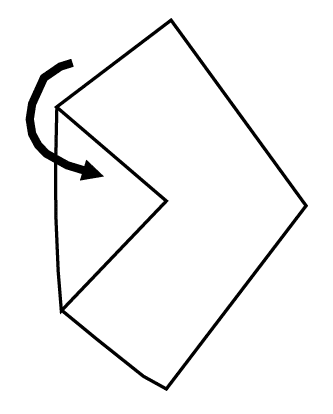
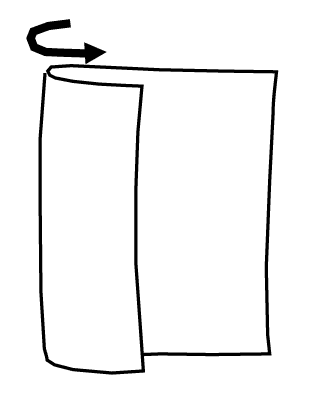
Instruction – The simple Windsor knot

The simple Windsor knot (also called half Windsor) is the classic among the tie knots and one of the most common knots in the world. The single Windsor knot is slightly smaller and more discreet than its big brother, the double Windsor knot.

1 The wide end of the tie is placed over the narrow end.


The rear end of the tie is then passed under the narrow end.


3  Fold up the wide end of the tie to the neck and lead it down again behind the loop.


4  Fold up the wide end of the tie one more time to the neck and lead it downwards behind the loop.


5  The wide end of the tie is then laid across the knot to the right and pulled through the part of the neck from below. (Photo Credit: © CATWALKPIX.COM)


The wide end of the tie is pulled through vertically downwards at the bottom of the transverse part. (Photo Credit: © CATWALKPIX.COM)


Now the knot can be pushed upwards and adapted to the neck.


  • Instructions for the construction of  patterns of tie and bow tie, rider’s plastron and cummerbund can be found in our free download.


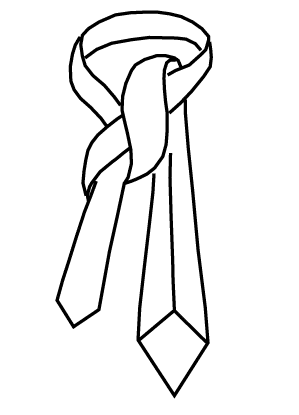
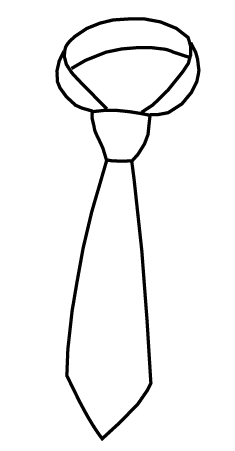
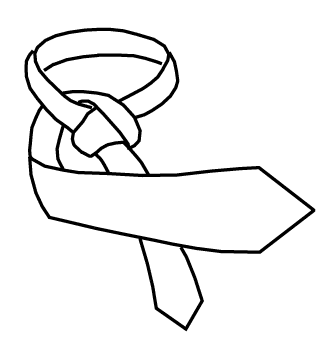
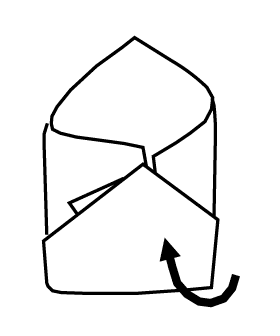
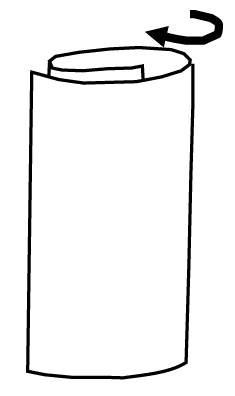
Instruction – The double Windsor knot

The double Windsor knot (also called large Windsor knot) is named after Duke of Windsor. He made this double knot popular for the tie. This type of tie is particularly suitable for shirts with widely spaced collar corners, such as the Kent collar or the shark collar. The knot is about a quarter larger than the simple Windor knot and therefore not suitable for ties with thick fabric or lining. The knot forms a wide triangular shape.


1 With the double Windsor you need a large part of the wide end and you have to hang the tie very far down on the right side. The first step is to place the wide end over the narrow end.


2In the second step, place the wide end around the narrow end from below and pull it out to the upper right.


3 Now insert the wide end under the node.


4Tip of tie forward again, fold towards neck. (Photo Credit: © CATWALKPIX.COM)


5Lead the wide end of the tie at the neck from above, behind the knot down.


6 Fold the wide end of the tie to the left.


7 …and from below, behind the part past the neck, pull up. (Photo Credit: © CATWALKPIX.COM)


8 The wide end of the tie is pulled through vertically downwards at the bottom of the transverse part.


Now the knot can be pushed upwards and adapted to the neck.


PDF Download: Download Book Men Fundamentals Menswear
88,00 €
TOC


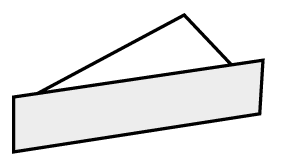
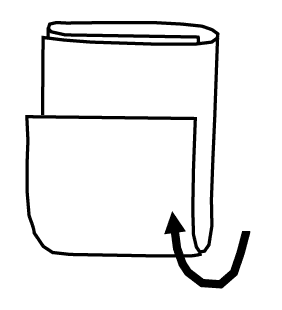
Instruction: Triangular folding

The triangular fold is somewhat more elegant than the very simple American fold.  So the handkerchief goes well with classic, dark suits.


1 Fold the left corner of the handkerchief towards the middle.


2 Fold the right corner of the handkerchief towards the left edge. So the upper thighs are somewhat asymmetrical. (Photo Credit: © CATWALKPIX.COM)


3 Fold the bottom corner upwards to form an envelope.


4 Now the handkerchief can be put into a breast pocket on the jacket.


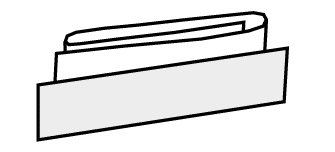
Instruction: American folding

The American folding (also called rectangular folding) is probably the most classic and easiest way to fold the handkerchief. The rectangularly folded handkerchief goes particularly well with a pinstripe suit. For this you choose a plain silk handkerchief.


1 Fold left edge to the right, towards the middle.


2 Place the right edge to the left, towards the left folding edge.


Fold approx. 1/3 of the handkerchief upwards.


4 Now the handkerchief can be put into a breast pocket on the jacket.


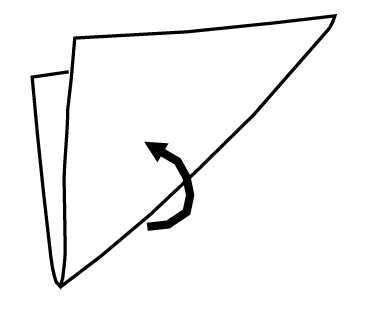
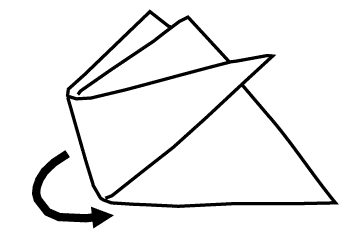
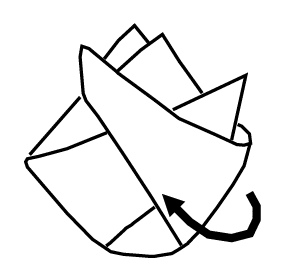
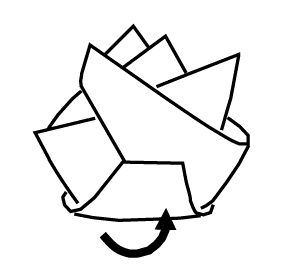
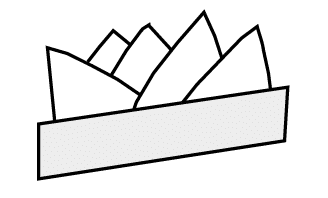
Instruction: Three-Corner-Up fold

Three-Corner-Up folding (also called Crown folding) is the most festive way to fold the cloth. The handkerchief is draped here to the crown and sits firmly in the breast pocket, without slipping. The pocket handkerchief in crown fold is worn with the festive evening attire. Strong colours give the handkerchief something floral and spread good mood and loosen the strict folding a little.

1 Fold handkerchief diagonally, slightly offset.


2 Left corner diagonally to the right, fold up.


3 Right corner diagonally to the left, fold up. The result is a crown with four teeth.


4  The lower edge of the cloth is folded over once.


5 Now the handkerchief can be put into a breast pocket on the jacket. (Photo Credit: © CATWALKPIX.COM)


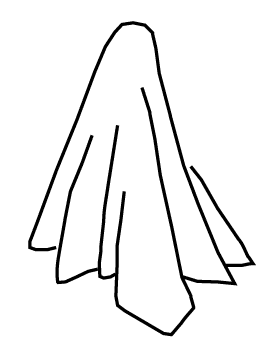
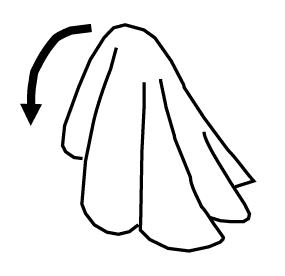
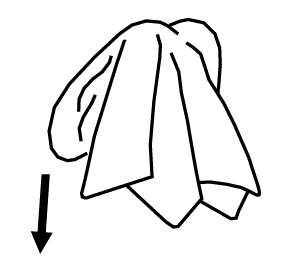
Instruction: Pocket handkerchief in bulk fold

The easiest folding is at the same time the heaviest folding technique and requires a little skill. It is particularly suitable for scarves made of fine silk and conjures up a casual elegance.


1 Hold the handkerchief in the middle between thumb and index finger.


2 Now fold the cloth loosely.


3  Make the cloth a little bulkier and possibly roll up the lower edge a little.


Now the handkerchief will be put into a breast pocket on the jacket.


PDF Download: Grading Dress Shirt for Men

Grading a men’s T-shirt

15,80 €
TOC
Product: M. Müller & Sohn Magazine 05.2020
M. Müller & Sohn Magazine 05.2020
Yoga Suits /// Grading T-Shirt /// Bucket Hat /// Blouse with Puffed Sleeve

1 Comment for this article

  1. Nice to meet you!
    I had a good look at your blog. I also have a blog. Korea’s Blog!
    I will visit again next time! I will come again~! Thank you~!

    Reply to this comment

Leave a Reply

Your email address will not be published. Required fields are marked *