
Sewing puffed sleeves
Deutsch
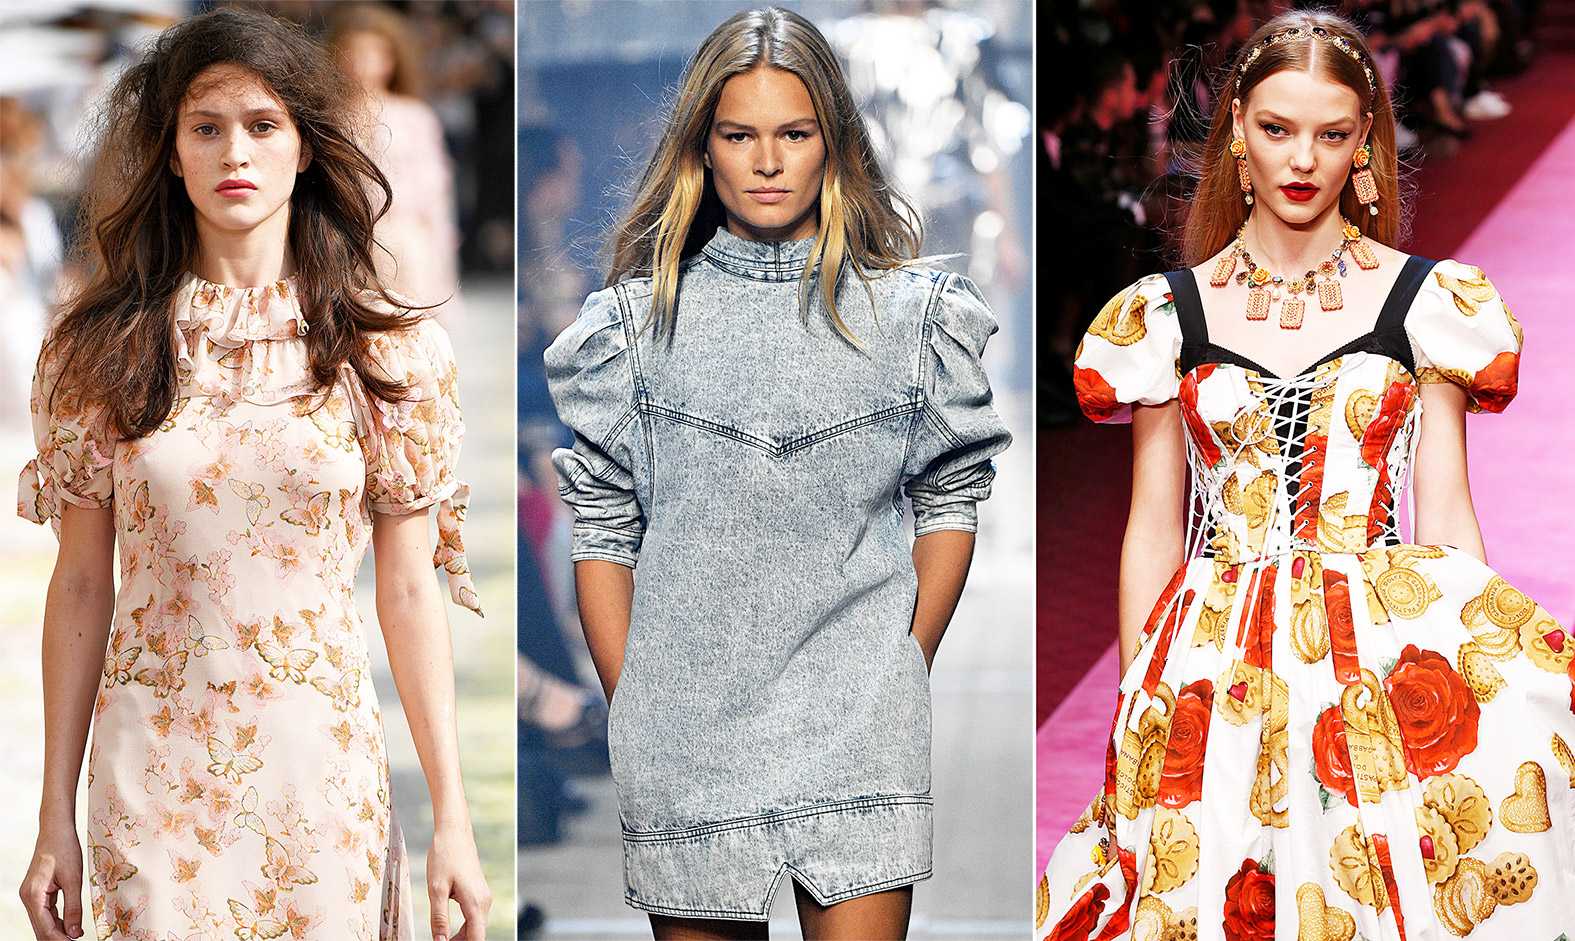
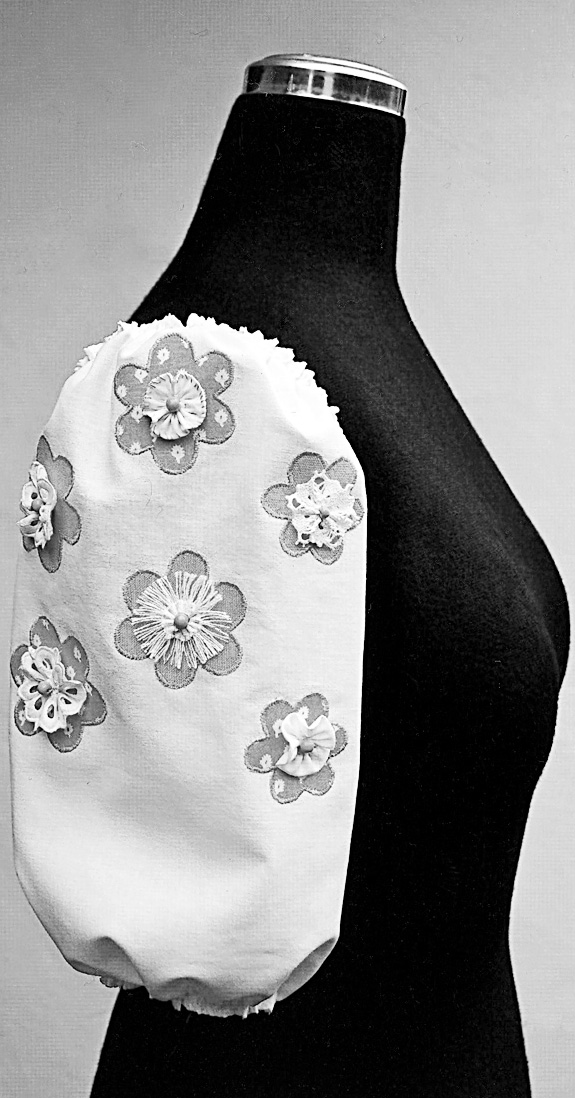
The puffed sleeve is indispensable in women’s traditional costumes, but the puffy sleeve can also be seen on fashionable blouses, summer dresses and even T-shirts. Decorated with flowers, lace ribbons, borders, rickrack, ruffles or in a mix of patterns, the puffed sleeve becomes an absolute key piece. Cuffs or elastic sleeve bands, with flounce or simply rolled in, are suitable as a hem for the voluminous sleeve.
This article is an excerpt from the book Atelier – Fachwissen aus der Praxis Teil 2. Further sewing instructions and inspiration for textile design can be found in this book.
How to draw the pattern for a puffed sleeve?
To save time use a matching one-piece sleeve, created with a normal sleeve cap height. This pattern is already fitted to the armhole. If the blouse or dress should be extended on the side seam, you have to transfer these measurements to the sleeve seam as well. The width of a puff sleeve is variable. Thin fabrics can be lavishly equipped, stronger materials work even with less voluminous puffed sleeves. Consider additional decoration elements in the width. Set the equipment, length and hem design of the puff sleeve on the pattern.

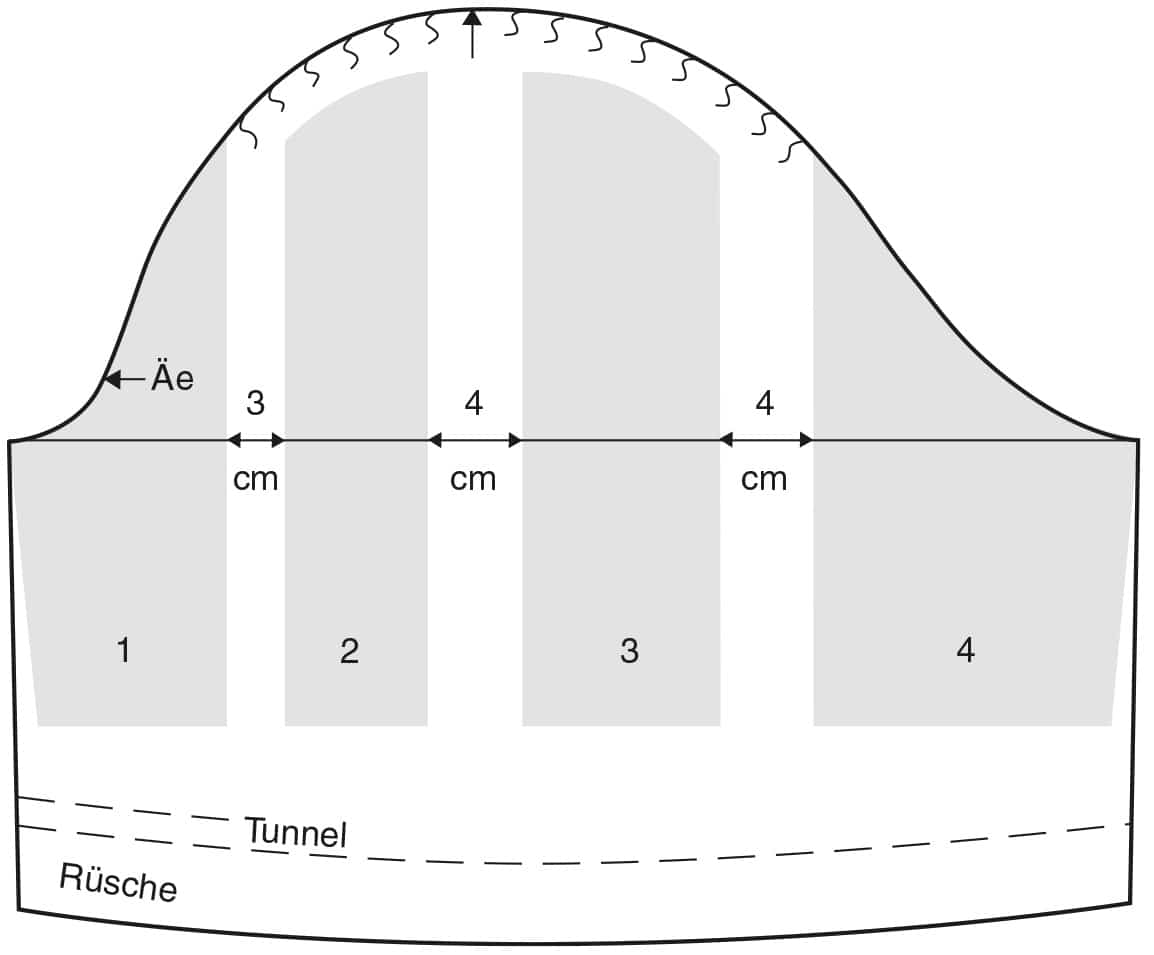
- Important: Draw a straight guide line at the forearm opening. Draw cut lines to extend the sleeve. From shoulder point – cap center – Place the tailors square at the guide line and draw a vertical line. Measure 6 cm forward and 8.5 cm towards the back and draw lines as well. Number the parts, mark the edge and slash the cut
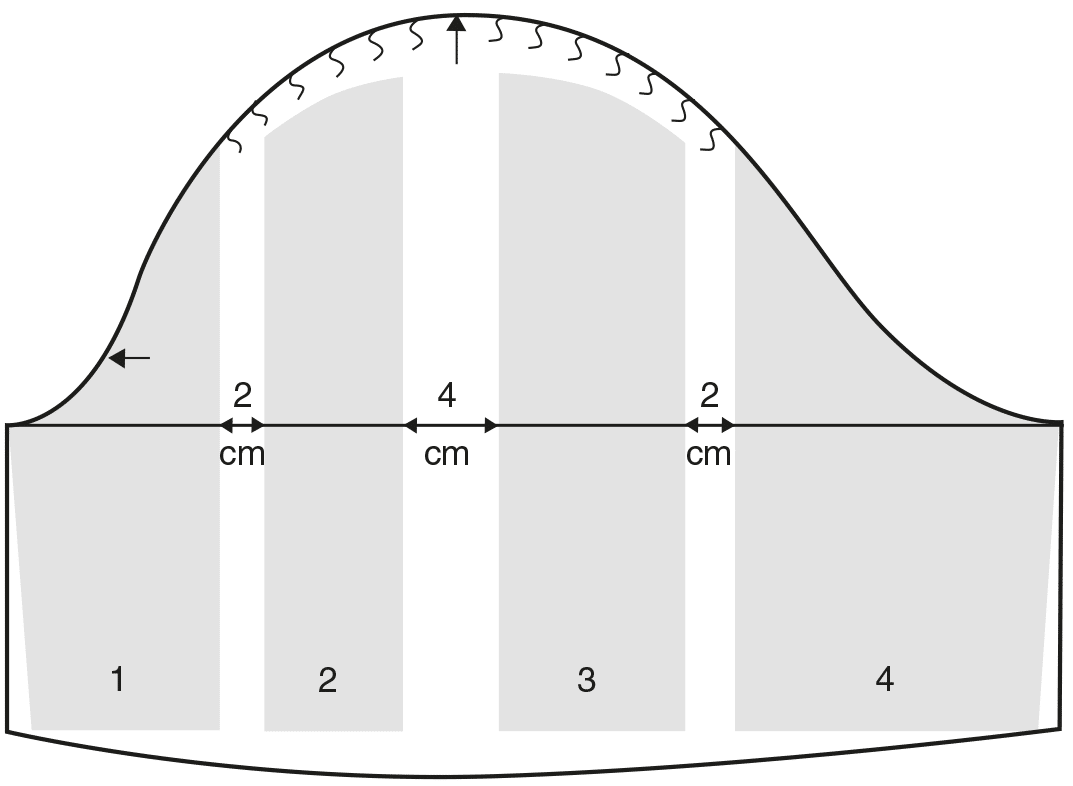
- Place the pieces of the sleeve pattern with a distance of 4 cm in the middle and laterally 2 cm each. Marks on the guide line must be continuous. Draw the sleeve seam straight down. Determine the length and mark the hemline in the middle, approximately 1.5- 2 cm. Calculate the ease for the ruffle on the puffed sleeve. Continue the sleeve cap as shown in the illustration.
- With narrow shoulders and light fabrics, the puffed sleeve can get more width. For a balanced sleeve cap , you should open the basic pattern four times and extend evenly. Shift the middle line 1 cm towards the front.
Decorative applications on the puffed sleeve
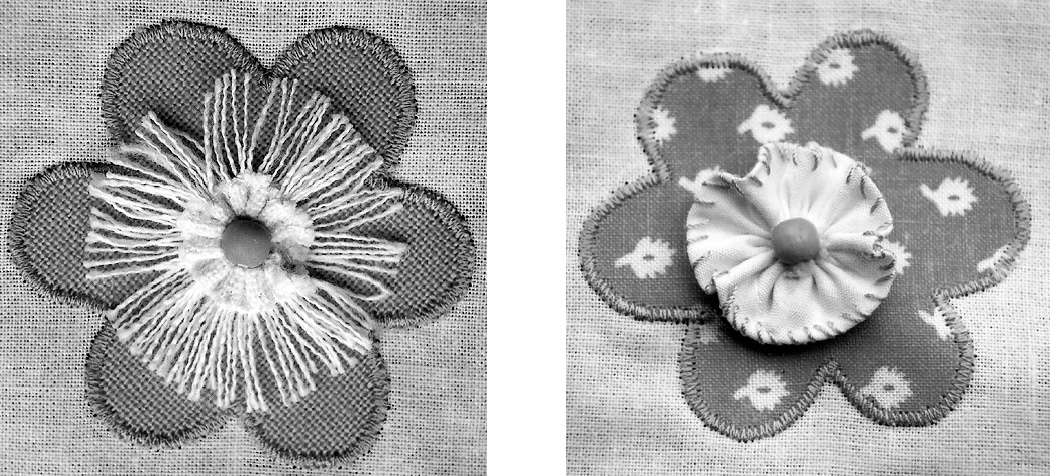
Vivid flowers of fabric
- For this variation (puff sleeve on blouse or dress) you should extend the sleeve at a maximum of 8 cm. The basic flower in two different sizes with 6 outer curves is applied scattered on the center of the sleeve.
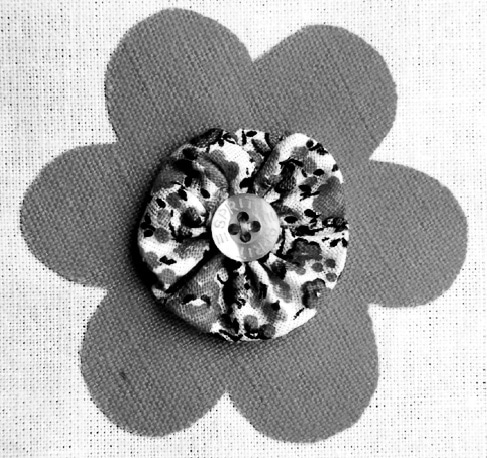
- Iron Vliesofix on the left side of the flower fabric. Vliesofix by Vlieseline is double-sided adhesive. Trace the motifs on the anti-adhesive paper, cut them out, peel off the paper and fix them to the markings on the sleeve. Stitch the edges with dense, approximately 2- 5 cm wide zig-zag stitches and machine embroidery thread. Pierce directly at the cutting edge. The flower diameter is 5 cm and 6 cm.
Flower appliqué
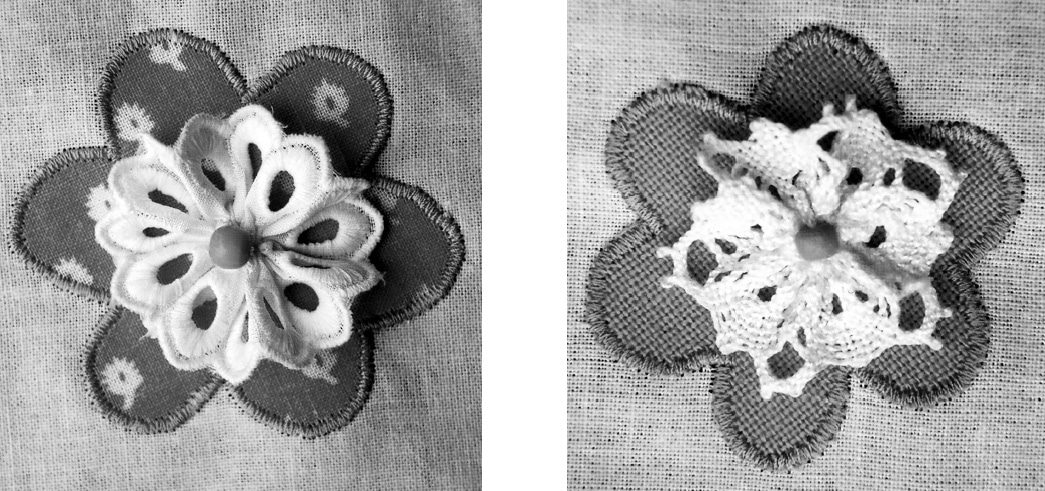
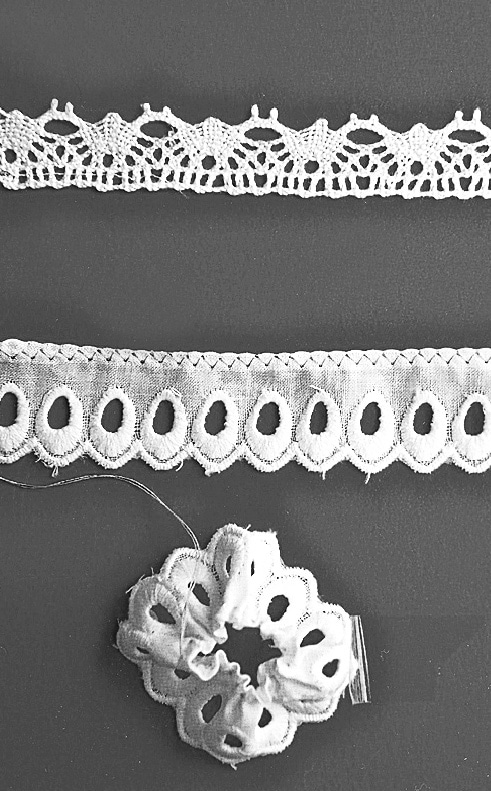
- Embroidery lace: The flower center is made of embroidery lace. Match the flower size and tip width. The diameter for the flower appliqué is 6 cm. The lace width is 2 cm and the length 14 cm. Don’t forget to add the seam allowance. Close the lace exactly to the circle and finish the seam. Roll the batiste edge 0.3 cm with thin yarn. Tackle, small stitches, pull in, hold in the middle and sew with a pearl or small button on the appliqué.
- Bobbin lace: The diameter of the blossom appliqué is 5 cm. The bobbin lace is 1.5 cm wide and 12 cm long, plus seam allowance. Pay attention to the pattern and sew the seam. Pull the edge together with the basting thread. Sew the resulting rosette with a pearl on the appliqué.
- Fabric fringes: For the flower made of fringes use fine linen fabric. Cut a straight thread line strip of fabric with a width of 3 cm and a length of 12- 15 cm, depending on the material thickness. Press the edge 0.5 cm on one side and sew with zig-zag stitches. Hand stitch both ends with matching yarn. Fringe the remaining material and add a basting stitch at the fabric fold. Use matching thread and sew with short stitches, because the stitches will remain in the material. Pull the edge together very tightly and connect it twice (snail-shaped). Sew the small fringe wreath in the middle of the appliqué and finish with a pearl or a
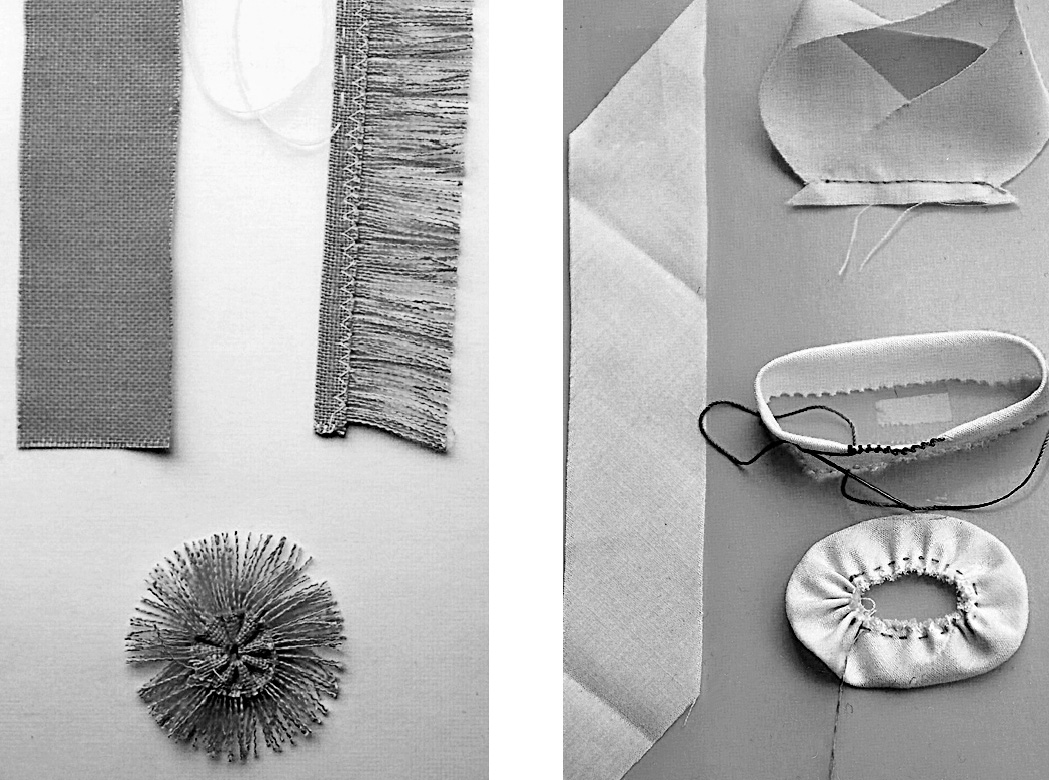
- Bias strip rosette: Prepare a bias strip of fabric with15 cm length and 3 cm width from batiste, fine silk or similar material. Close the diagonal strip to a Separate and press the seam. Place the circle on fold, sew the edges together and add a matching basting stitch. An additional effect is achieved by overlocking the fold line with contrasting ornamental yarn. Pull the basting thread close to the center, sew and apply the rosette onto the appliqué. Cover the center with a pearl or a small button.
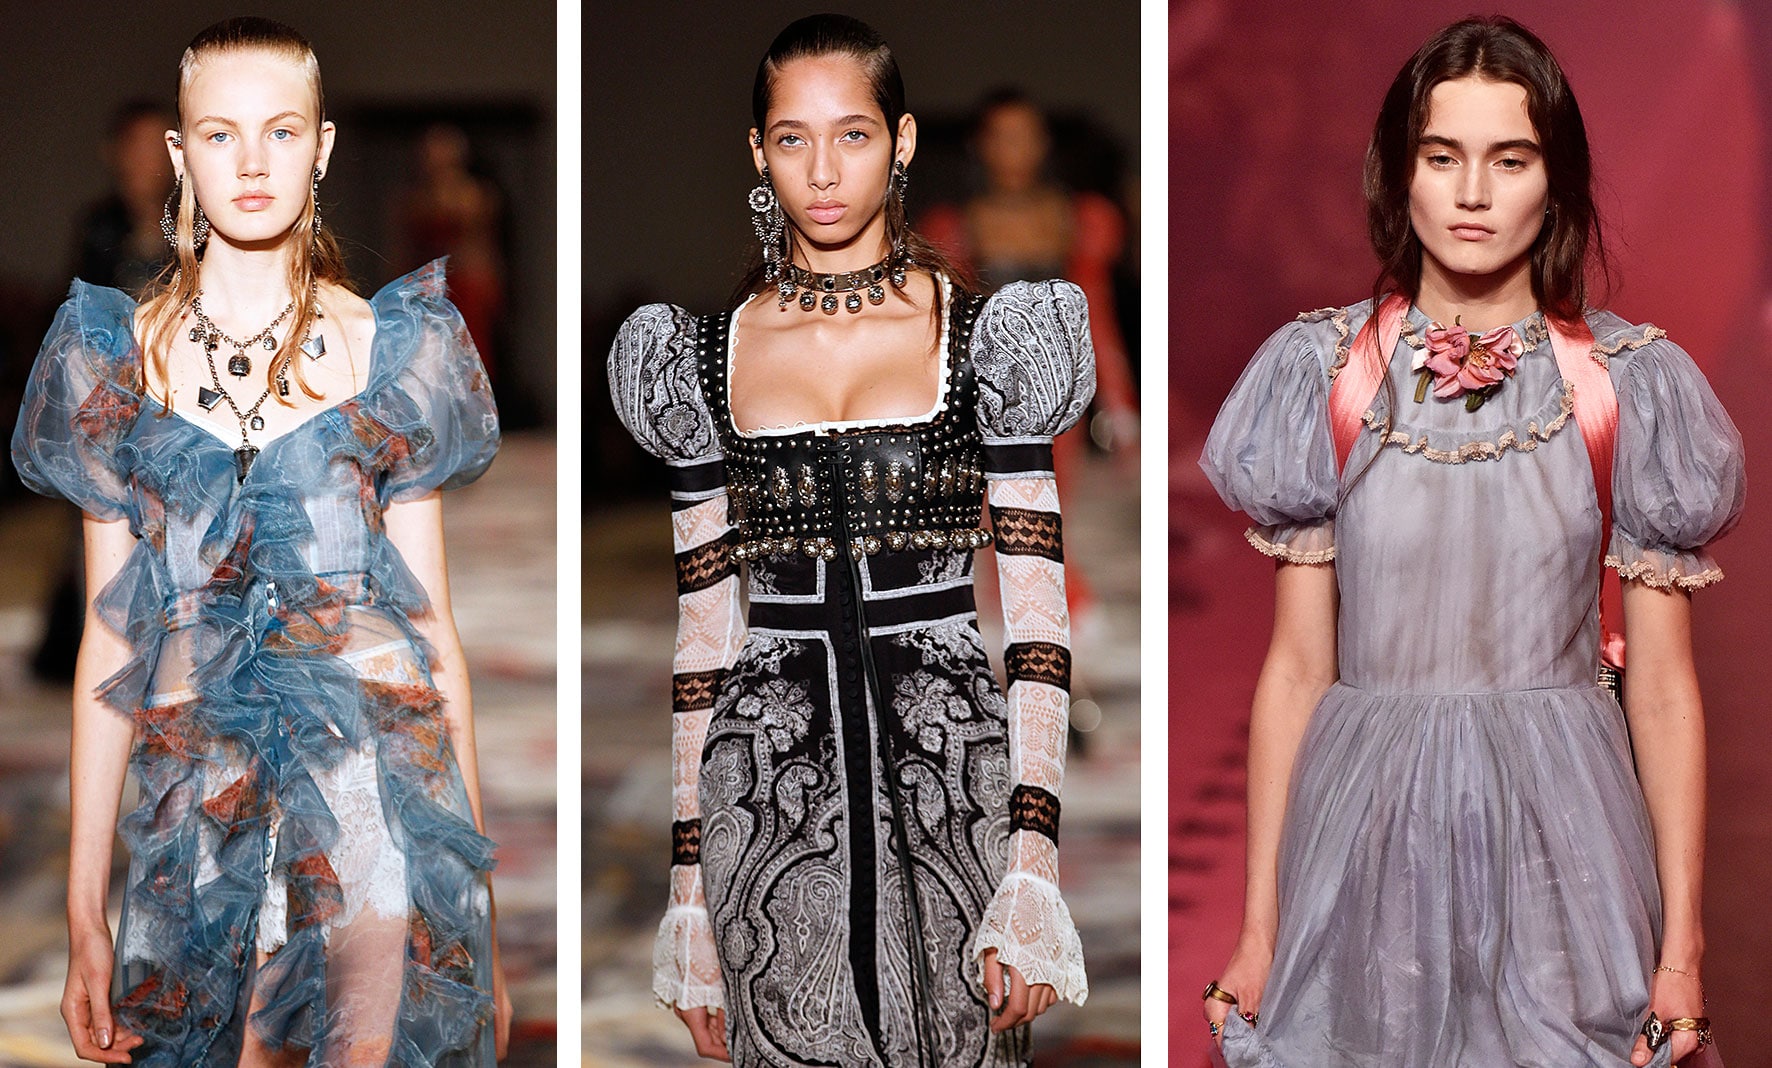
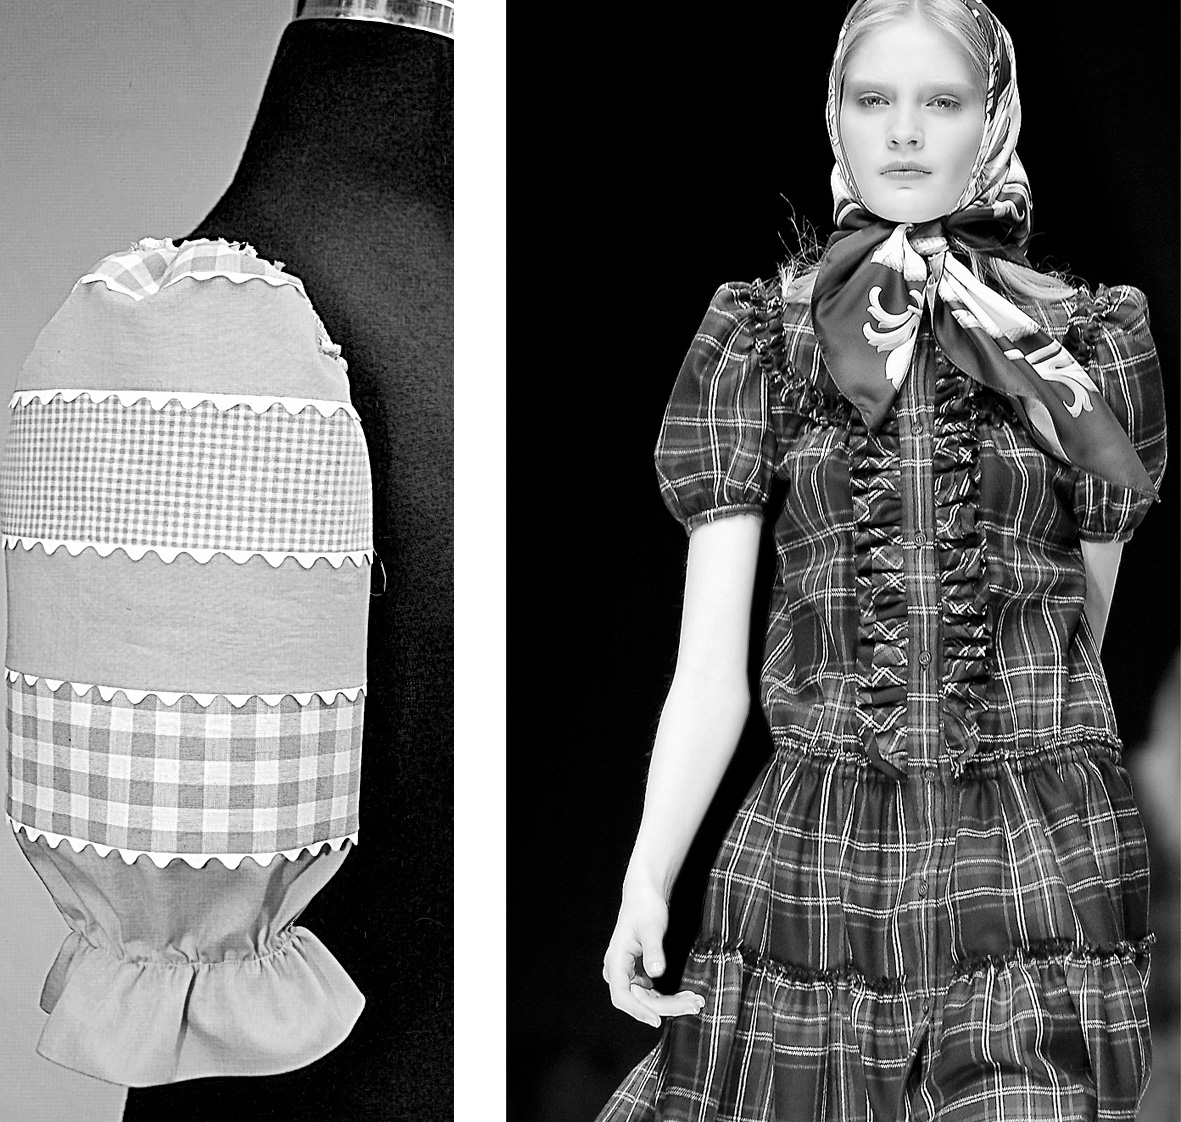
Puffed sleeve in pattern mix with hem ruffle
If the material qualities are coordinated anything is possible. The new puffed sleeve blouses may be- with any pattern and color, boldly provocative mixed and are very trendy. In uni- colors and different check sizes they are more home in the folklore area.
Pattern construction for the puffed sleeve in patchwork style
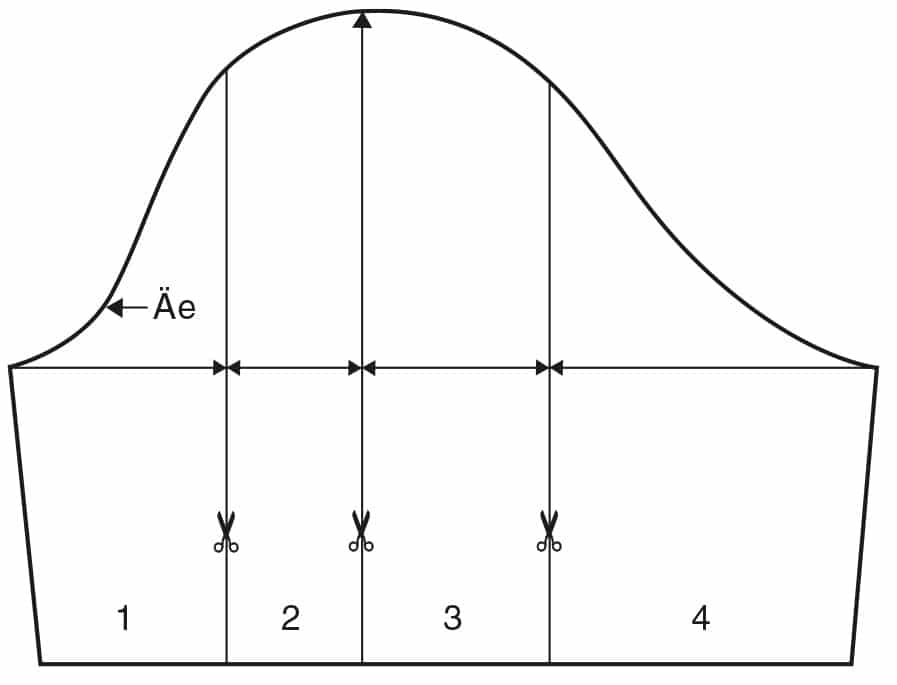
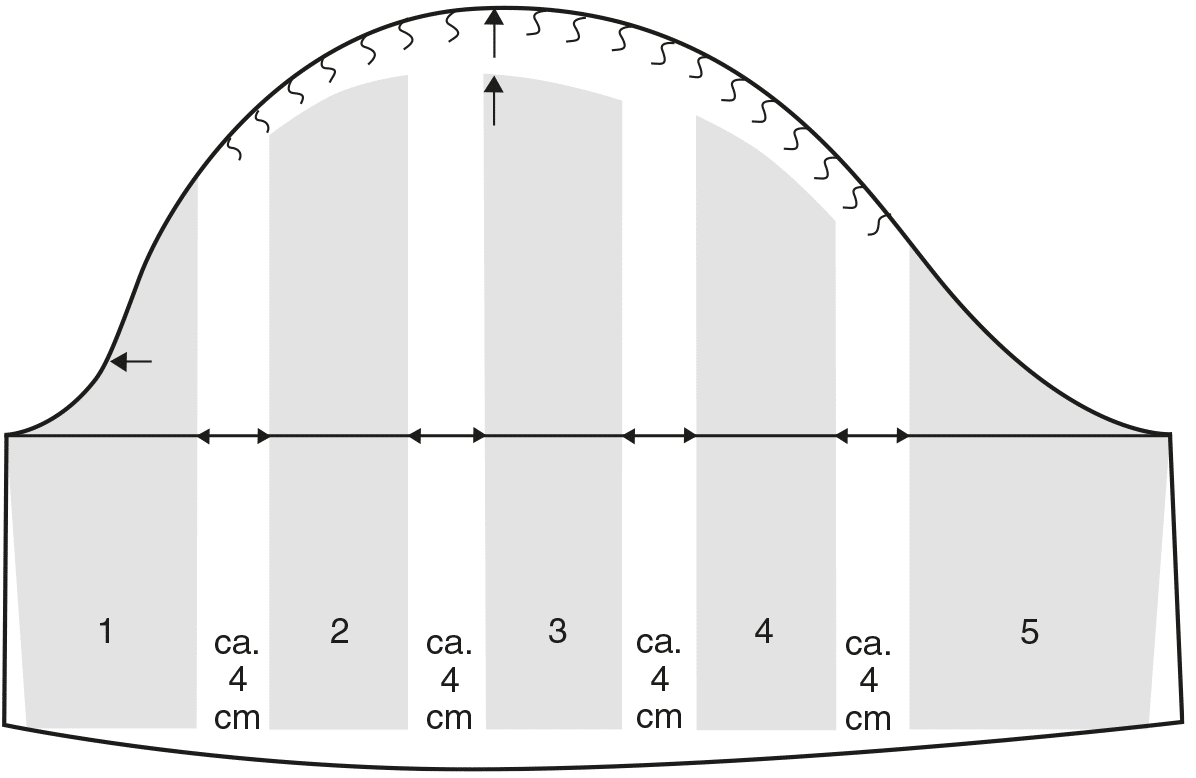
The extension of the normal sleeve cap is based on the material thickness and can be between 8 and 12 cm. Divide into three cuts. Begin in the center of the sleeve cap- shoulder point – draw the first line downwards. Draw two lines at a distance of 6 cm to the front and 8 cm to the back. Draw the guide line on the underarm area, slash the cut lines to separate the pieces of the sleeve.
Distance: Part 1 and Part 2 = 3 cm; Part 2 and Part 3 = 4 cm; Part 3 and Part 4 = 4 cm.
The mark on the guide line has to be continuously. Shape the sleeve cap and draw the sleeve seam straight down. Determine the sleeve length and calculate 5 cm for the ruffle. Draw down the hemline 1.5 cm at the center.
Pattern Arrangement
Mark the height and pattern of the individual strips. Before cutting out the proportions number the pieces and mark at the front edge. If sufficient material is available, you can save time by putting the strips together and then cutting out the sleeves.
Cutting Pattern
Add 1 cm seam allowance to the pattern pieces. Trimming strip for the hem: length of the sleeve width, width 7.5-8 cm. Trimming as a form panel or in diagonal grainline.
Sewing the Puffed Sleeve
Stitch the rick rack braid onto the seam line at the upper edge. Pay attention to an equal length. When all the rick rack braids are sewn on, put the parts together, in the same stitching line. Sew without shifting. Finish all the raw edges. Stitch the trimming to the sleeve hem and close the sleeve seam including the trimming completely. Leave the trimming 1.5 – 2 cm open (in rubber width) for the tunnel. Press the edge of hem on fold and stitch the trimming at 4 cm (ruffle height) onto the outer fabric. Turn the trimming edge, seam width inside and sew close to the edge. Attach a small button to the tunnel opening and use a buttonhole elastic. This makes it easier to regulate the width.

Stripe arrangement from top to bottom: Large square 4.5 cm; uni- color 5 cm; small check 6 cm; uni- color 5.5 cm; large check 6.5 cm; uni- color, with ruffle approximately 12 cm.
Sewing the Cuff
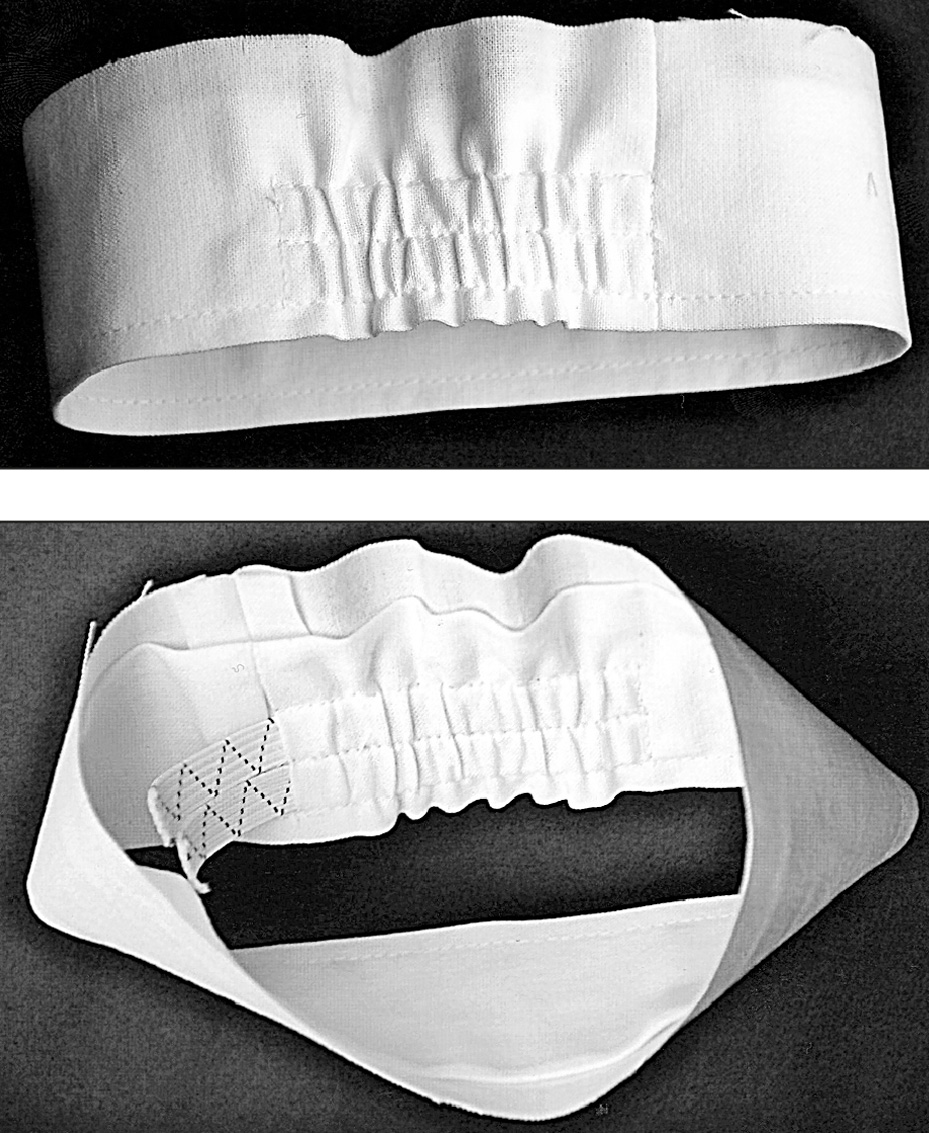
The cuff of the puffed sleeve may cause problems. The upper arms are not always equally strong. The cuff may, depending on the model, neither slip nor be too narrow. Stretching is a convenient solution. Add seam allowance to the cuff and cut on fabric fold. Fix the upper side with a thin batiste. Sew a rubber band with the width of the cuff, on the underside of the sleeve at a length of approximately 8-9 cm. Two tunnels for a simple pull-in or buttonhole elastic are easier for the width adjustment. Therefore close the seam and leave the trimming open for the buttonhole elastic. Put the cuff on fabric fold and topstitch the hem edge. Sew tunnels. Sew the cuff with the right sides together onto the sleeve. Pull in the rubber band before finishing the sleeve. Secure at the outside. If a buttonhole elastic is used, attach a small button to the tunnel opening. The width can be regulated at the seam. If a simple rubber band is used, define the width and sink-stitch. Now insert the puffed sleeve to create a playful dress in folklore style or a chic traditional blouse. Styling tip: For a cheekier appearance style the puffed sleeve blouse with rocking accessories.
Sewing patterns for women’s fashion with puffed sleeves can be found in our online shop.